Configure Access to S3 Data Sources Through Integration with AWS Lake Formation
This guide provides step-by-step instructions on integrating Relyt with AWS Lake Formation to allow Relyt access data stored in Amazon S3. It covers every detail from purchasing Relyt to running queries on your data hosted on Amazon S3 after Relyt is connected to your external data lake.
You can skip any steps you have already completed or use the following links to quickly navigate to the sections you want to start.
-
Step 3. Use Terraform to create DW service units, DPS clusters, and DW users
-
Step 7. Use Boto3 to run async queries and dump query results
Step 1. Subscribe to Relyt
This section describes how to subscribe to Relyt on AWS Marketplace. If your have already subscribed to Relyt, skip this section.
You can also directly subscribe to Relyt through our official website data.cloud.
-
Log in to AWS Marketplace.
-
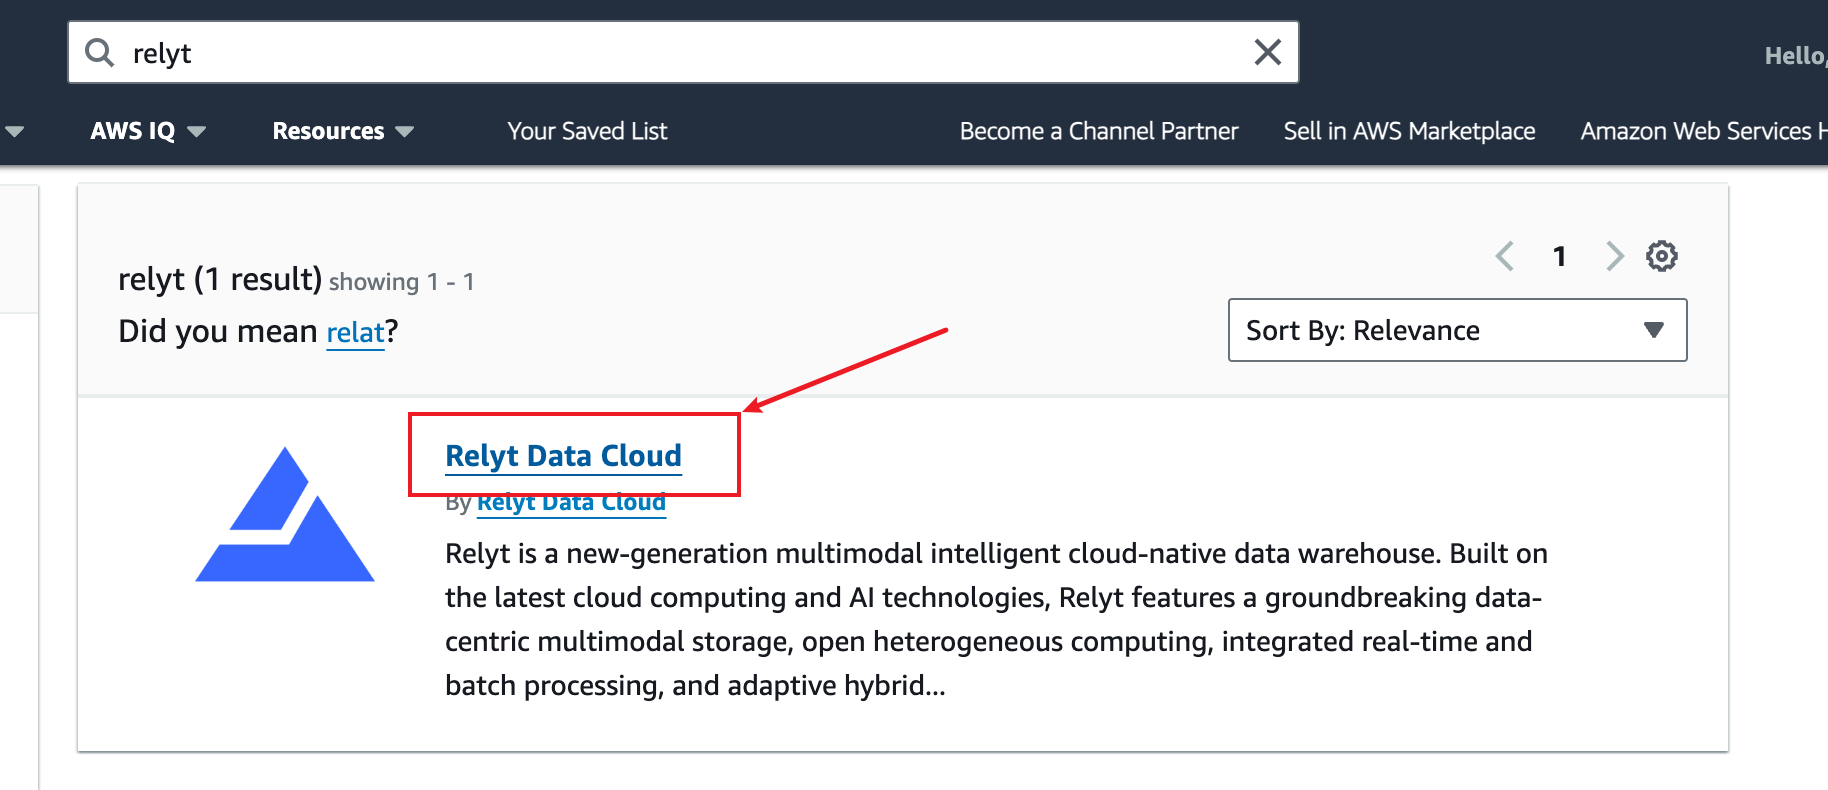
Search for keyword Relyt, and select Relyt Data Cloud from the search result.
-
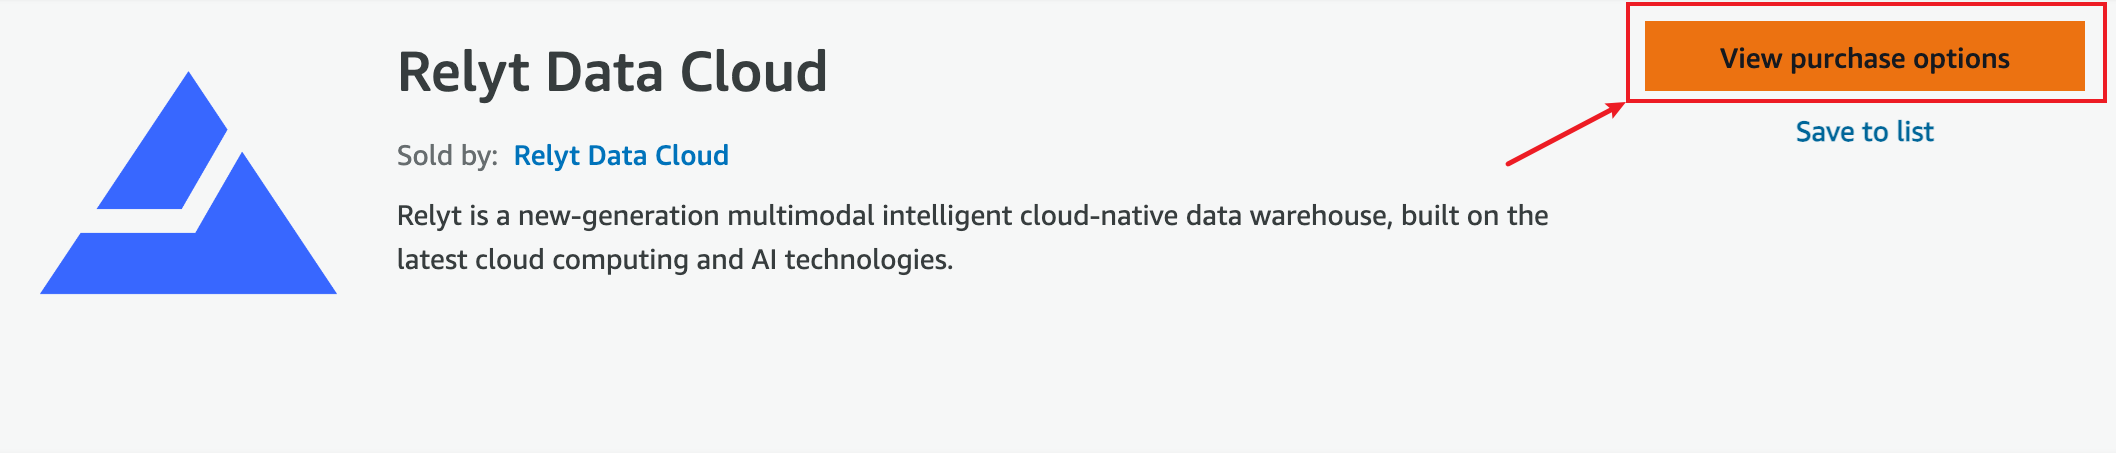
Click View purchase options.
-
In the Offers section, select the offer you want, and click Subscribe.
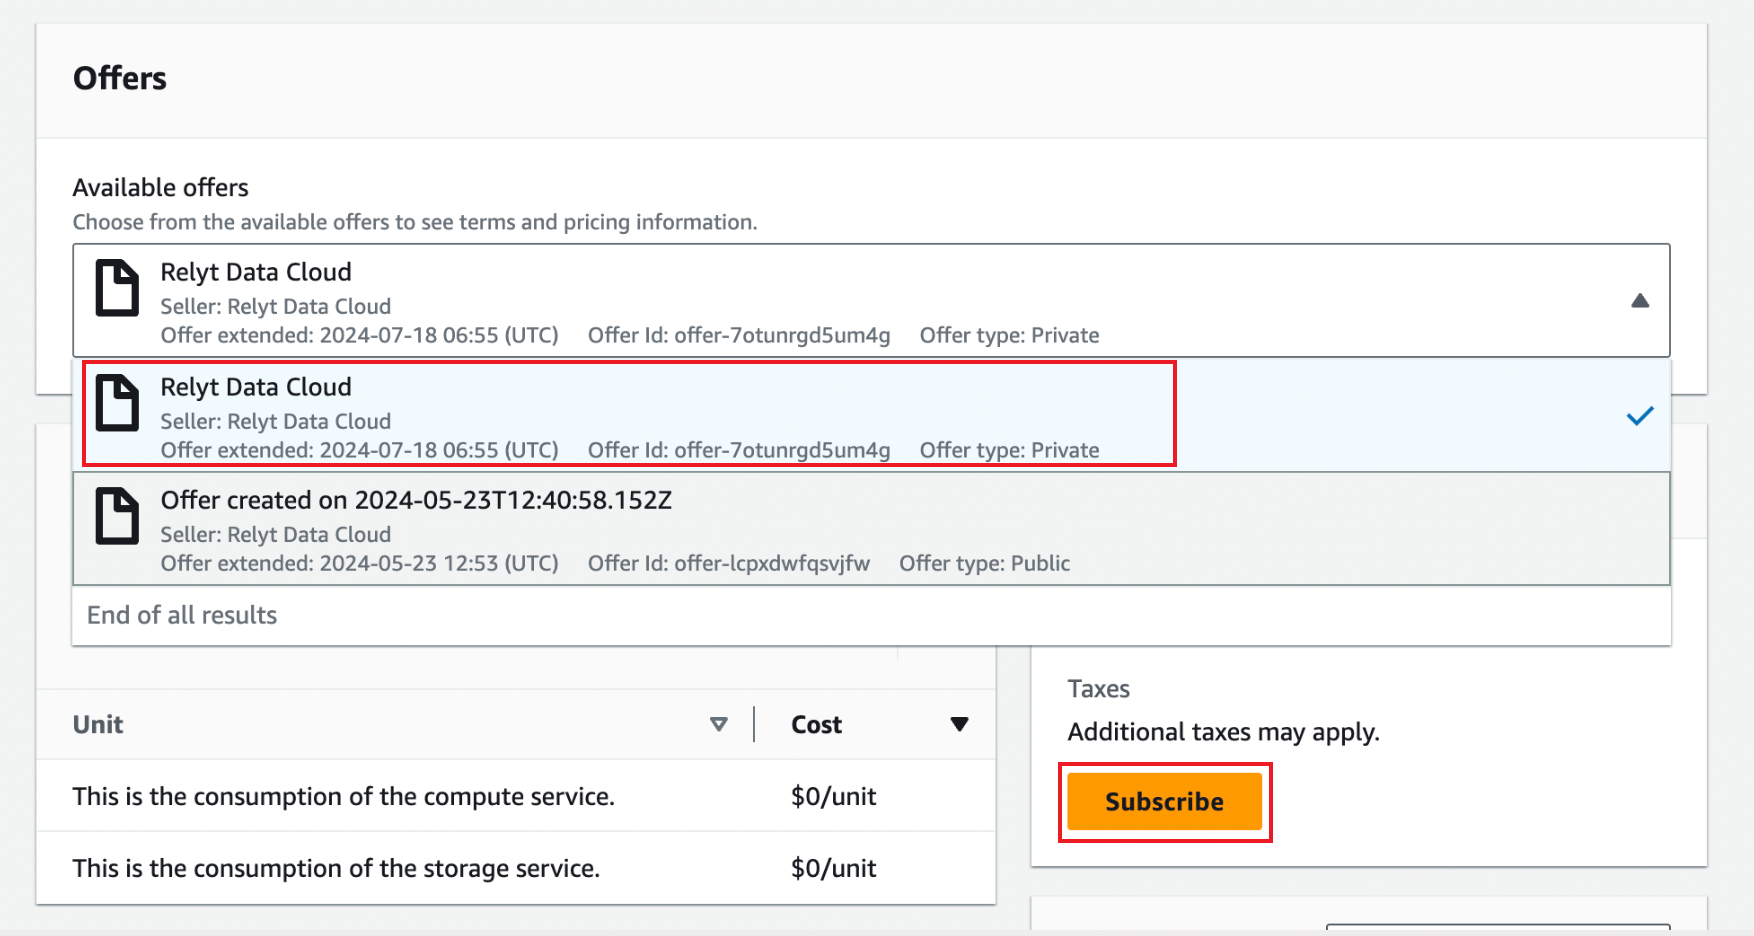
In this example, a private offer is selected.
-
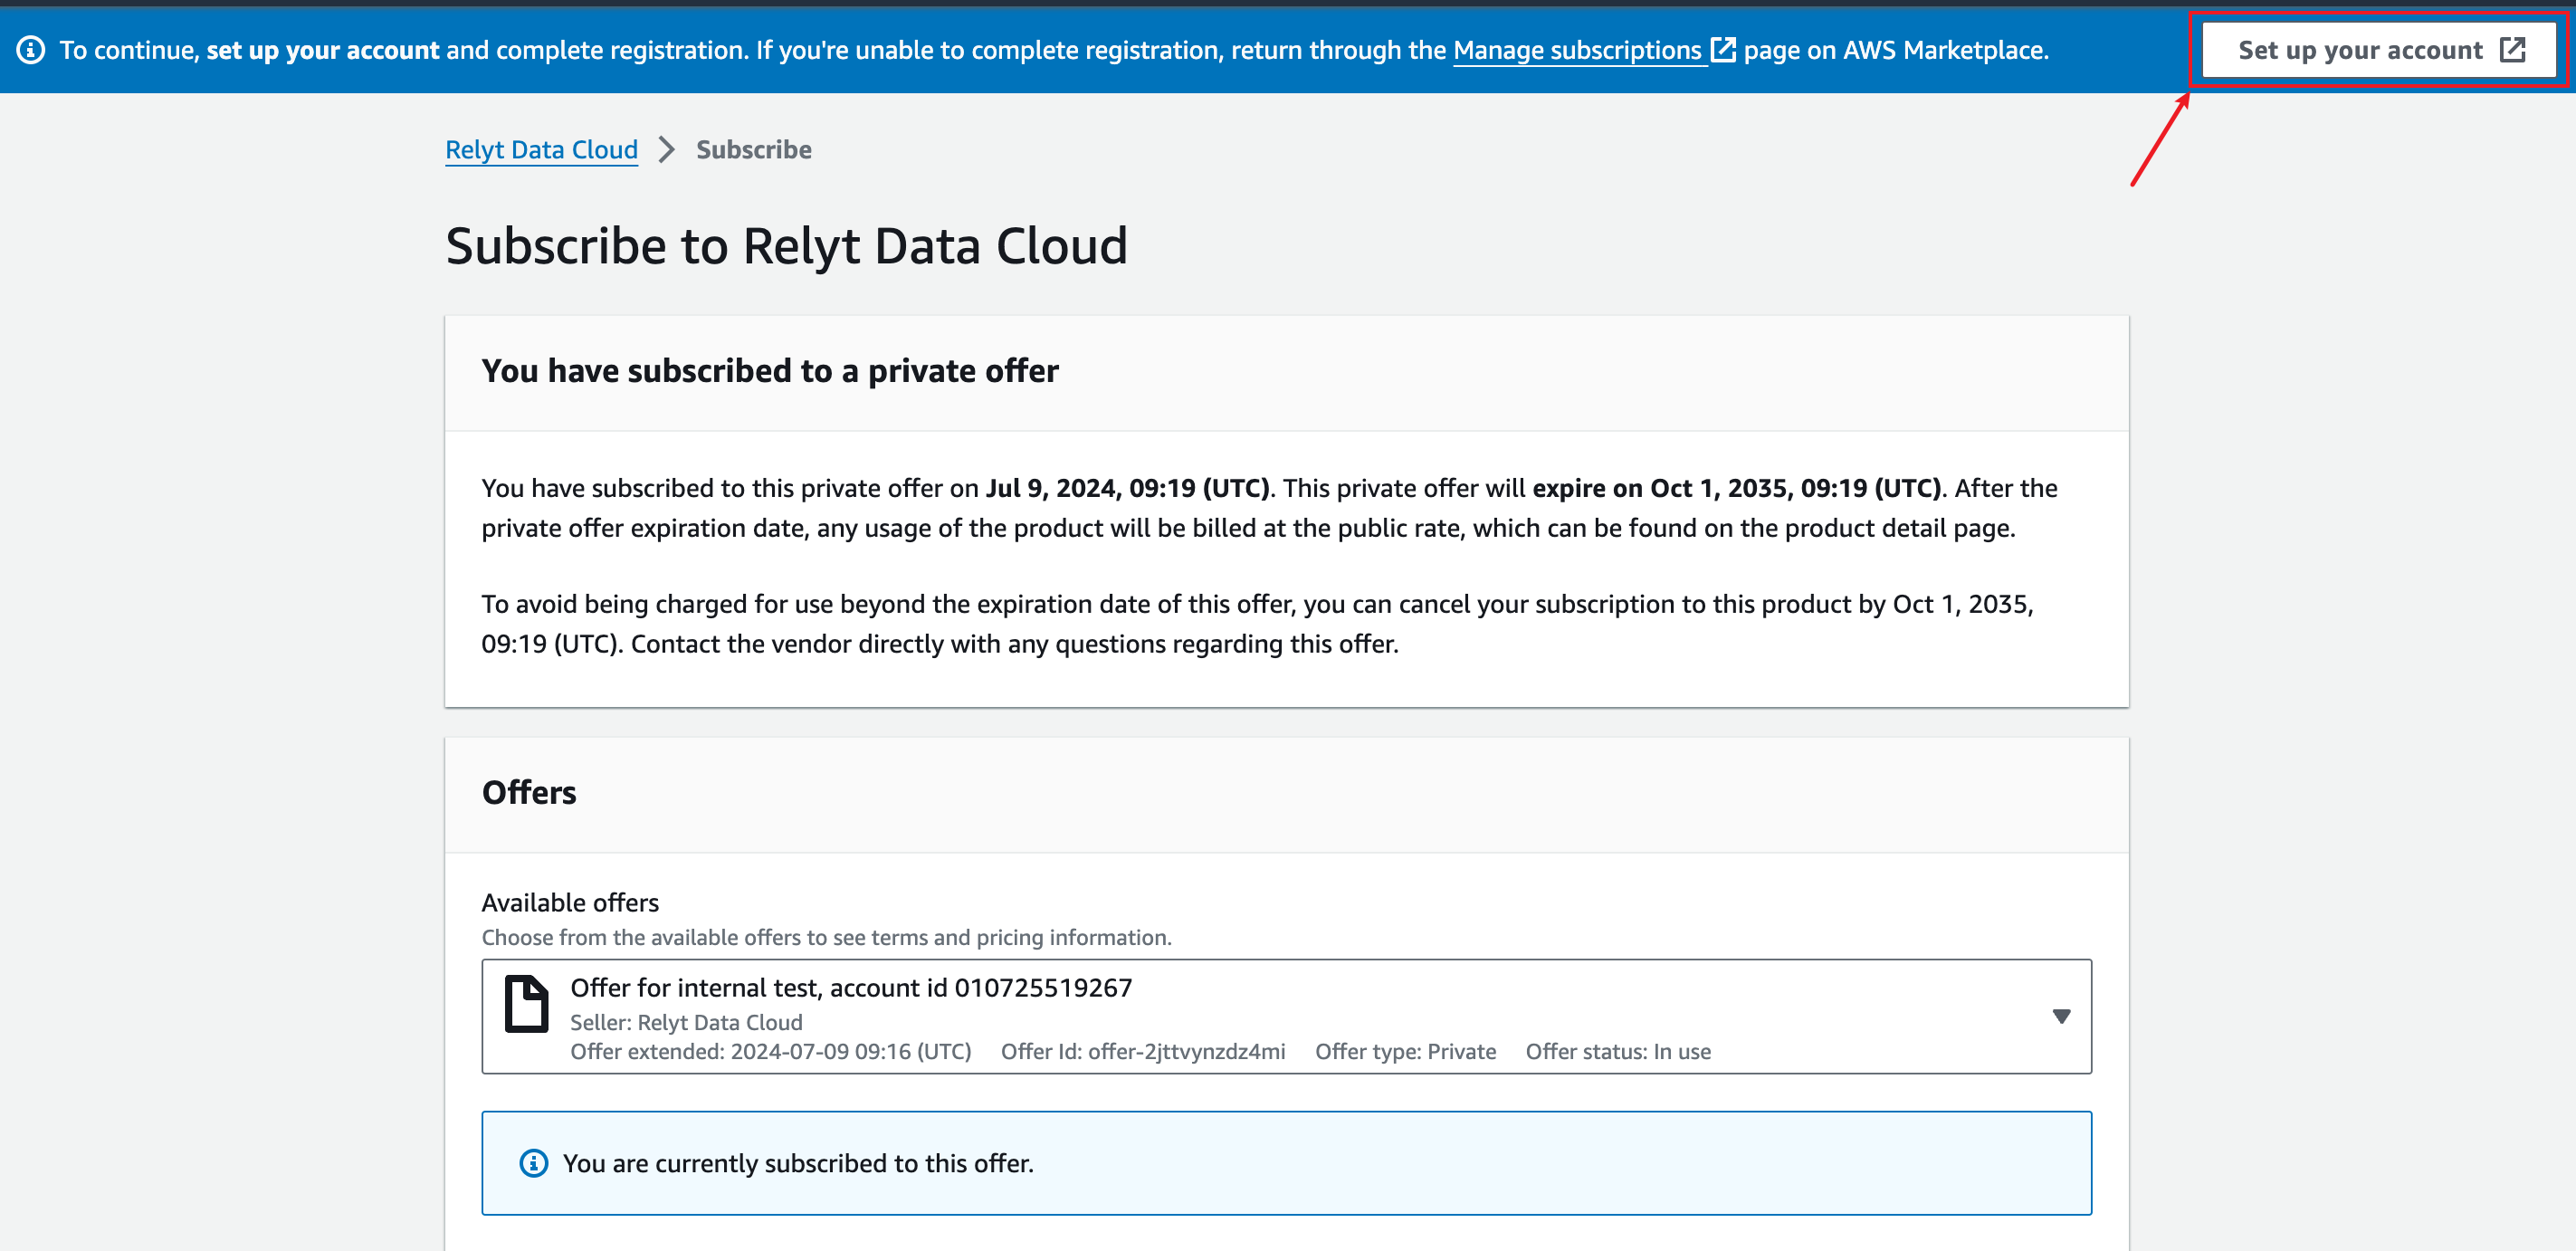
After you complete the subscription, click Set up your account to create your Relyt cloud account.
Step 2. Sign up with Relyt and obtain the auth key
-
On the sign-up page, enter your email address and click Sign Up.
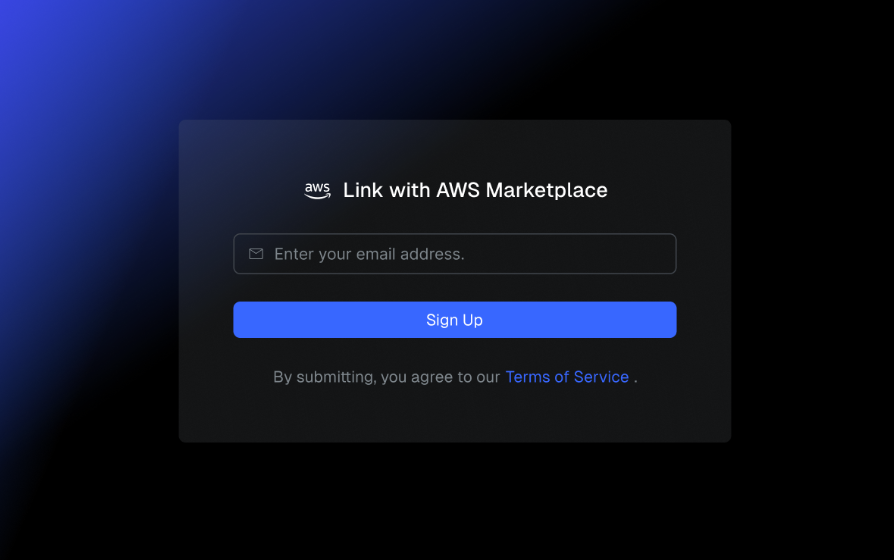
An email with a verification code will be sent to your email address.
-
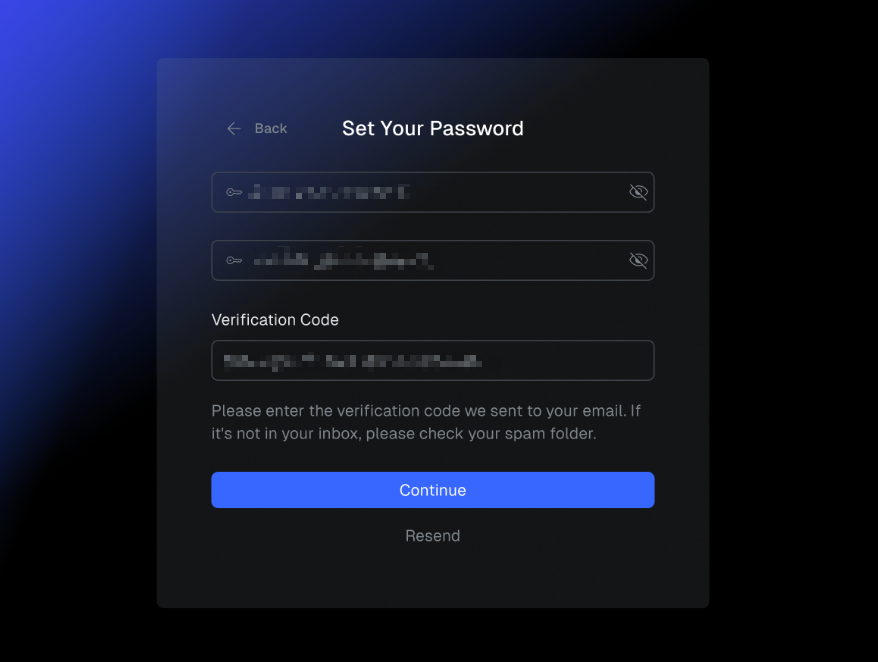
Set and confirm your password, enter the verification code obtained from the email, and click Continue.
 info
infoIf you cannot find the email or the verification code expires, click Resend to get another one.
-
Sign in with the email address and the password you just set.
-
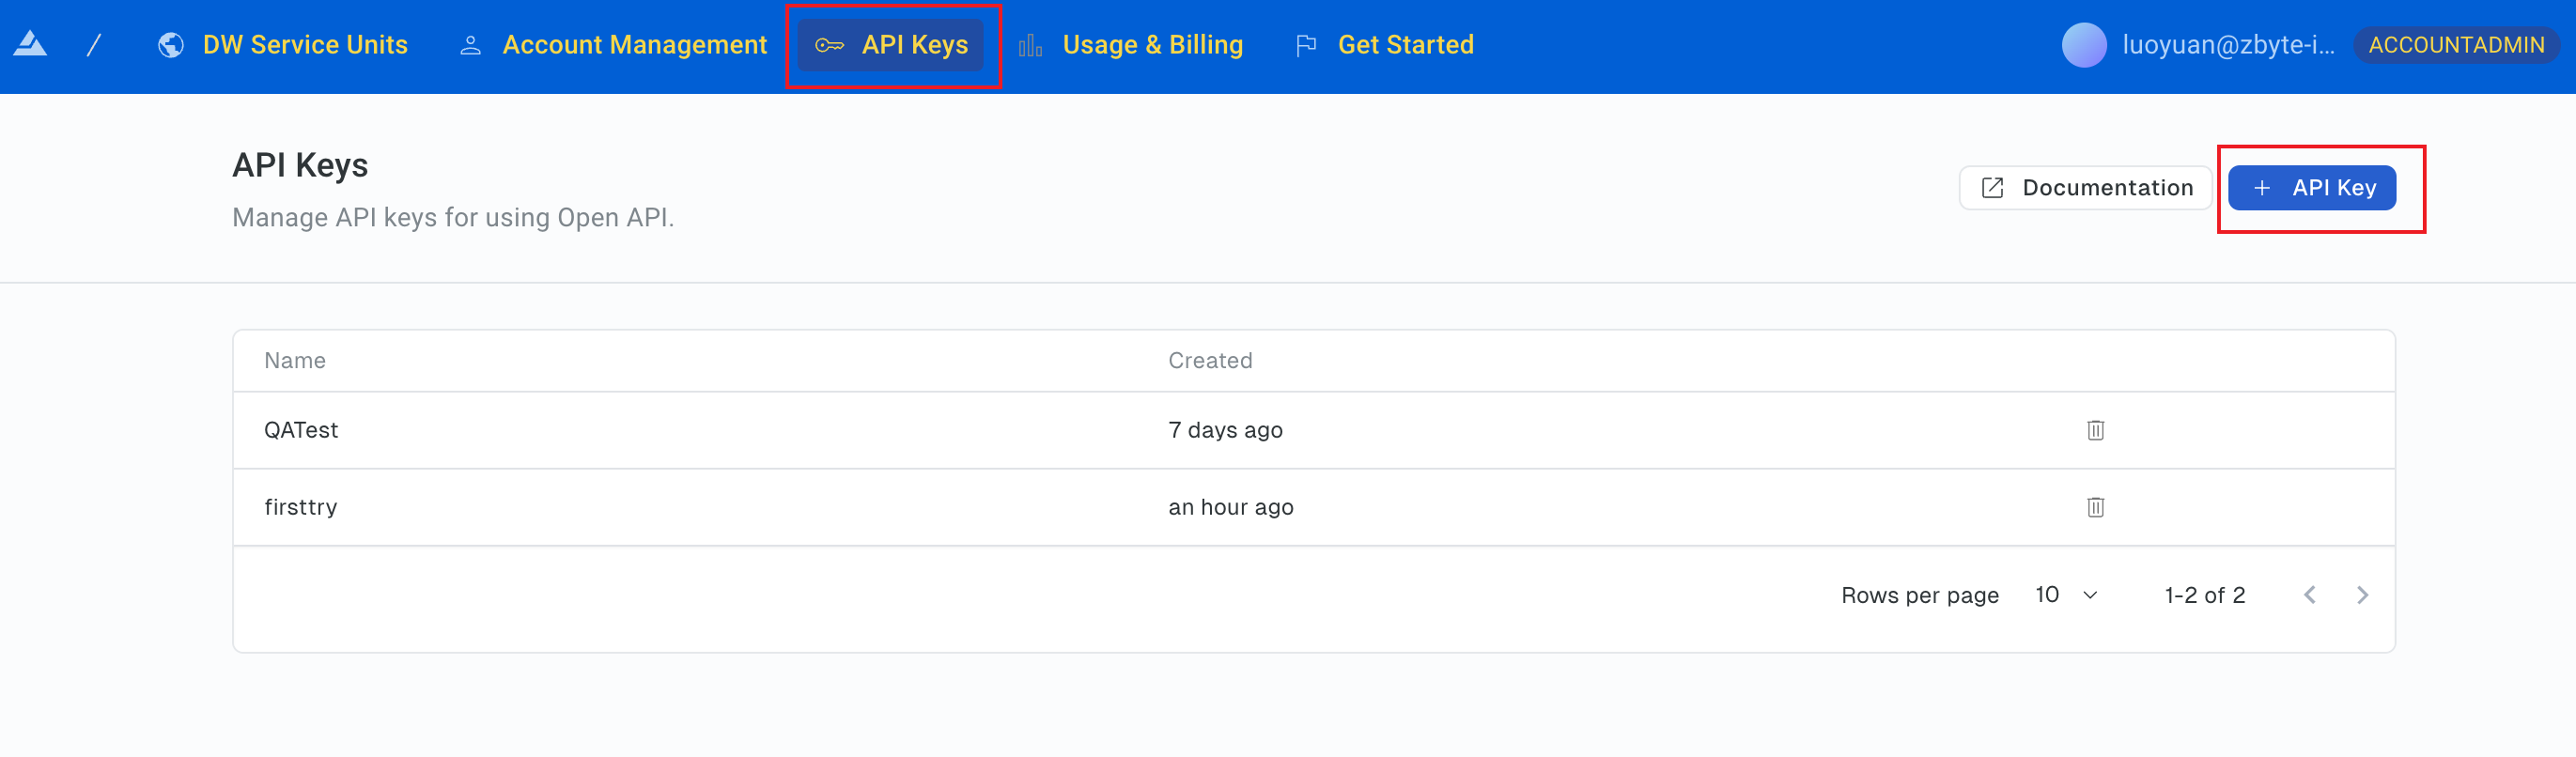
In the top navigation bar, select API Keys, and click + API Key.
-
In the dialog box that is displayed, set a name for the API key, and click Create.
-
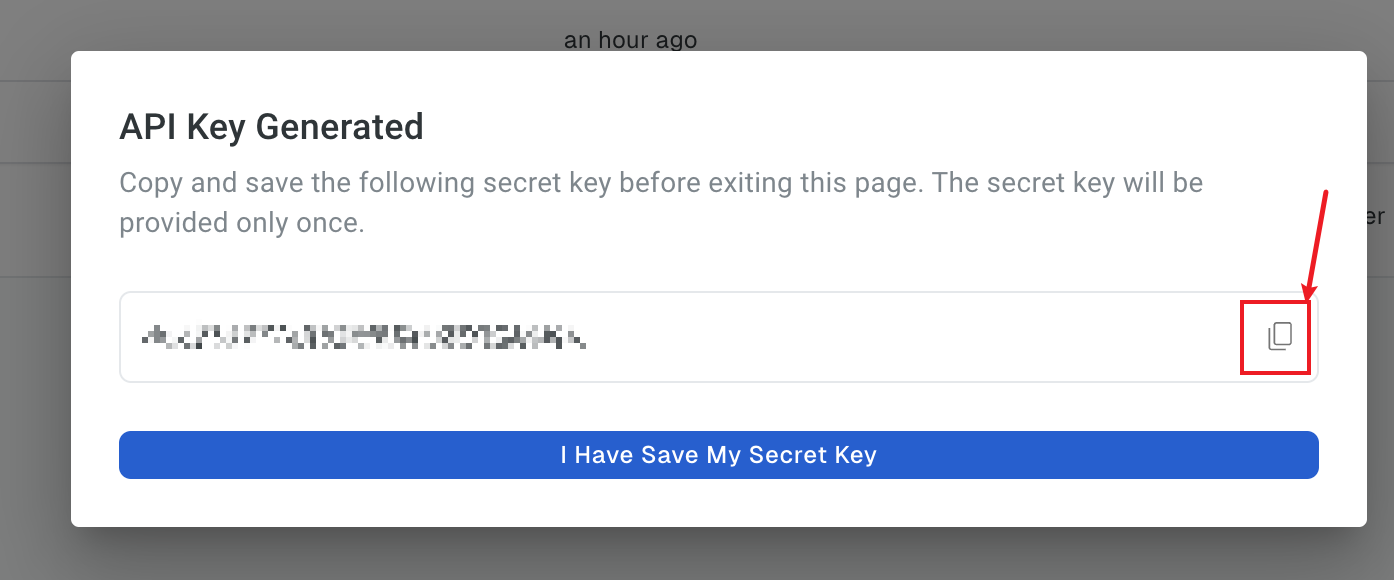
Copy the generated API key for later use and click I Have Save My Secret Key.
Step 3. Use Terraform to create DW service units, DPS clusters, and DW users
This section describes how to use a Terraform script to automatically create a DW service unit, a Hybrid DPS cluster, an Extreme DPS cluster, and several DW users.
If you already have these resources in your Relyt data cloud, skip this section.
You can also choose to create these resources on the Relyt console by referring to Manage DW Service Units, Manage DW Users, and Manage DPS Clusters.
-
Prepare your Terraform script.
infoThis is just an example. You are recommended to download the latest Relyt Terraform resources from:
https://github.com/relytcloud/terraform-provider-relyt/tree/v0.0.4/docs/demo/terraform/modules/relyt
Set the required parameters in the following code.
terraform {
  required_providers {
    relyt = {
      source  = "relytcloud/relyt"
      version = "<version_id>"
    }
  }
}

provider "relyt" {
  auth_key = "<api_key>" # Copy the API key you obtained from the previous step.
  role     = "SYSTEMADMIN" # The system role for the Relyt cloud account to create, fixed to SYSTEMADMIN.
}


locals {
  cloud_id = {
    id = "aws"
  }
  region_id = {
    id = "<region_id>" # Set the ID the region in which the DW service unit will be created.
  }
  BASIC = {
    id = "basic"
  }
}

# Create a DW service unit and its default Hybrid DPS cluster.
  resource "relyt_dwsu" "dwsu_example" {
  cloud     = local.cloud_id.id
  region    = local.region_id.id
  domain    = "dwsu-example-tf" # The subdomain, customizable.
  alias     = "dwsu-example-test" # The alias of the DW service unit.
  default_dps = {
    name        = "hdps-test" # The name for the Hybrid DPS cluster, customizable.
    description = "The Hybrid DPS cluster" # A short description for the Hybrid DPS cluster, customizable and optional.
    engine      = "hybrid" # The type of the DPS cluster, fixed to hybrid.
    size        = "S" # The size of the Hybrid DPS cluster. Set it based on your needs.
}
}

# Create an Extreme DPS cluster.
resource "relyt_dps" "edps_example" {
  dwsu_id     = relyt_dwsu.dwsu_example.id
  name        = "edps1" # The name for the Extreme DPS cluster, customizable.
  description = "An Extreme DPS cluster" # A short description for the Extreme DPS cluster, customizable.
  engine      = "extreme" # The type of the DPS cluster, fixed to extreme.
  size        = "XS" # The size of the Extreme DPS cluster. Set it based on your needs.
}

# Create a DW user. You can repeat this code block to create multiple DW users.
resource "relyt_dwuser" "user1" {
  dwsu_id          = relyt_dwsu.dwsu_example.id
  account_name     = "user1" # Name the DW user to create.
  account_password = "Qwer123!" # The password for the DW user, which must be 8 to 32 characters in length and contain at least one uppercase letter, one lowercase letter, one digit, and one special character.


# Other optional parameters
  datalake_aws_lakeformation_role_arn = "anotherRole2" # The ARN of the IAM role with access permissions to AWS Lake Formation.
  async_query_result_location_prefix  = "simple"       # The prefix of the path to the S3 output location.
  async_query_result_location_aws_role_arn = "anotherSimple" # The ARN of the IAM role with access permissions to the S3 output location.
}


data "relyt_dwsu_service_account" "test" {
  dwsu_id = relyt_dwsu.dwsu_example.id
} -
Open your terminal and navigate to the directory that contains the script.
cd <save_directory>Set
<save_directory>to the directory path where the script is saved. -
Run the following command to initialize the Terraform working directory.
terraform init -
Run the following command to apply the script.
terraform apply -
Wait for the script execution to complete. This process takes approximately 10 minutes.
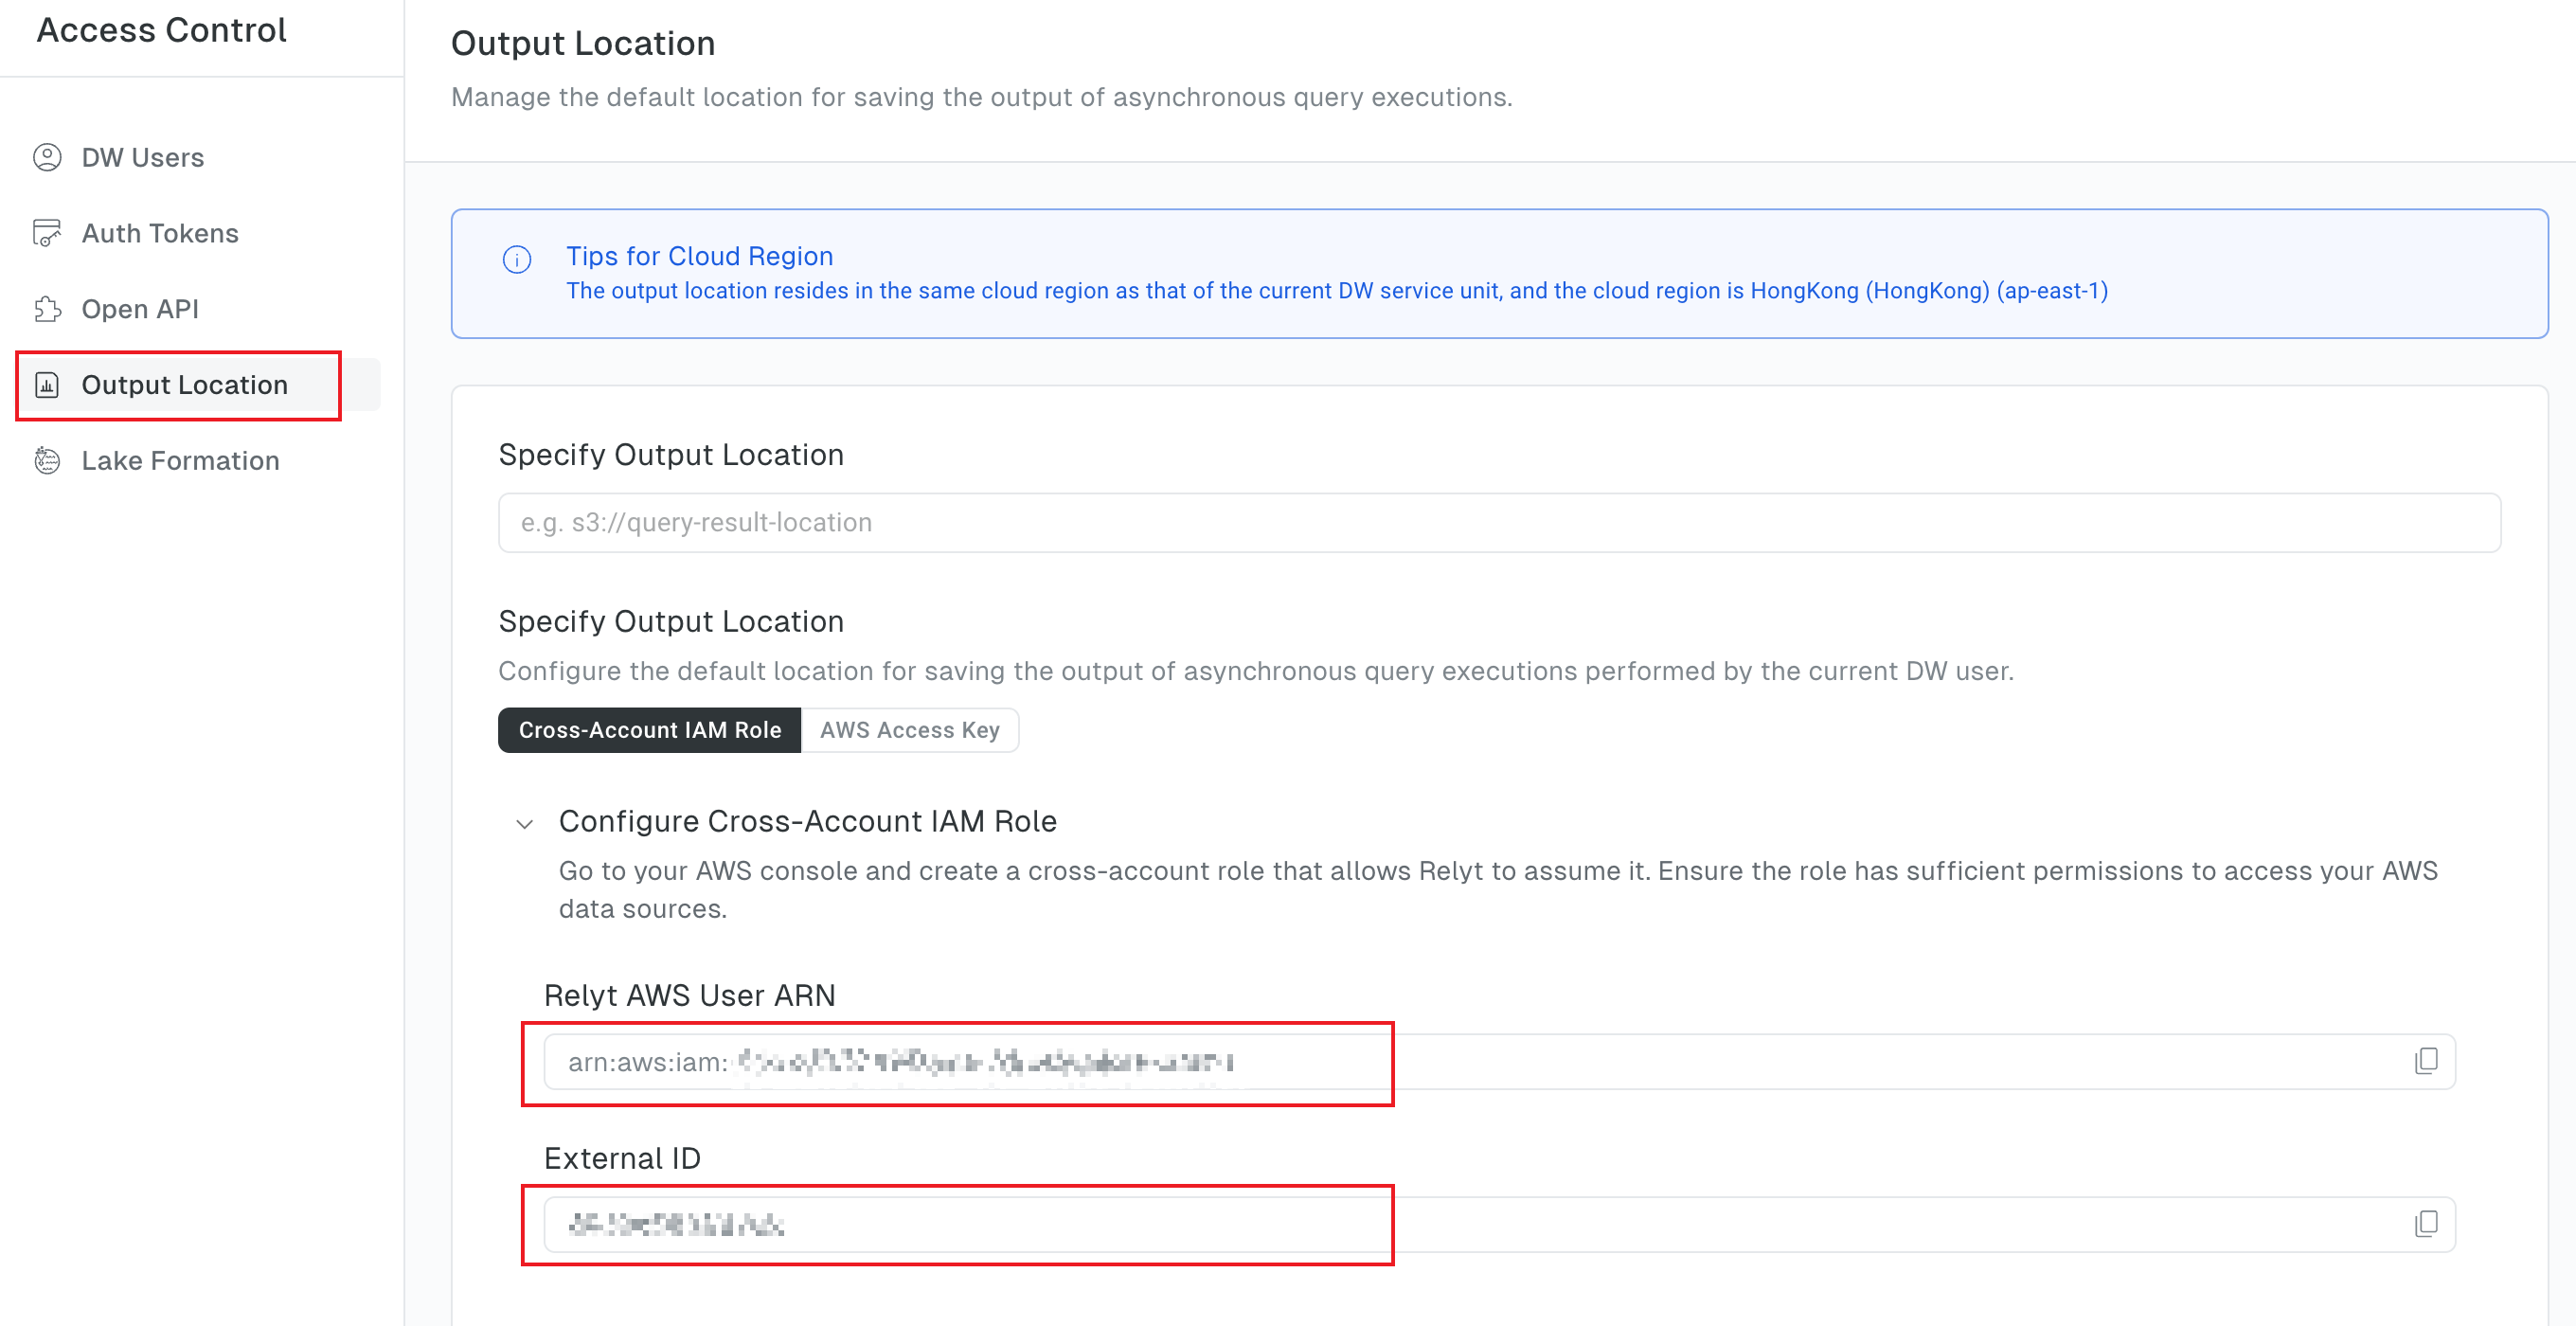
Step 4. Obtain the Relyt IAM user ARN and external ID
-
Log in the DW service unit you have created in the previous step.
-
In the left sidebar, choose Access Control > Output Location, and expand the Configure Cross-Account IAM Role.
-
Copy and save the values of the Relyt AWS User ARN and External ID fields.
Step 5. Complete configurations on AWS
This section describes how to create IAM policies and IAM roles that are required for Lake Formation authentication, how to integrate Relyt with Lake Formation, and more.
If you have already completed these configurations on AWS, skip this section.
If you want to configure an existing role as the cross-account IAM role, ensure that the role has sufficient permissions.
5.1 Create a policy for access to S3 and attach it to a role
This policy and its attached role are for internal Data Formation use only.
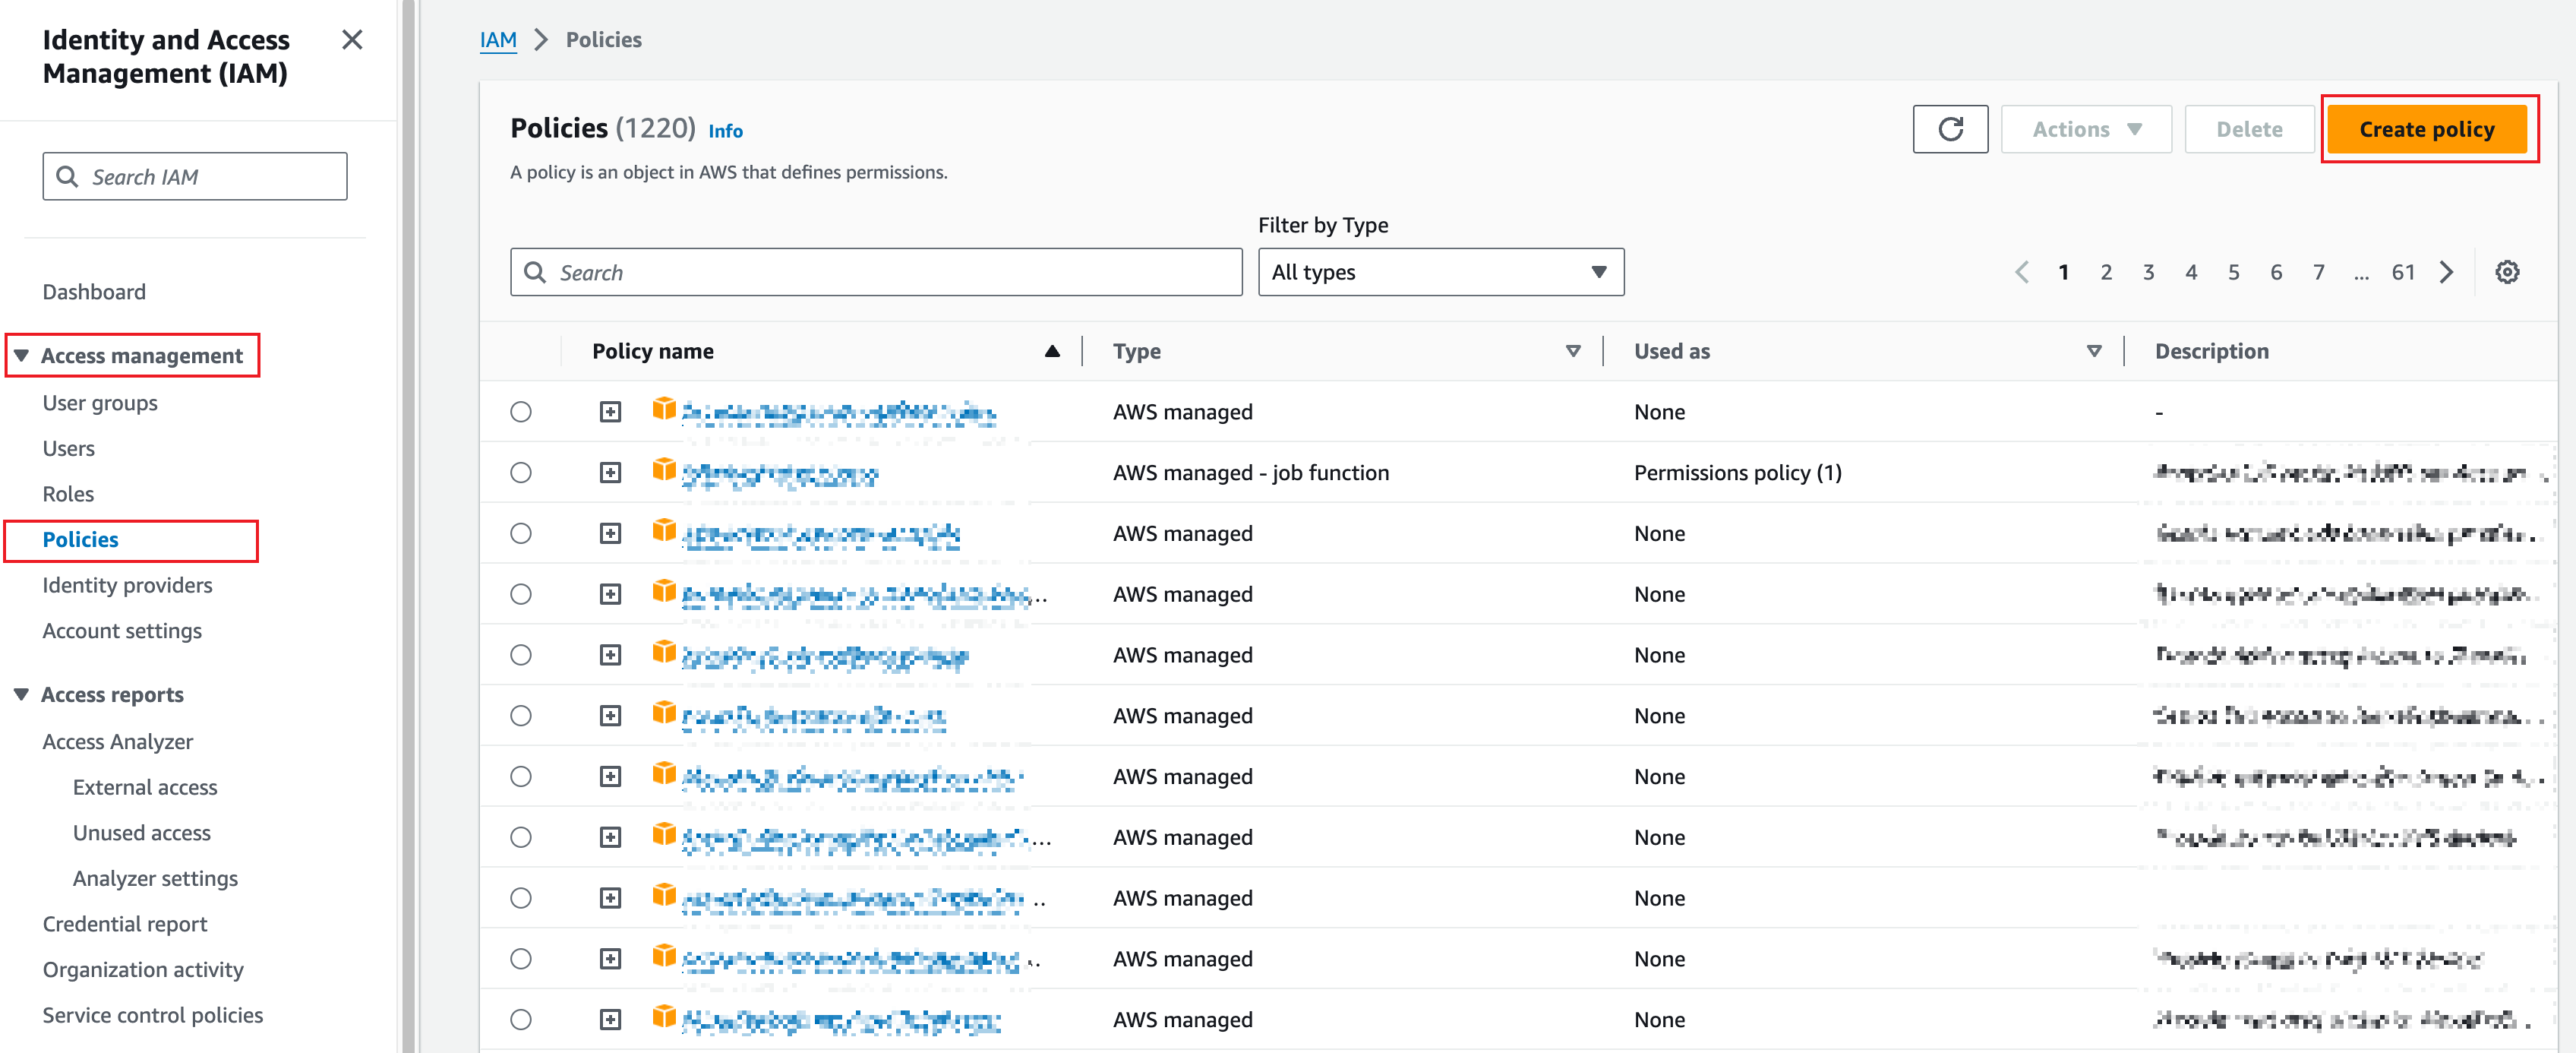
5.1.1 Create a policy for access to S3
-
Log in to the AWS IAM Console.
-
In the left sidebar, choose Access management > Policies, and click Create policy.
-
In the policy editor, set the mode to JSON.
-
In the JSON editor, enter the following content, and click Next.
infoThe following policy example grants full access to S3. You can minimize the privileges if possible.
{
    "Version": "2012-10-17",
    "Statement": [
	    {
		    "Sid": "AllowS3FullAccess",
		    "Effect": "Allow",
		    "Action": [
			    "s3:*"
		    ],
		    "Resource": [
		    	"*"
		    ]
	    }
    ]
} -
Set a name for the policy and optionally add a description, and then review permissions.
-
Click Create policy.
For more information, see Creating IAM policies (console) in the AWS official documentation.
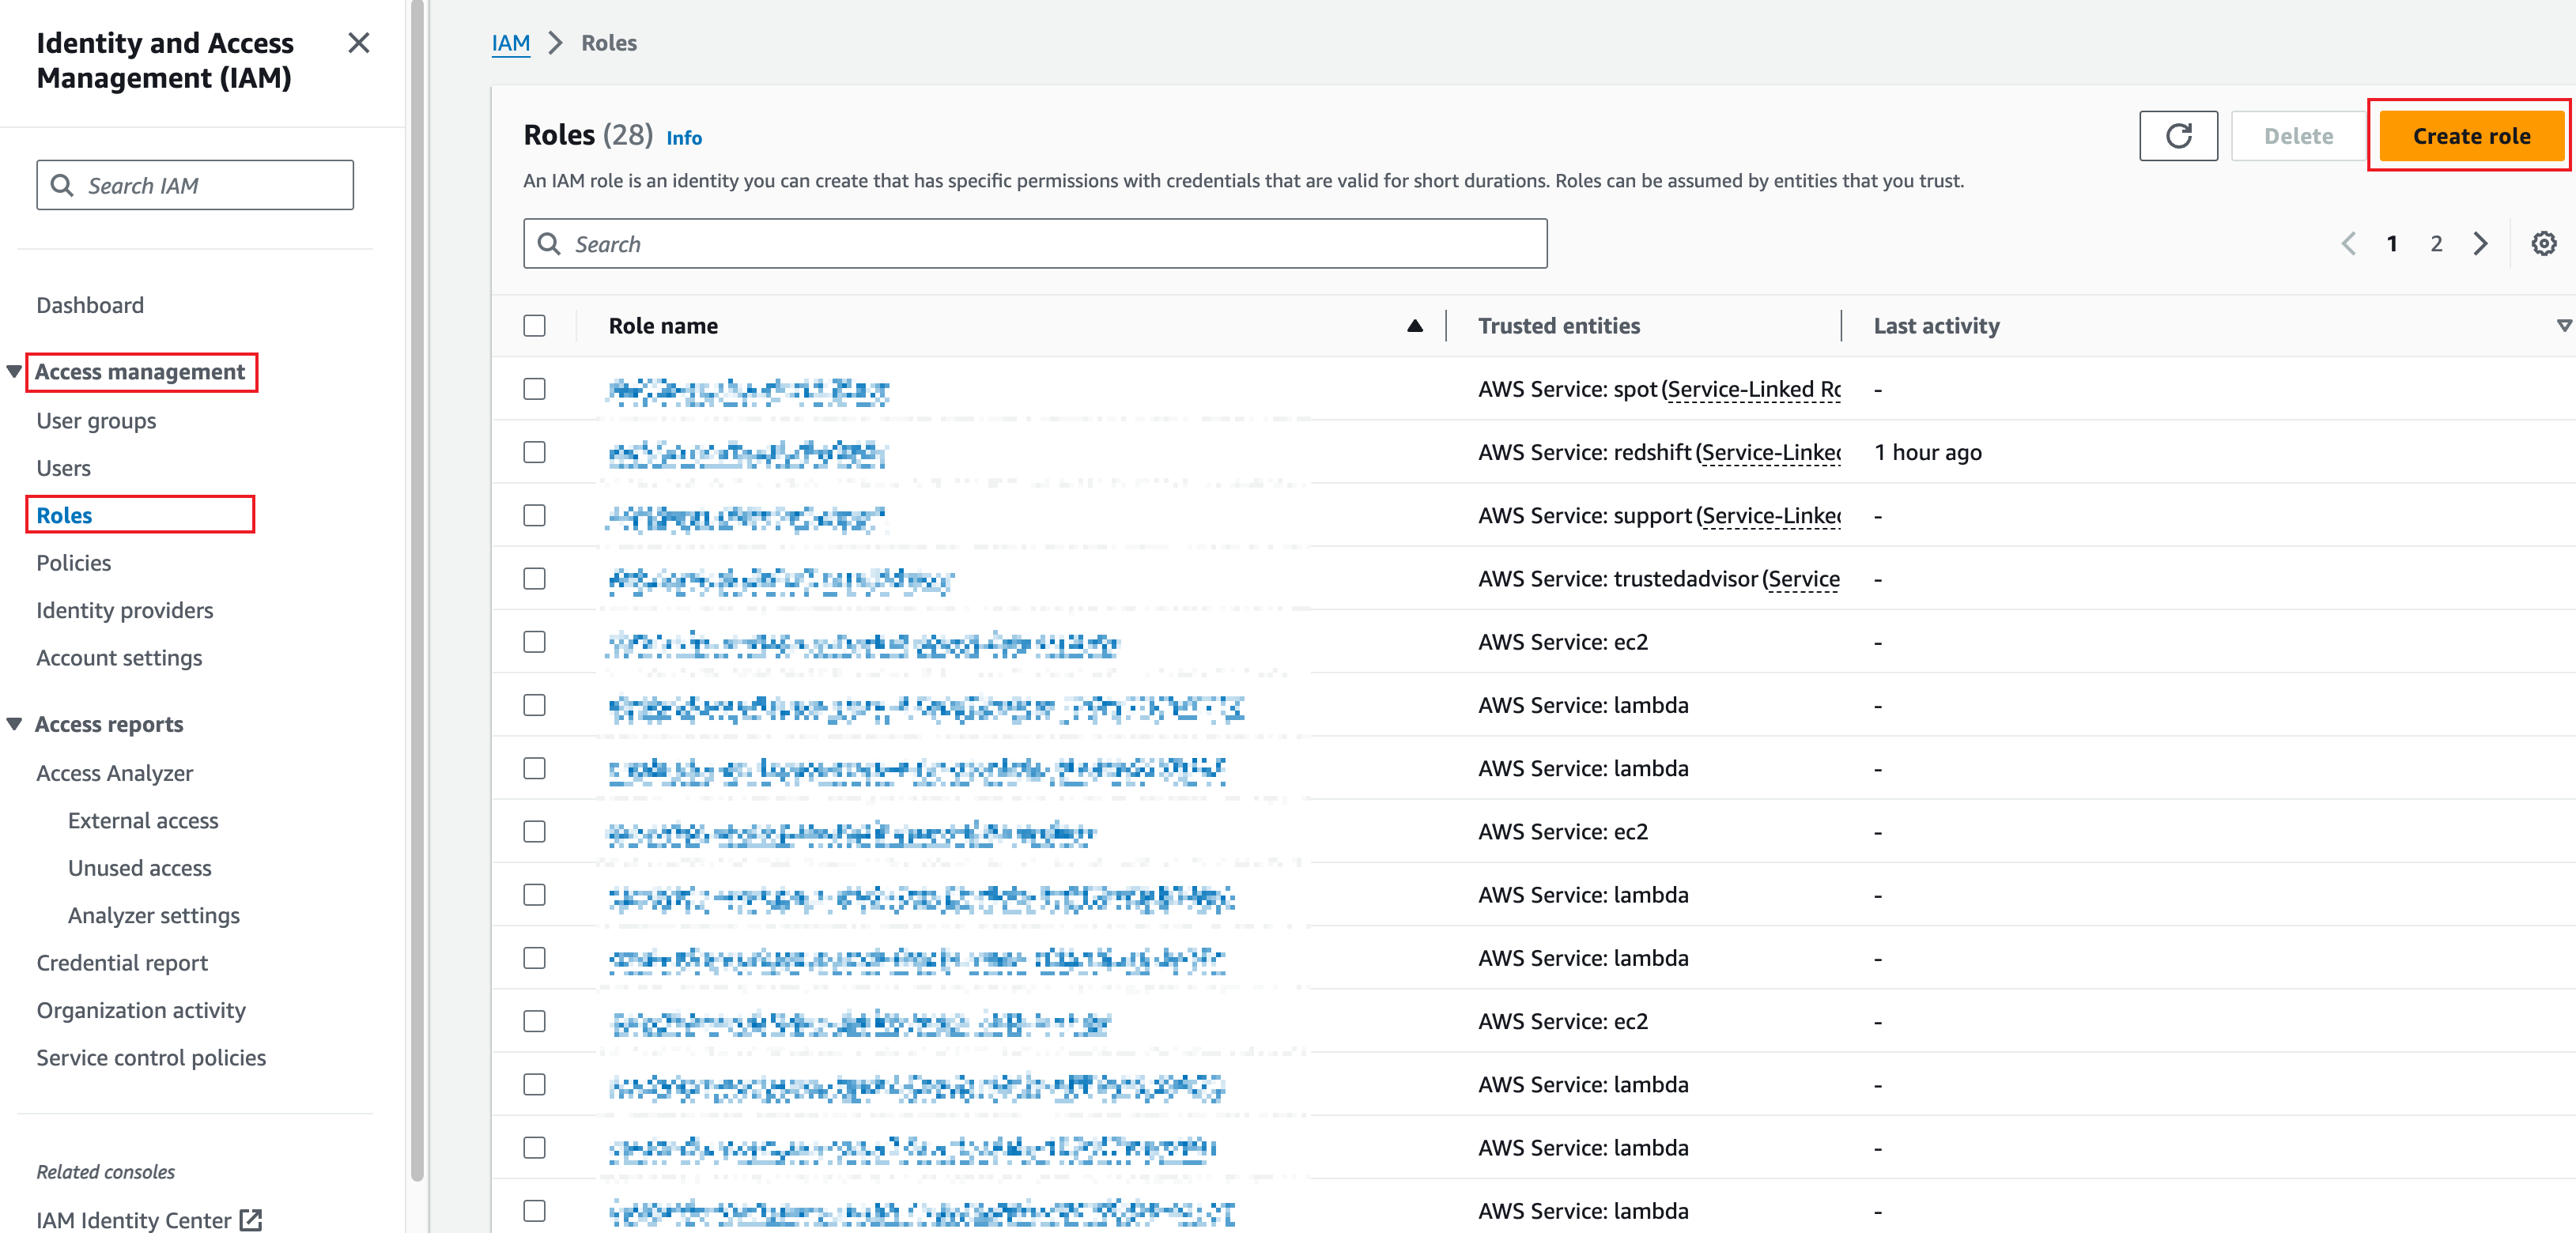
5.1.2 Create a role for internal use
-
In the left sidebar, choose Access management > Roles, and click Create role.
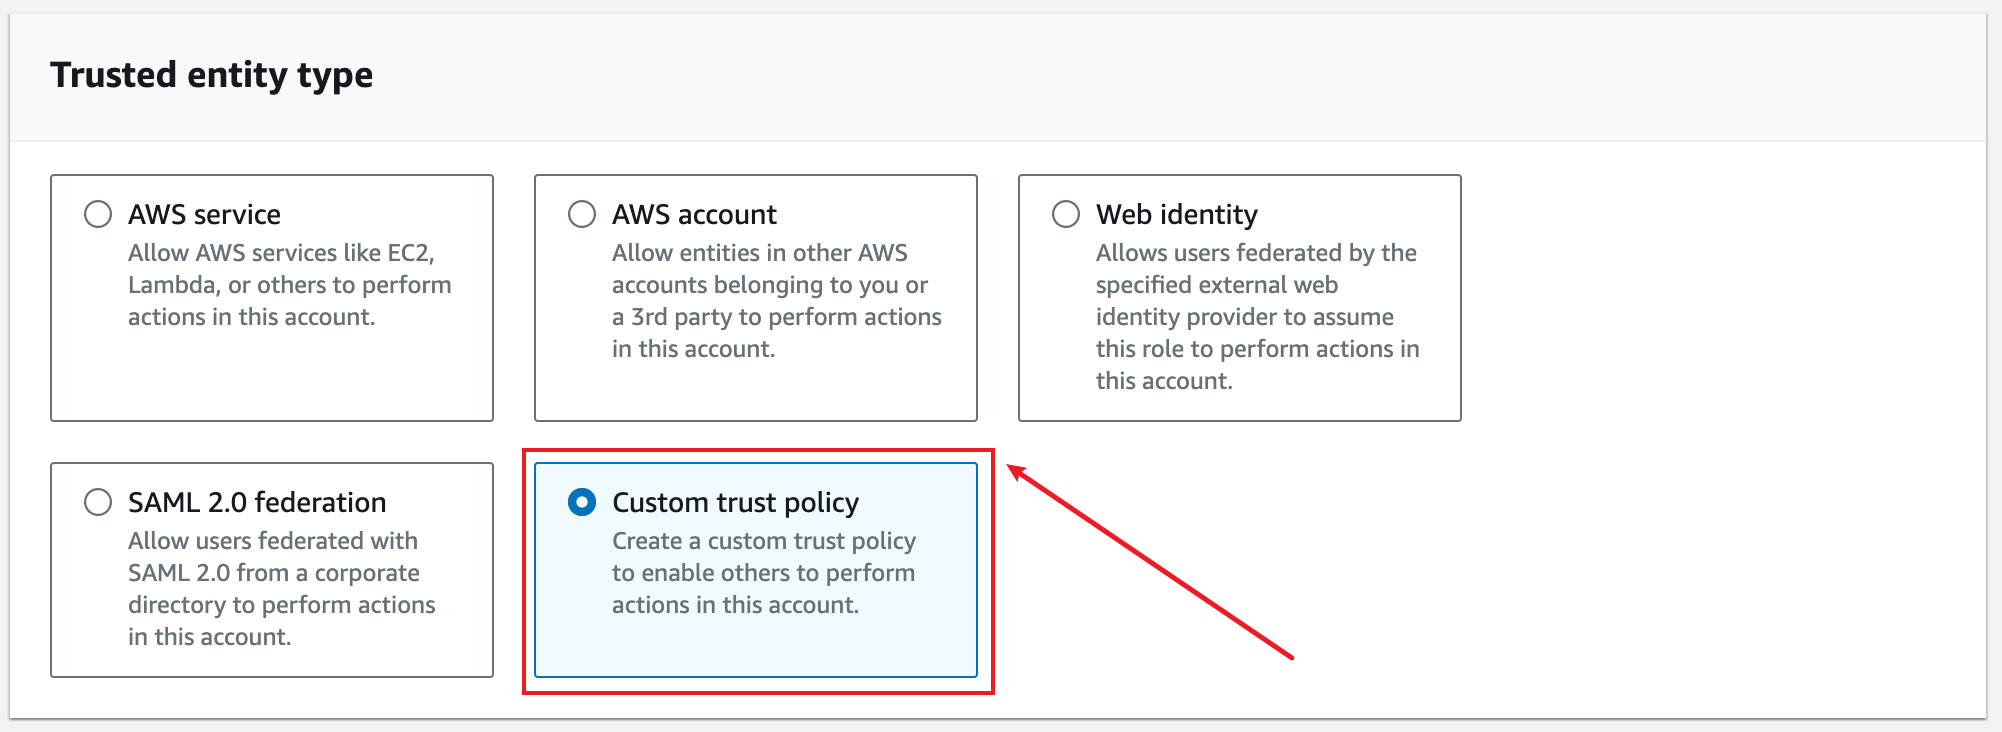
-
In the Trusted entity type section, choose Custom trust policy.
-
In the Custom trust policy editor, enter the following content to allow Lake Formation to assume this role.
{
    "Version": "2012-10-17",
    "Statement": [
        {
            "Effect": "Allow",
            "Principal": {
                "Service": "lakeformation.amazonaws.com"
            },
            "Action": "sts:AssumeRole"
        }
    ]
} -
In Add permissions, select the policy created in 5.1.1, and click Next.

-
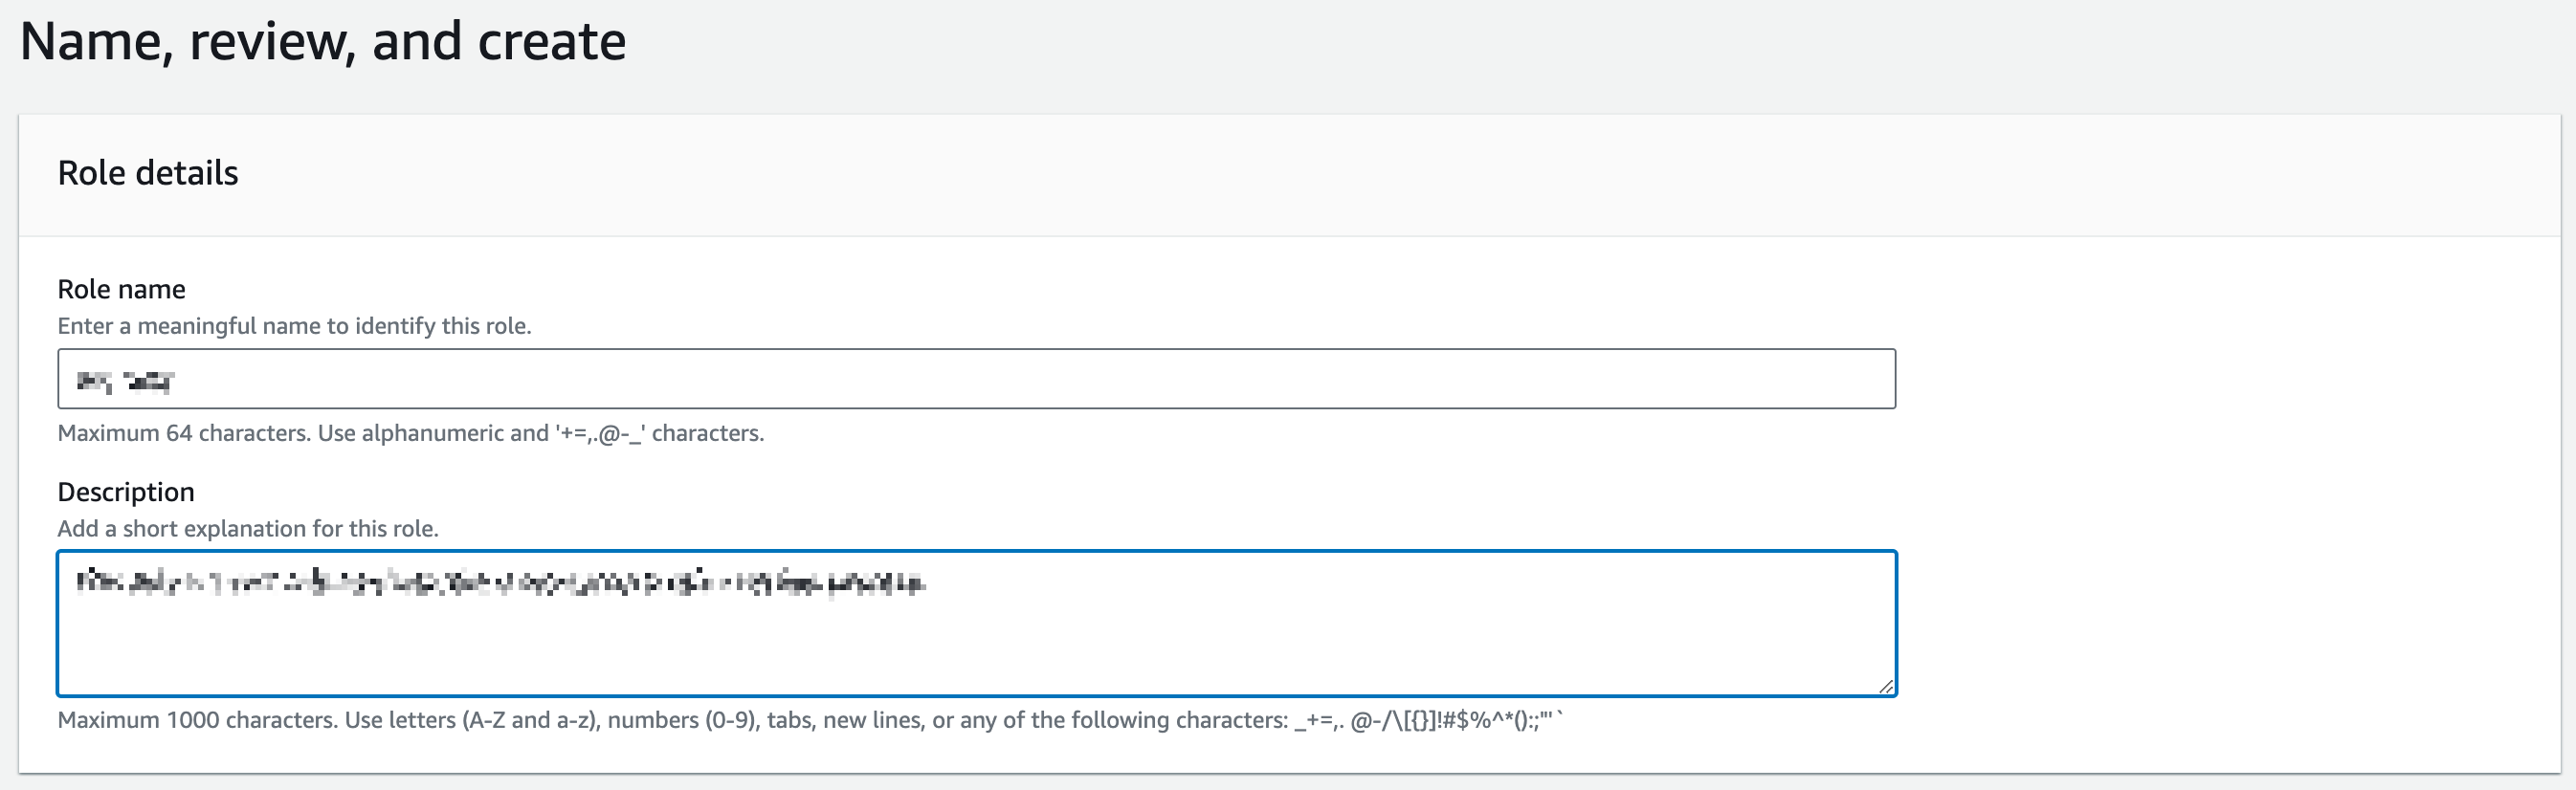
Set a meaningful name for the role and explains the role in the Description field.
-
Click the Create role button.
-
Click View role in the upper corner or go back to the Roles page and click the role name to go to the role details page.
-
Copy and save the ARN of the role for later use.
5.2 Create a policy to allow access to Glue, Lake Formation, and S3 and attach it to a role
5.2.1 Create a policy to allow access to Glue, Lake Formation, and S3
-
In the left sidebar, choose Access management > Policies, and click Create policy.
-
In the policy editor, set the mode to JSON.
-
In the JSON editor, enter the following content, and click Next.
infoThe following policy example grants full access to Glue, the write permission to Lake Formation, and full access to S3. You can minimize the privileges if possible.
{
    "Version": "2012-10-17",
    "Statement": [
        {
            "Effect": "Allow",
            "Action": [
                "lakeformation:GetDataAccess"
            ],
            "Resource": "*"
        },
        {
            "Sid": "AllowGlueCatalogFullAccess",
            "Effect": "Allow",
            "Action": [
                "glue:*"
            ],
            "Resource": [
                "*"
            ]
        },
        {
		    "Sid": "AllowS3FullAccess",
		    "Effect": "Allow",
		    "Action": [
			    "s3:*"
		    ],
		    "Resource": [
		    	"*"
		    ]
	    }
    ]
} -
Set a name for the policy and optionally add a description, and then review permissions.
-
Click Create policy.
5.2.2 Create a role for external use
-
In the left sidebar, choose Access management > Roles, and click Create role.
-
In the Trusted entity type section, choose Custom trust policy.
-
In the Custom trust policy editor, enter the following content.
{
    "Version": "2012-10-17",
    "Statement": [
        {
            "Sid": "Statement1",
            "Effect": "Allow",
            "Principal": {
                "AWS": "<relyt_aws_user_arn>"
            },
            "Action": "sts:AssumeRole",
            "Condition": {
                "StringEquals": {
                    "sts:ExternalId": "<external_id>"
                }
            }
        }
    ]
}ImportantSet variables
<relyt_aws_user_arn>and<external_id>to the Relyt AWS user ARN and the external ID obtained in Step 4. -
In Add permissions, select the policy created in 5.2.1, and click Next.
-
Set a meaningful name for the role and explains the role in the Description field.
-
Click the Create role button.
-
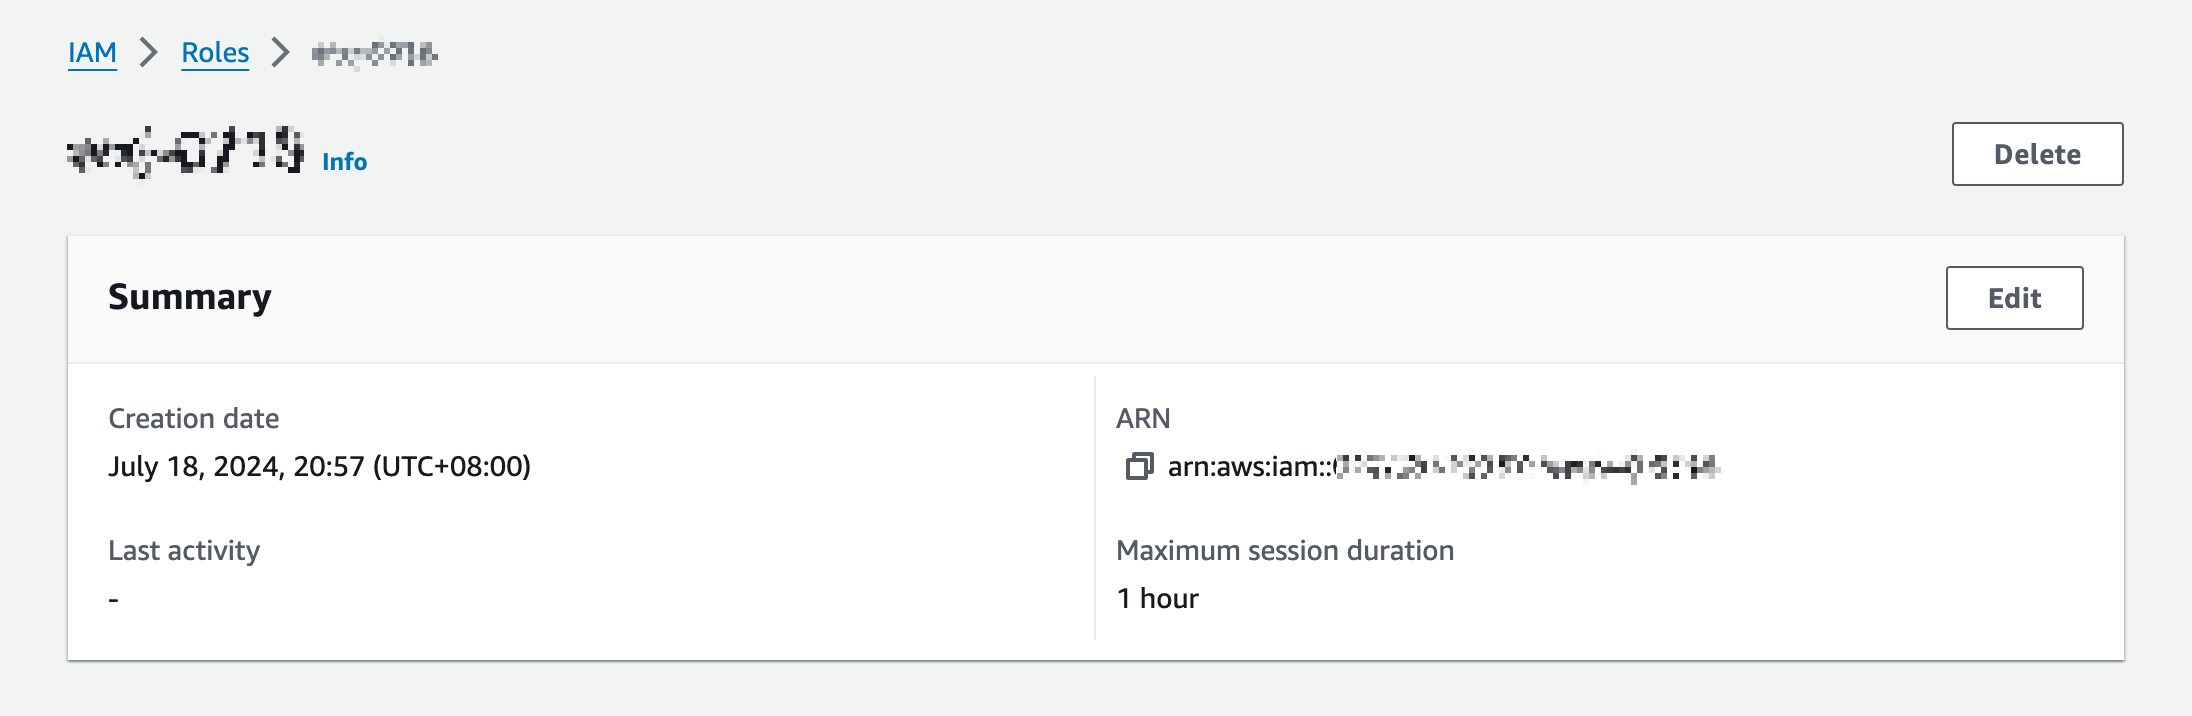
Click View role in the upper corner or go back to the Roles page and click the role name to go to the role details page.
-
Copy the ARN of the role.

The digit string that follows
arn:aws:iam:::is the account ID and the string that followsrole/is the role name. -
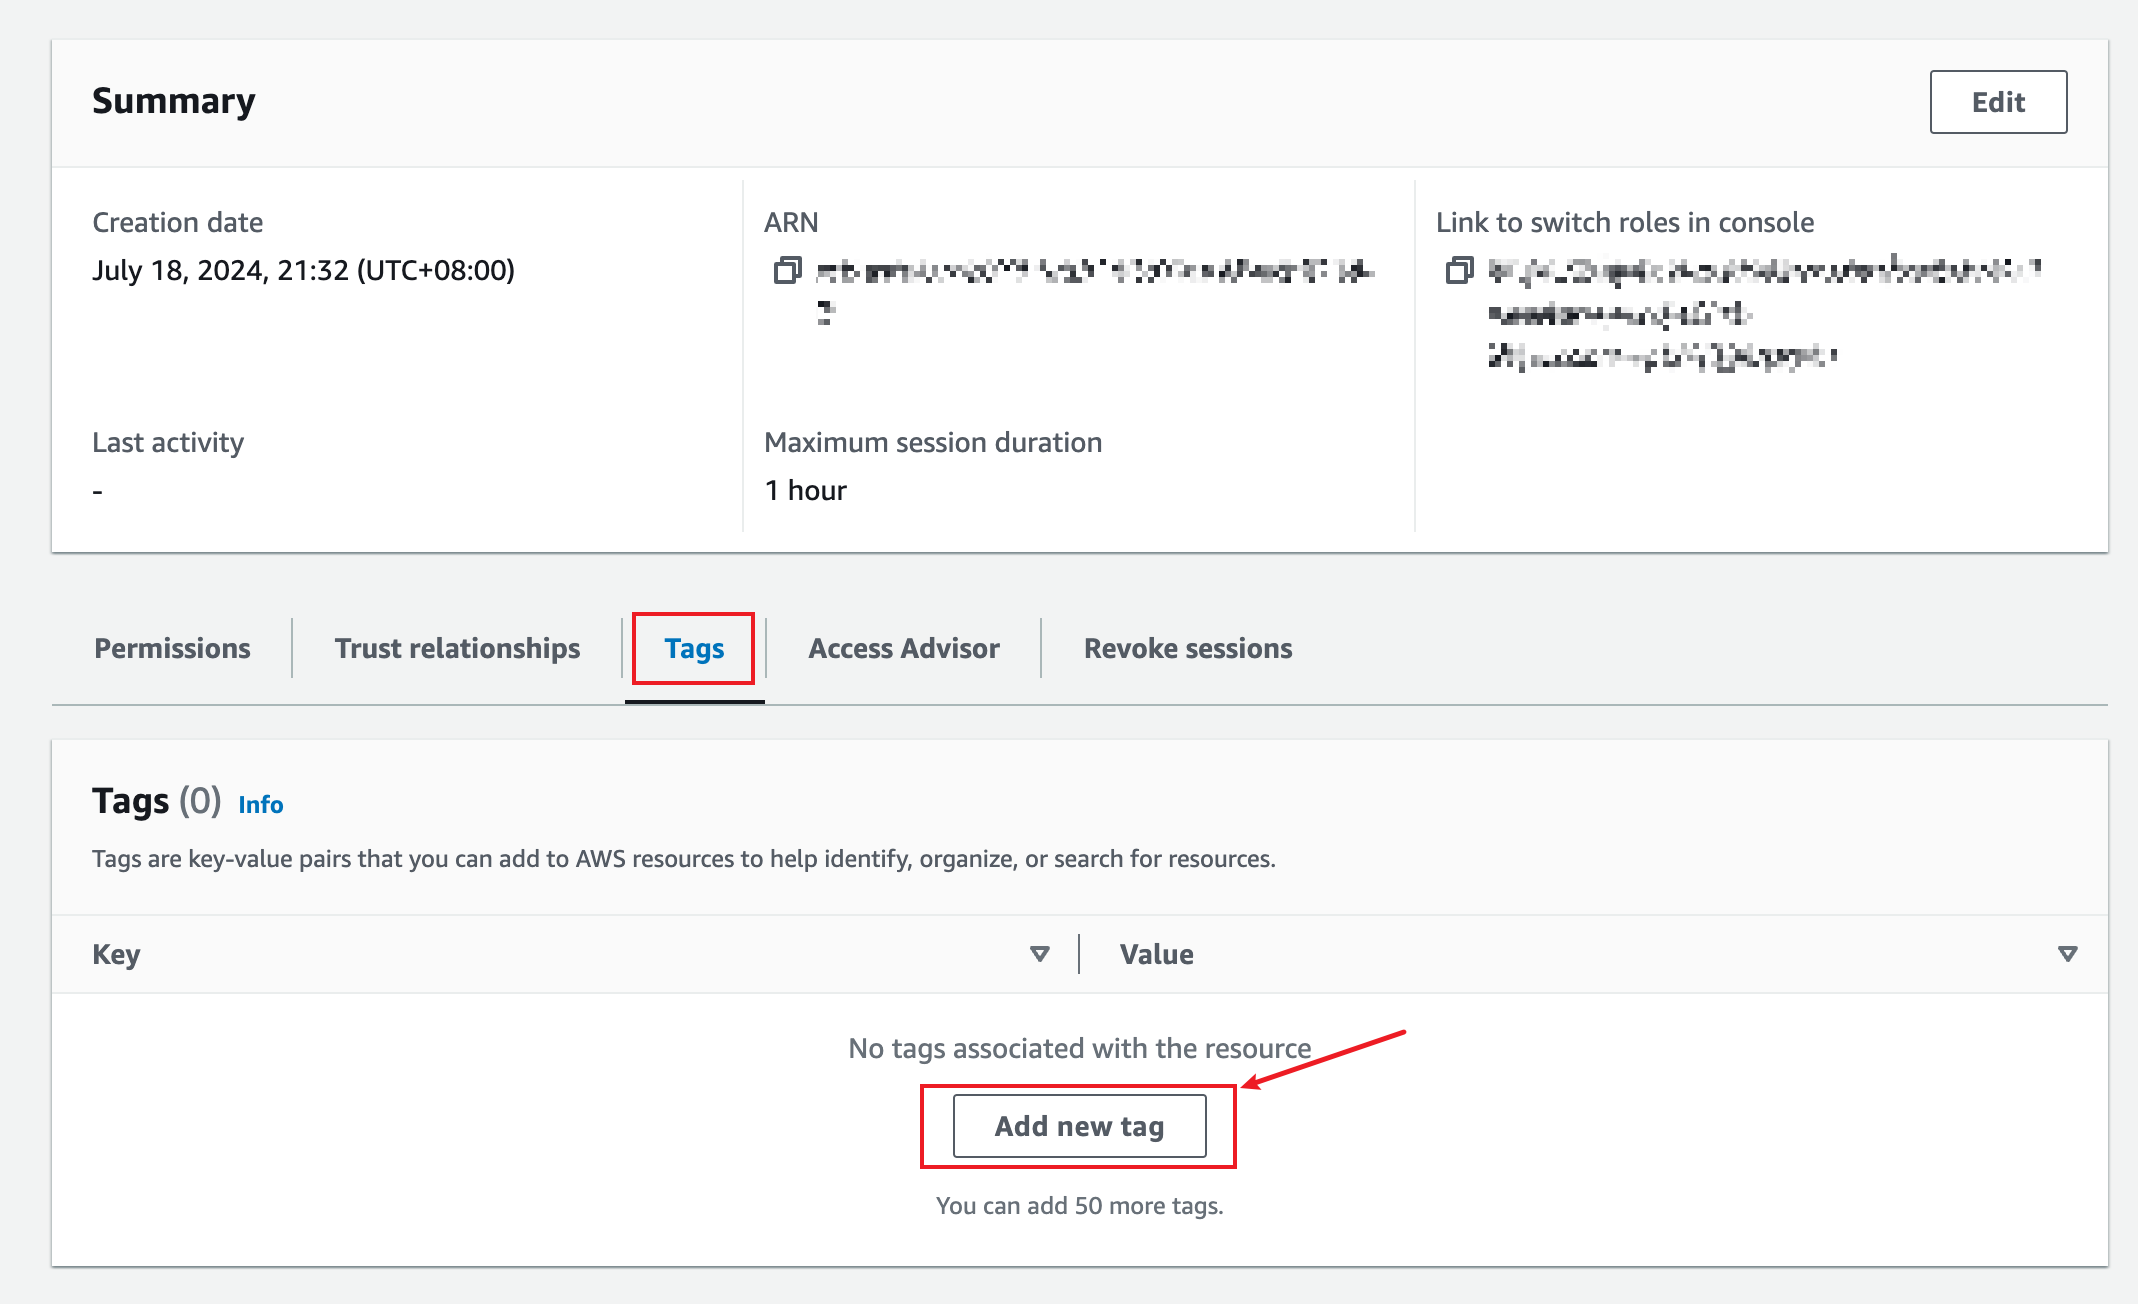
Click the Tags tab and click Add new tag.
-
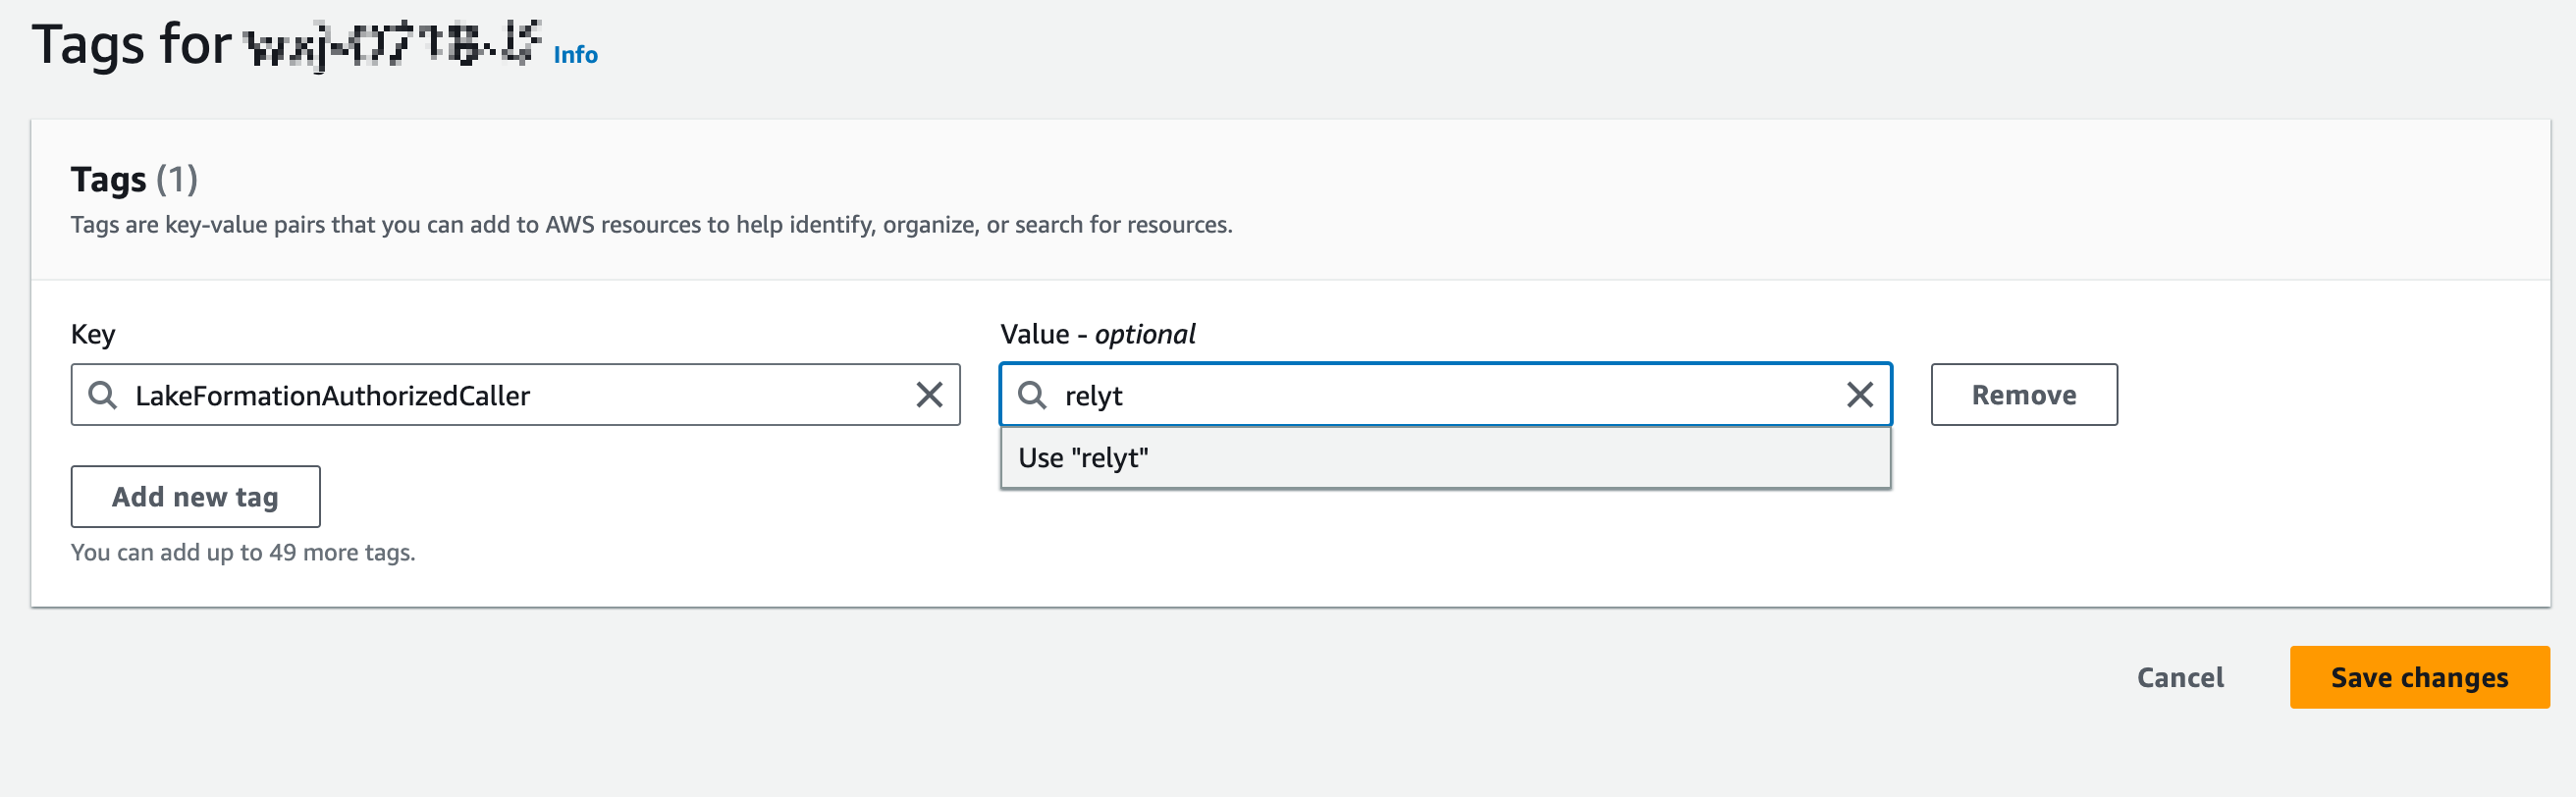
Set the key to LakeFormationAuhtorizedCaller and the value to relyt, and click Save change.
Save the value for this tag for later use. The value is customizable. Here we set it to relyt for ease of use.
5.3 Configure Lake Formation
5.3.1 Configure to allow third-party integration
-
Log in to the AWS Lake Formation Console.
-
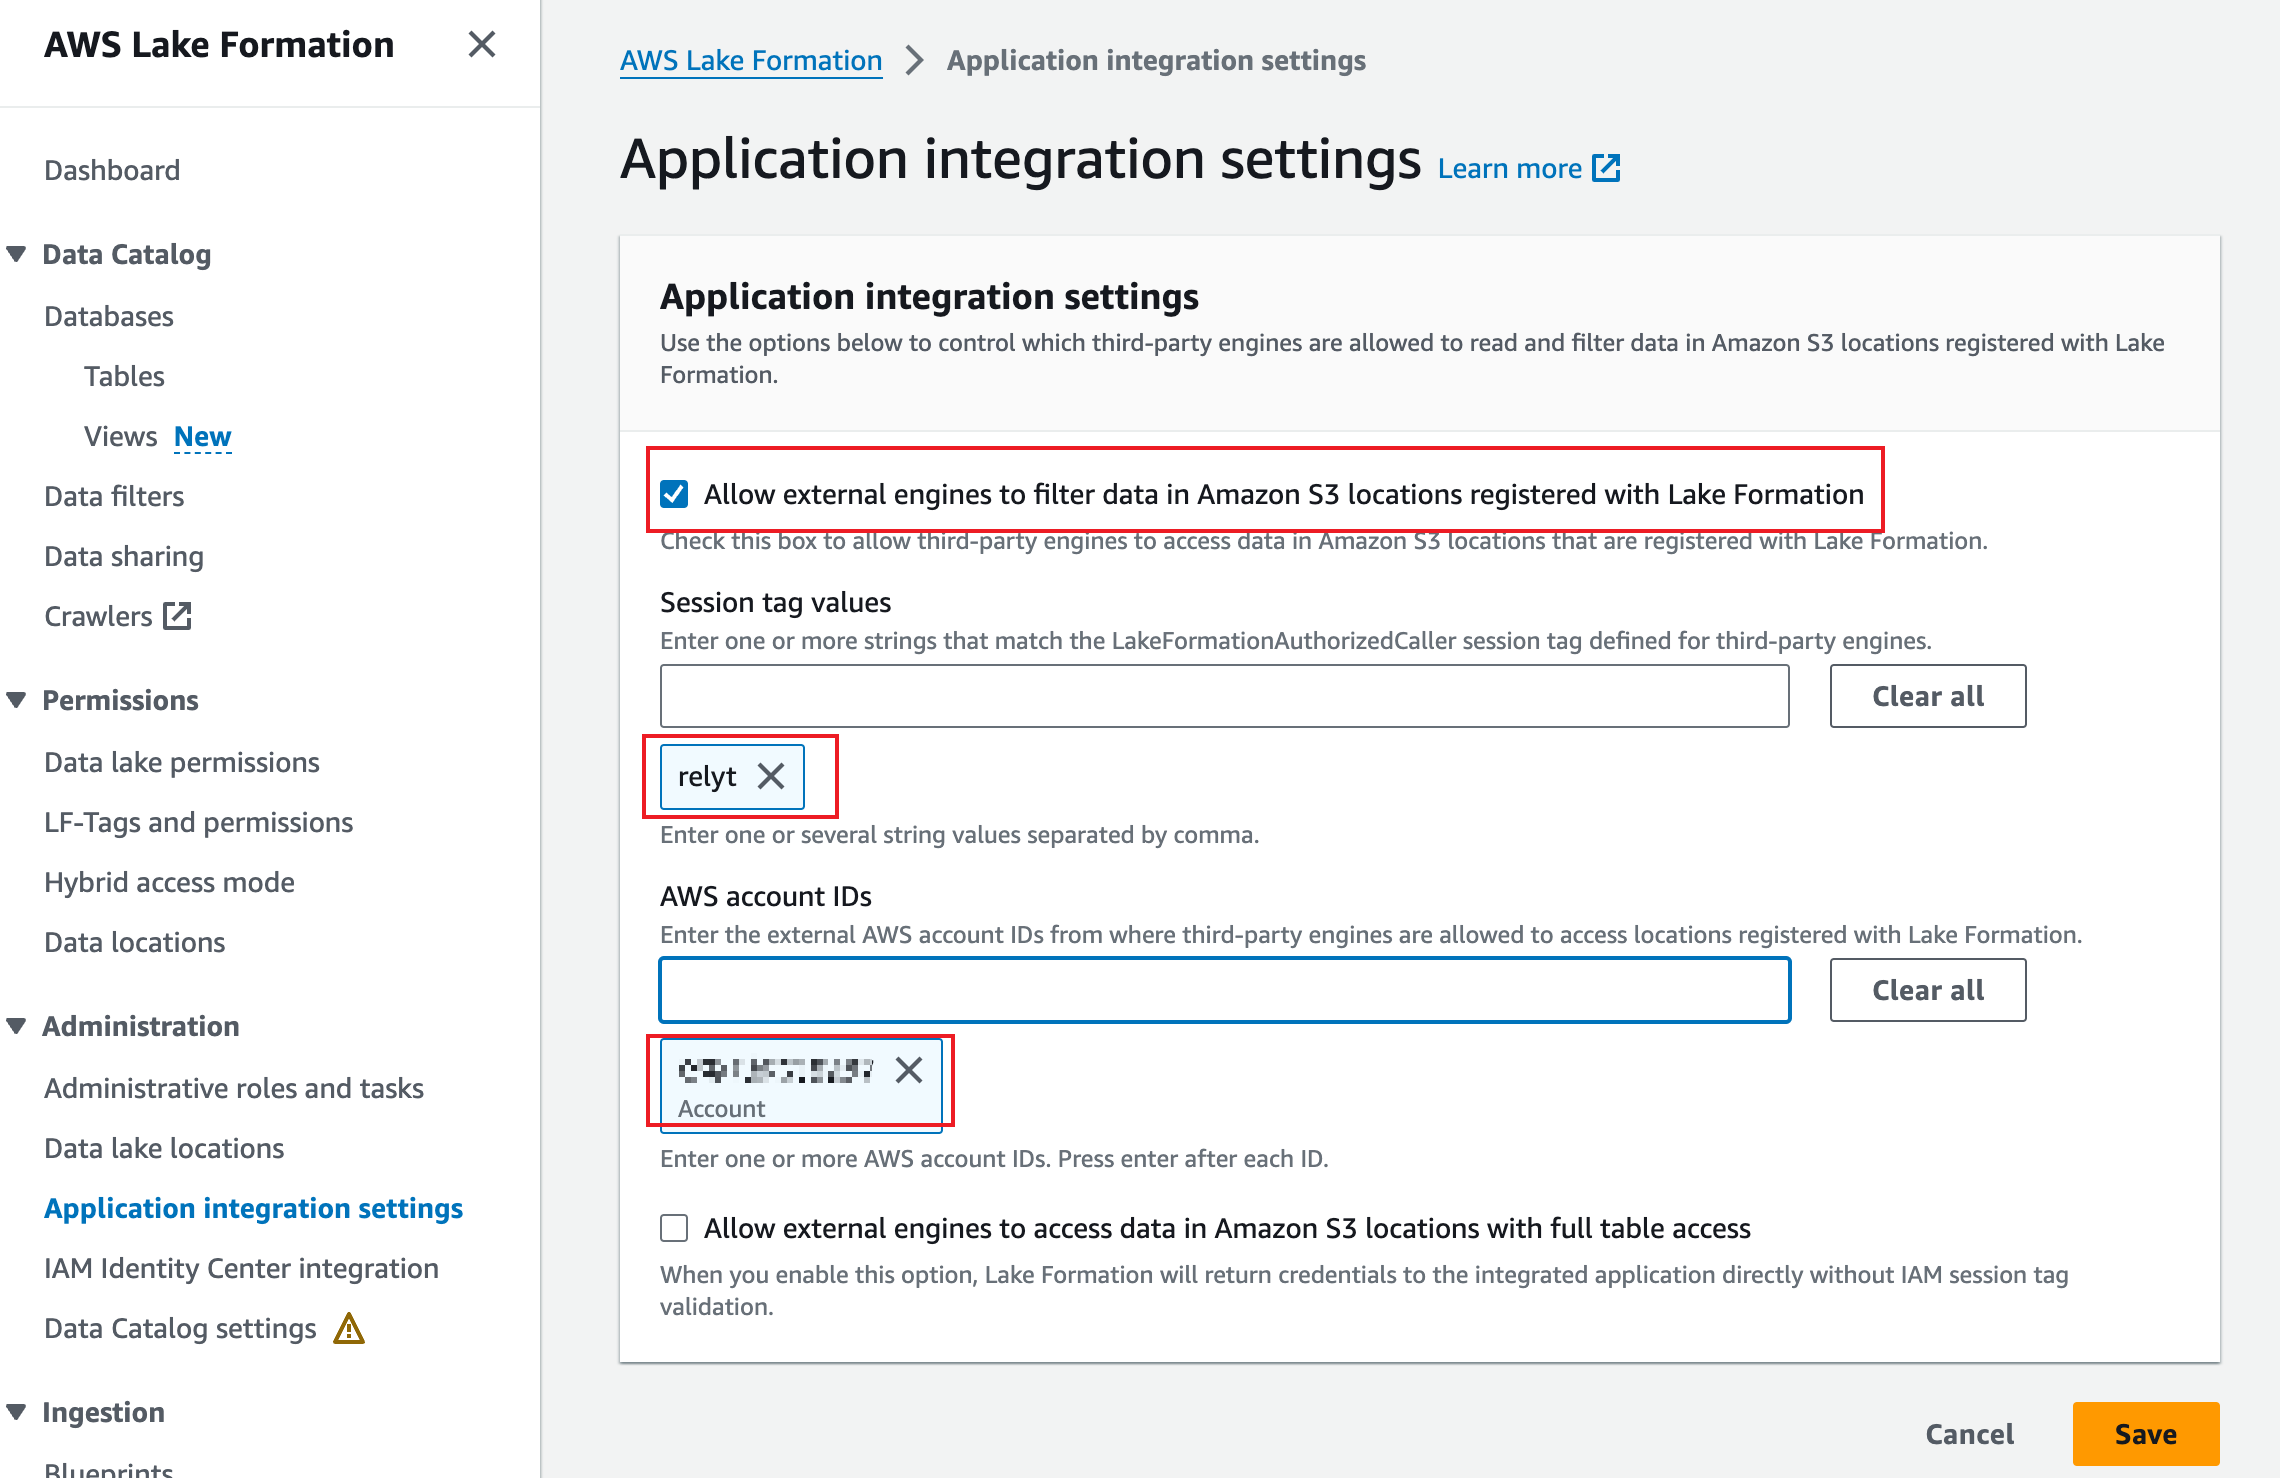
In the left sidebar, choose Administration > Application integration settings.
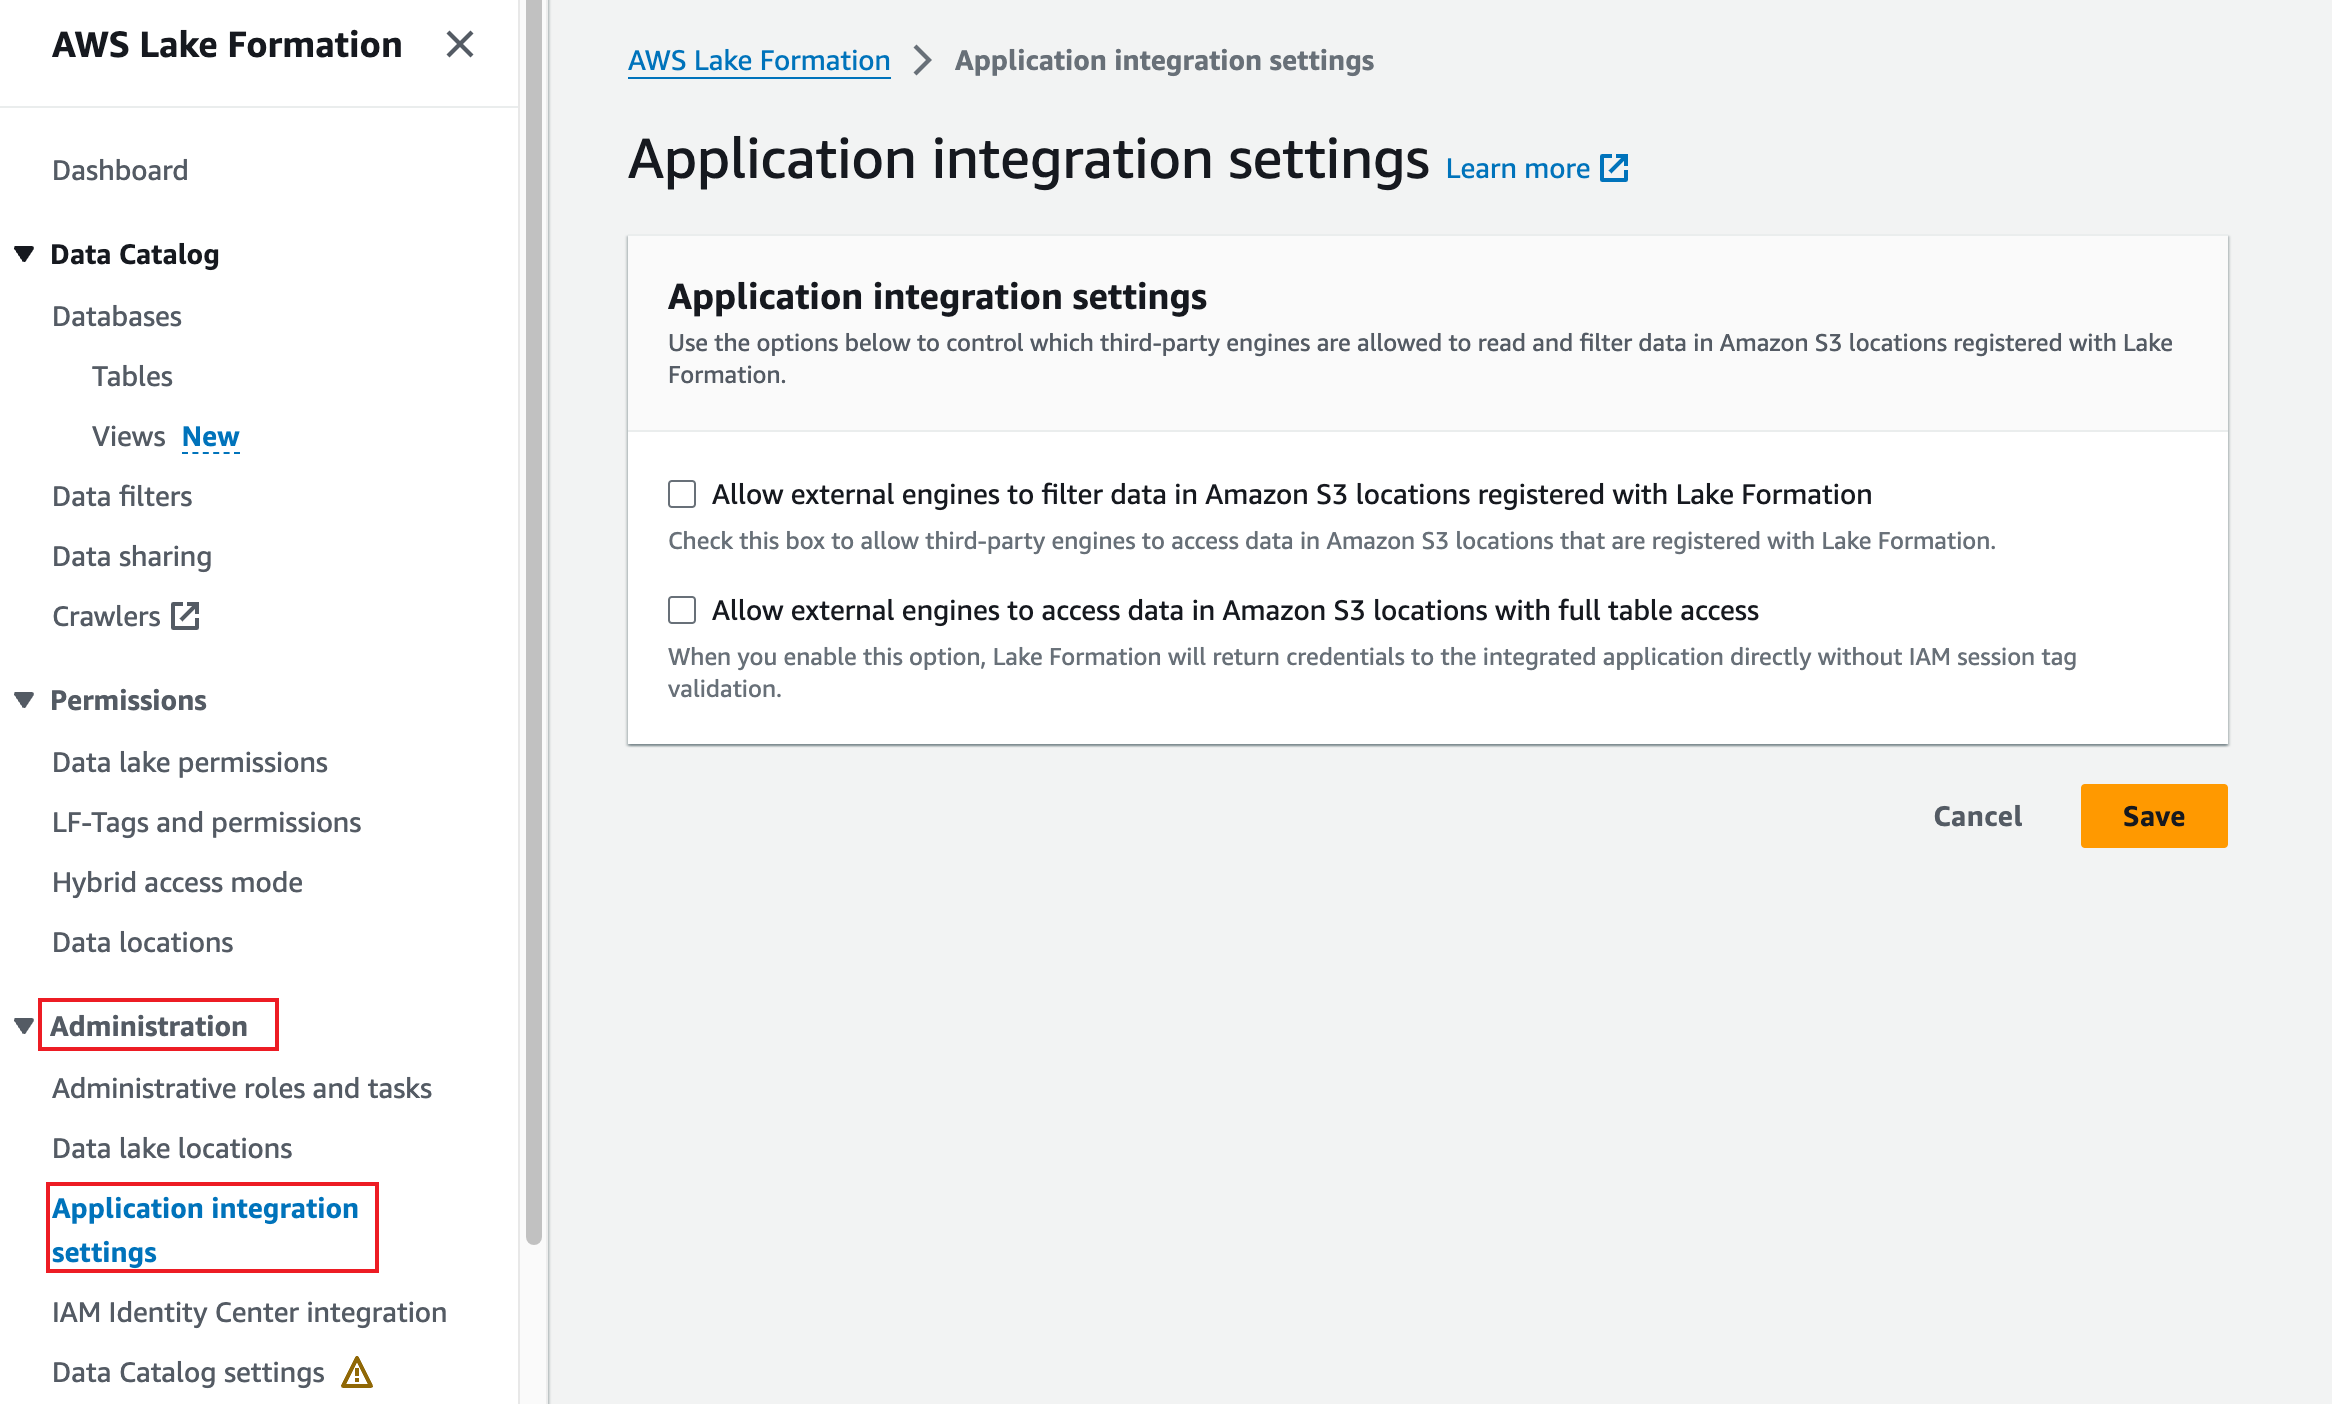
-
Select Allow external engines to filter data in Amazon S3 locations registered with Lake Formation, and set Session tag values to relyt, enter the account ID obtained step 8 in 5.2.2, and click Save.
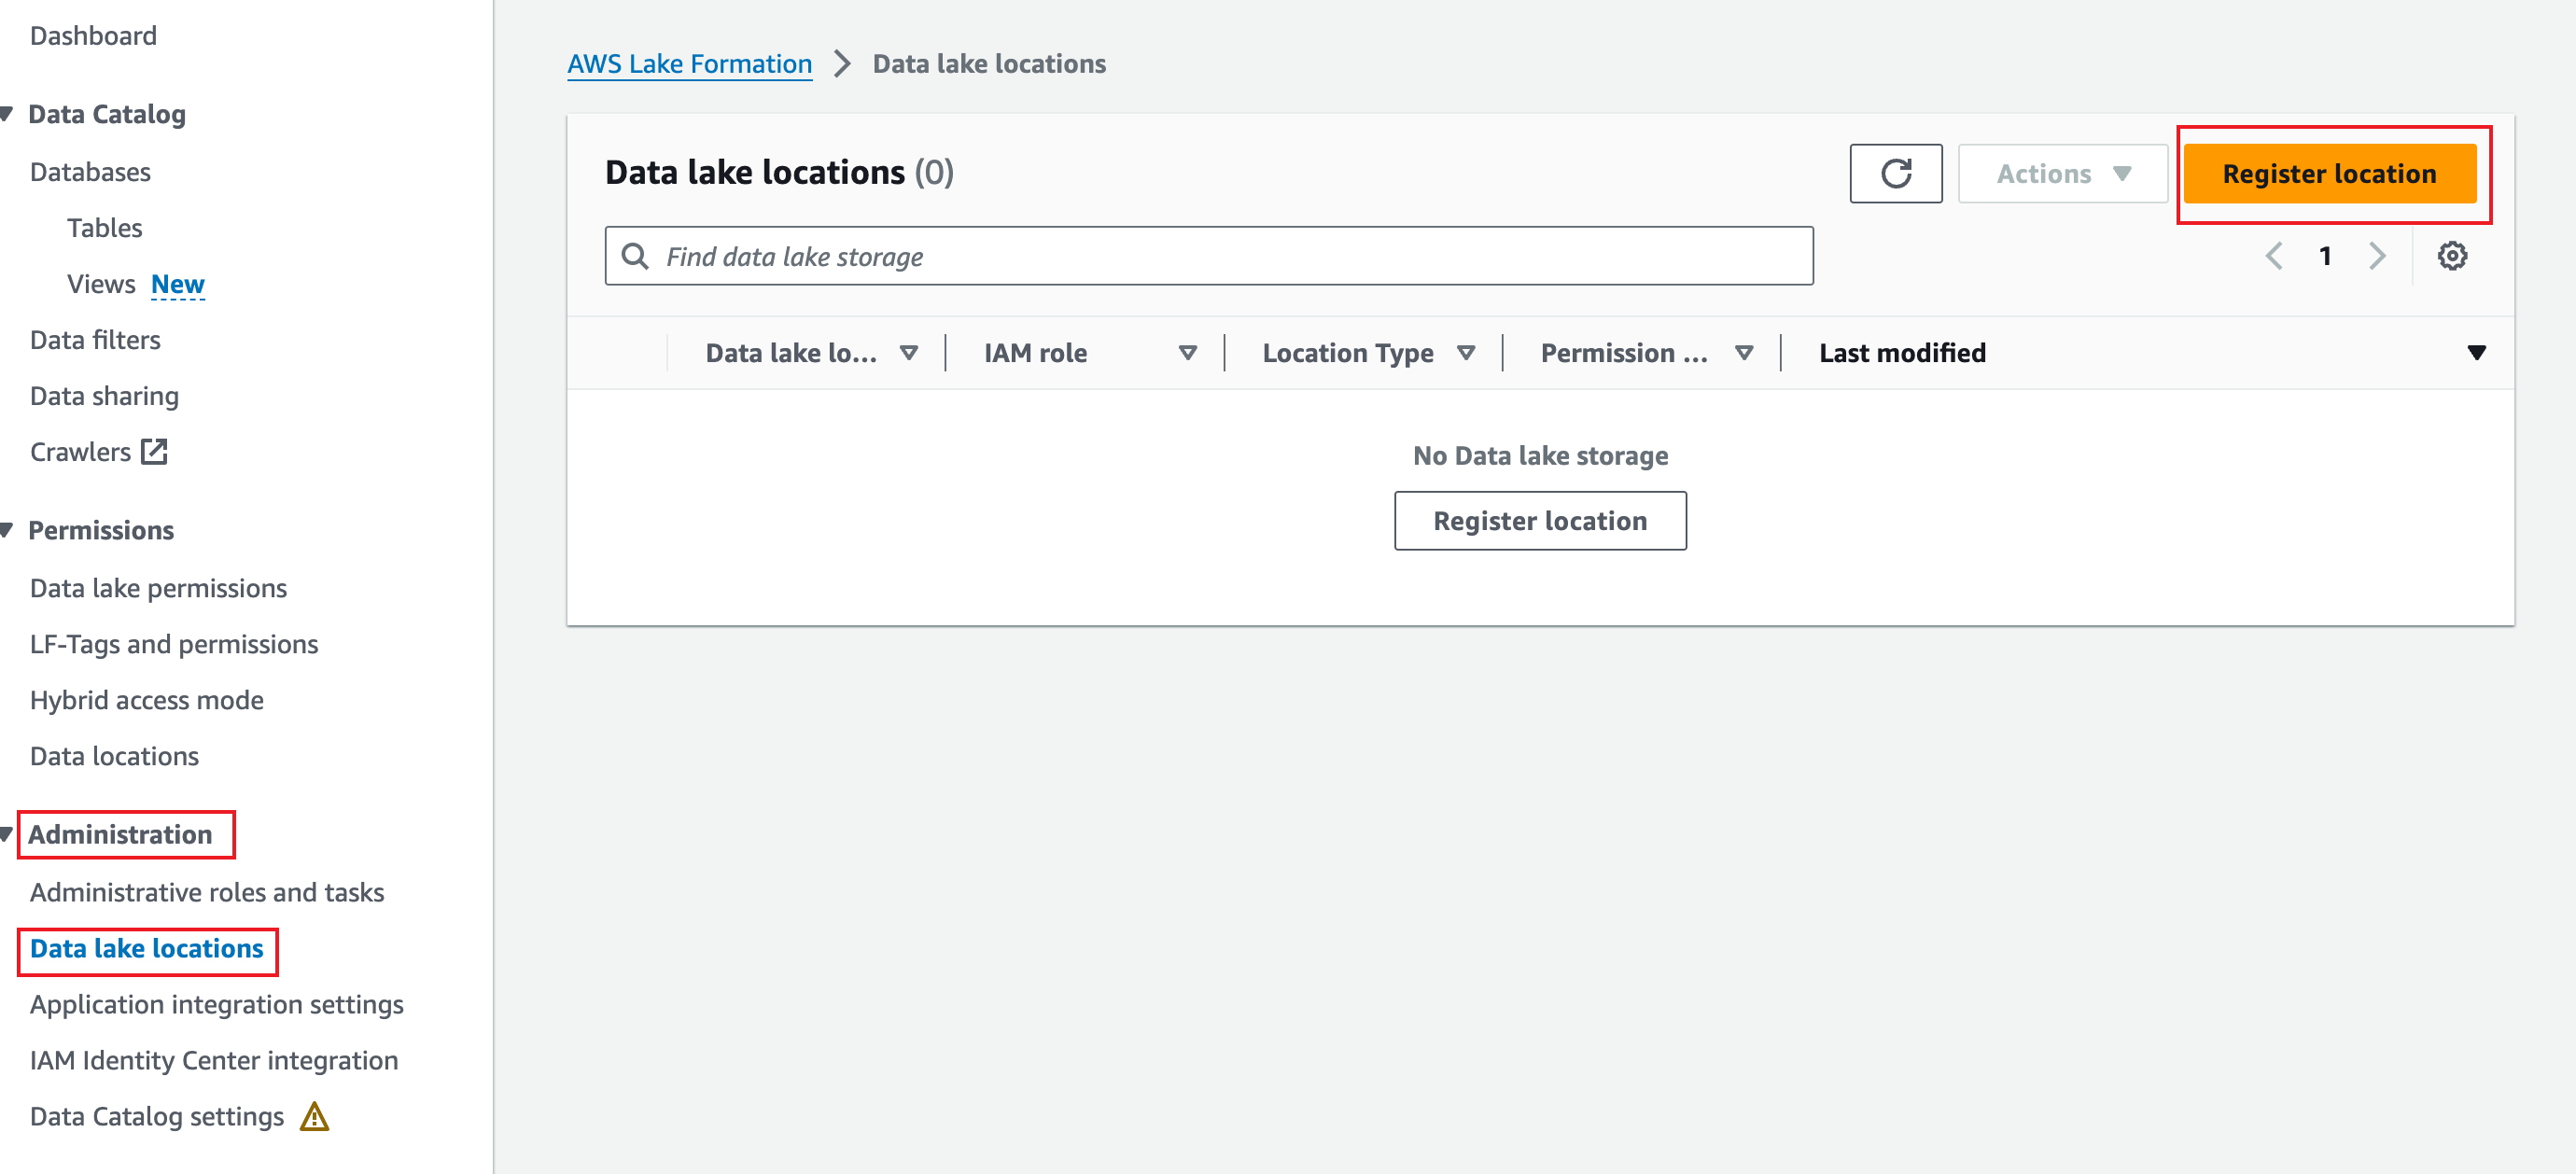
5.3.2 Register data lake locations
-
In the left sidebar, choose Administration > Data lake locations, and click Register location.
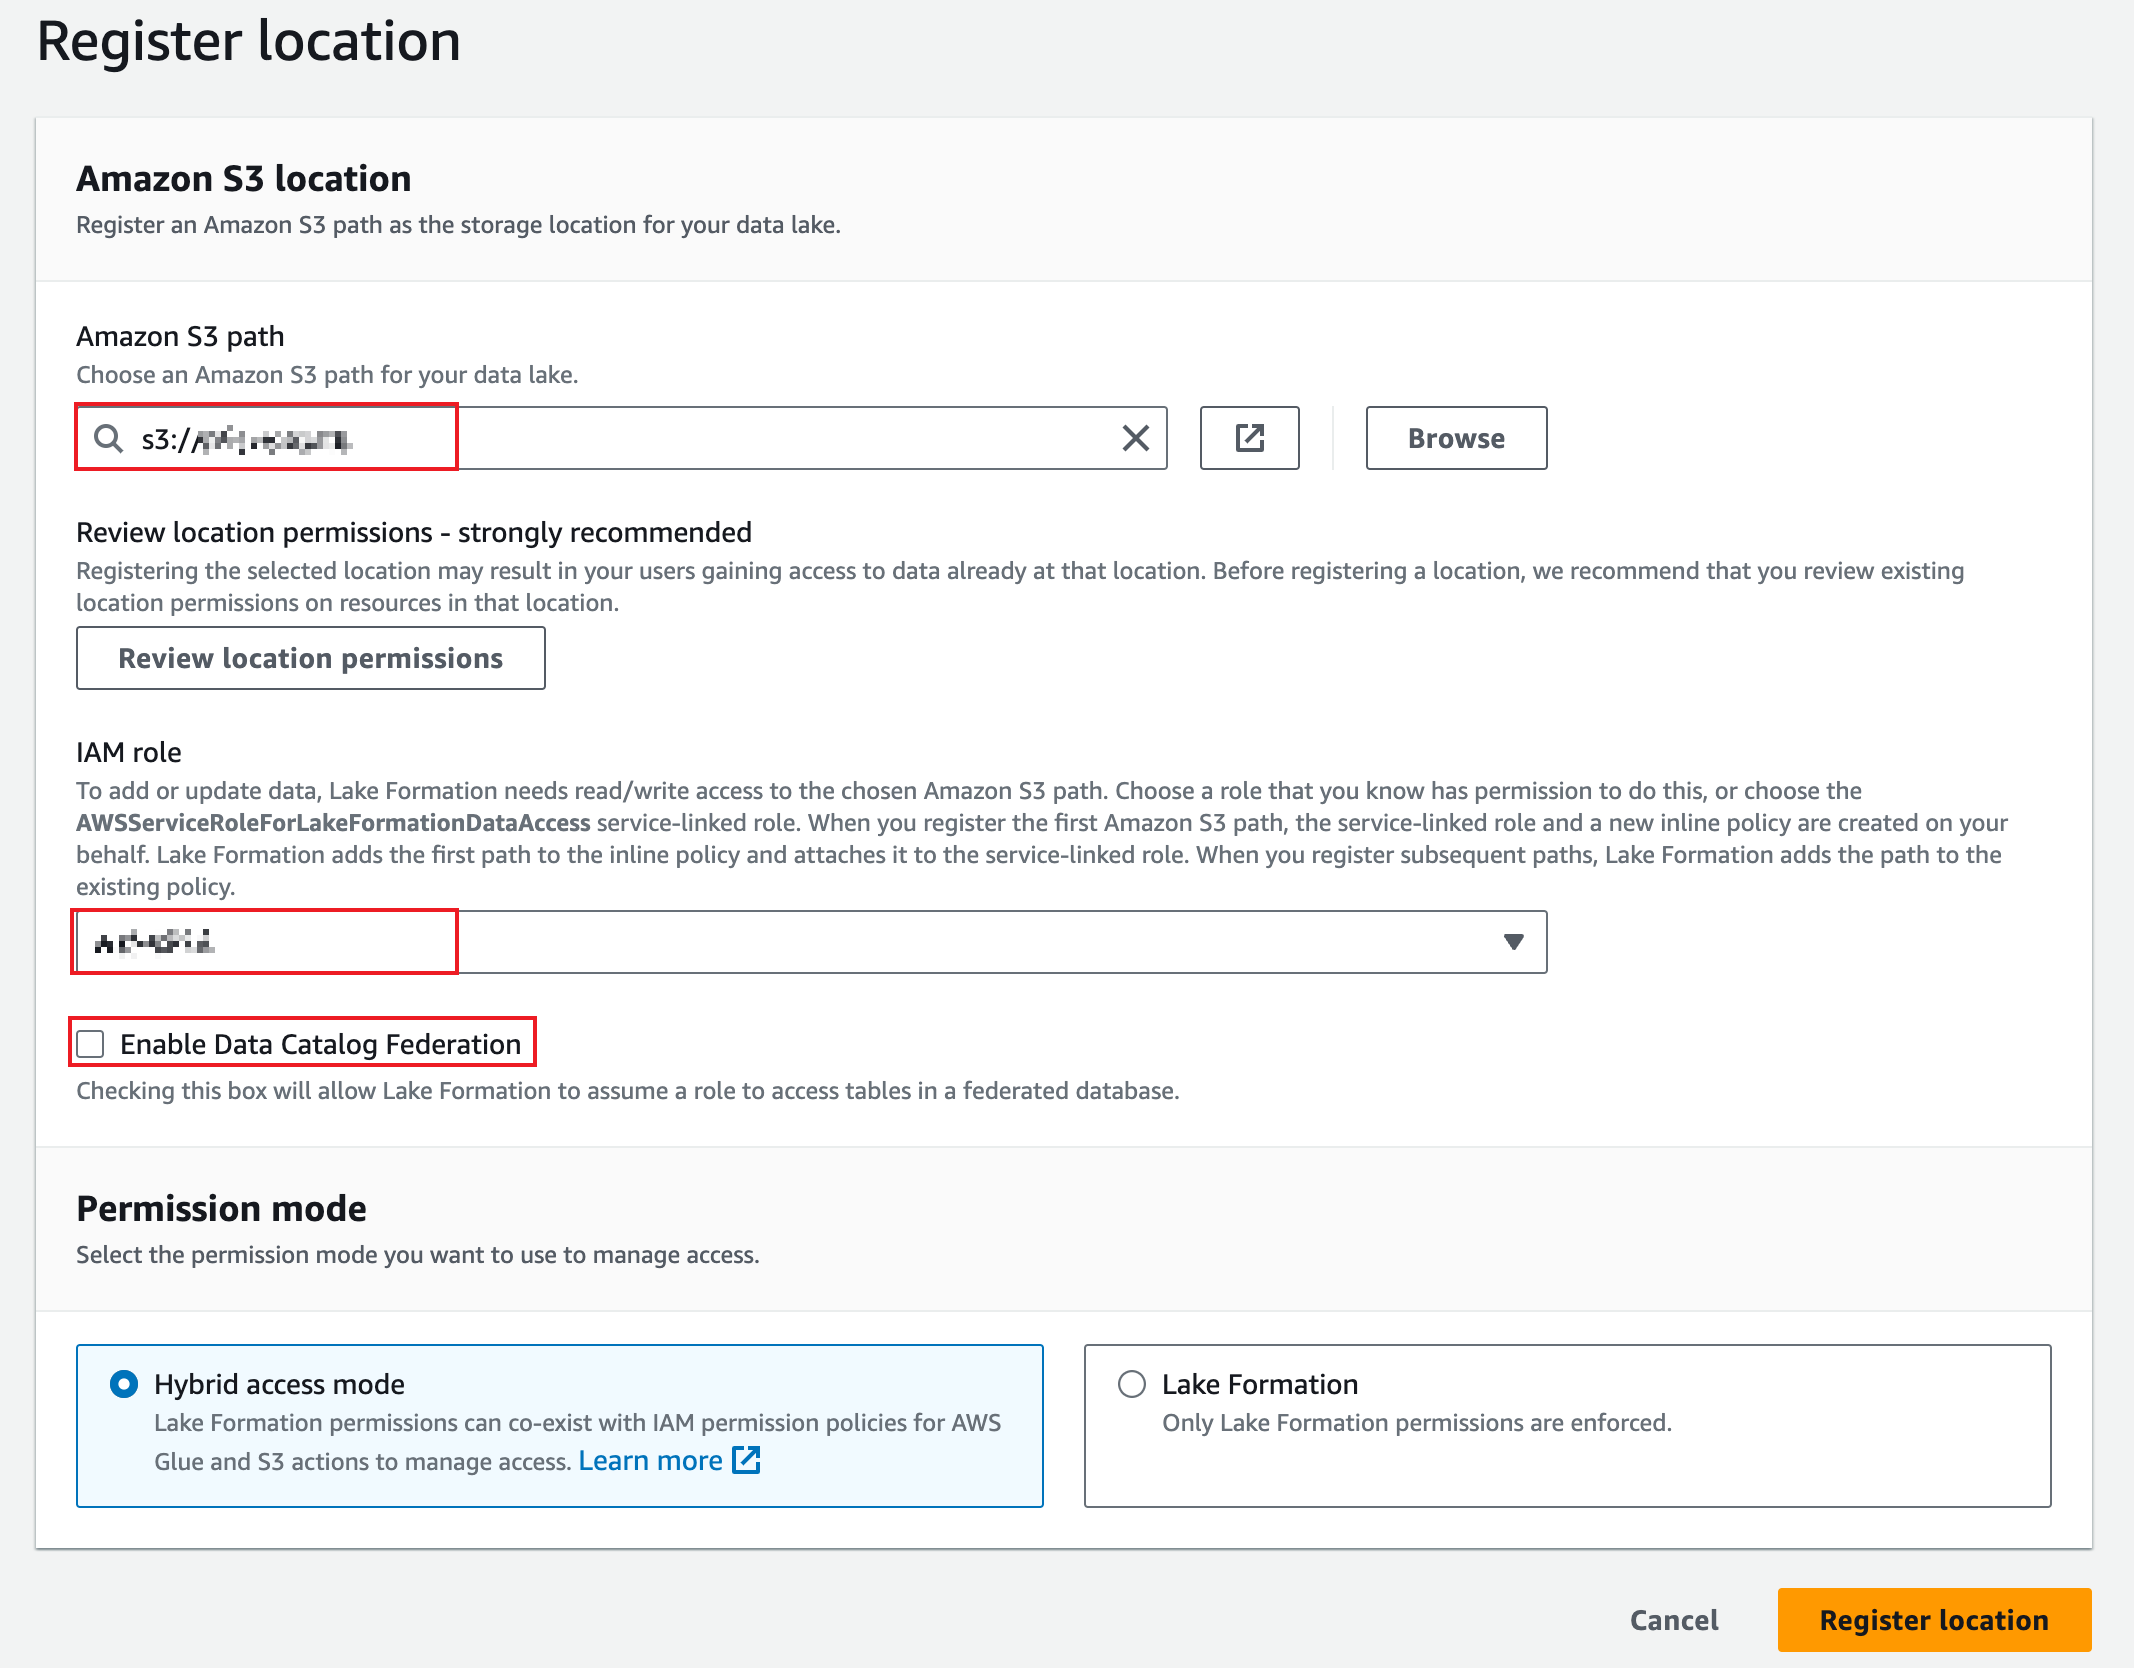
-
Choose an S3 path for your data lake, set the IAM role to the role created in 5.1.2, deselect Enable Data Catalog Federation, and click Register location.
5.3.3 Configure access to Lake Formation
Note that Relyt does not support column-level and lower-level access control.
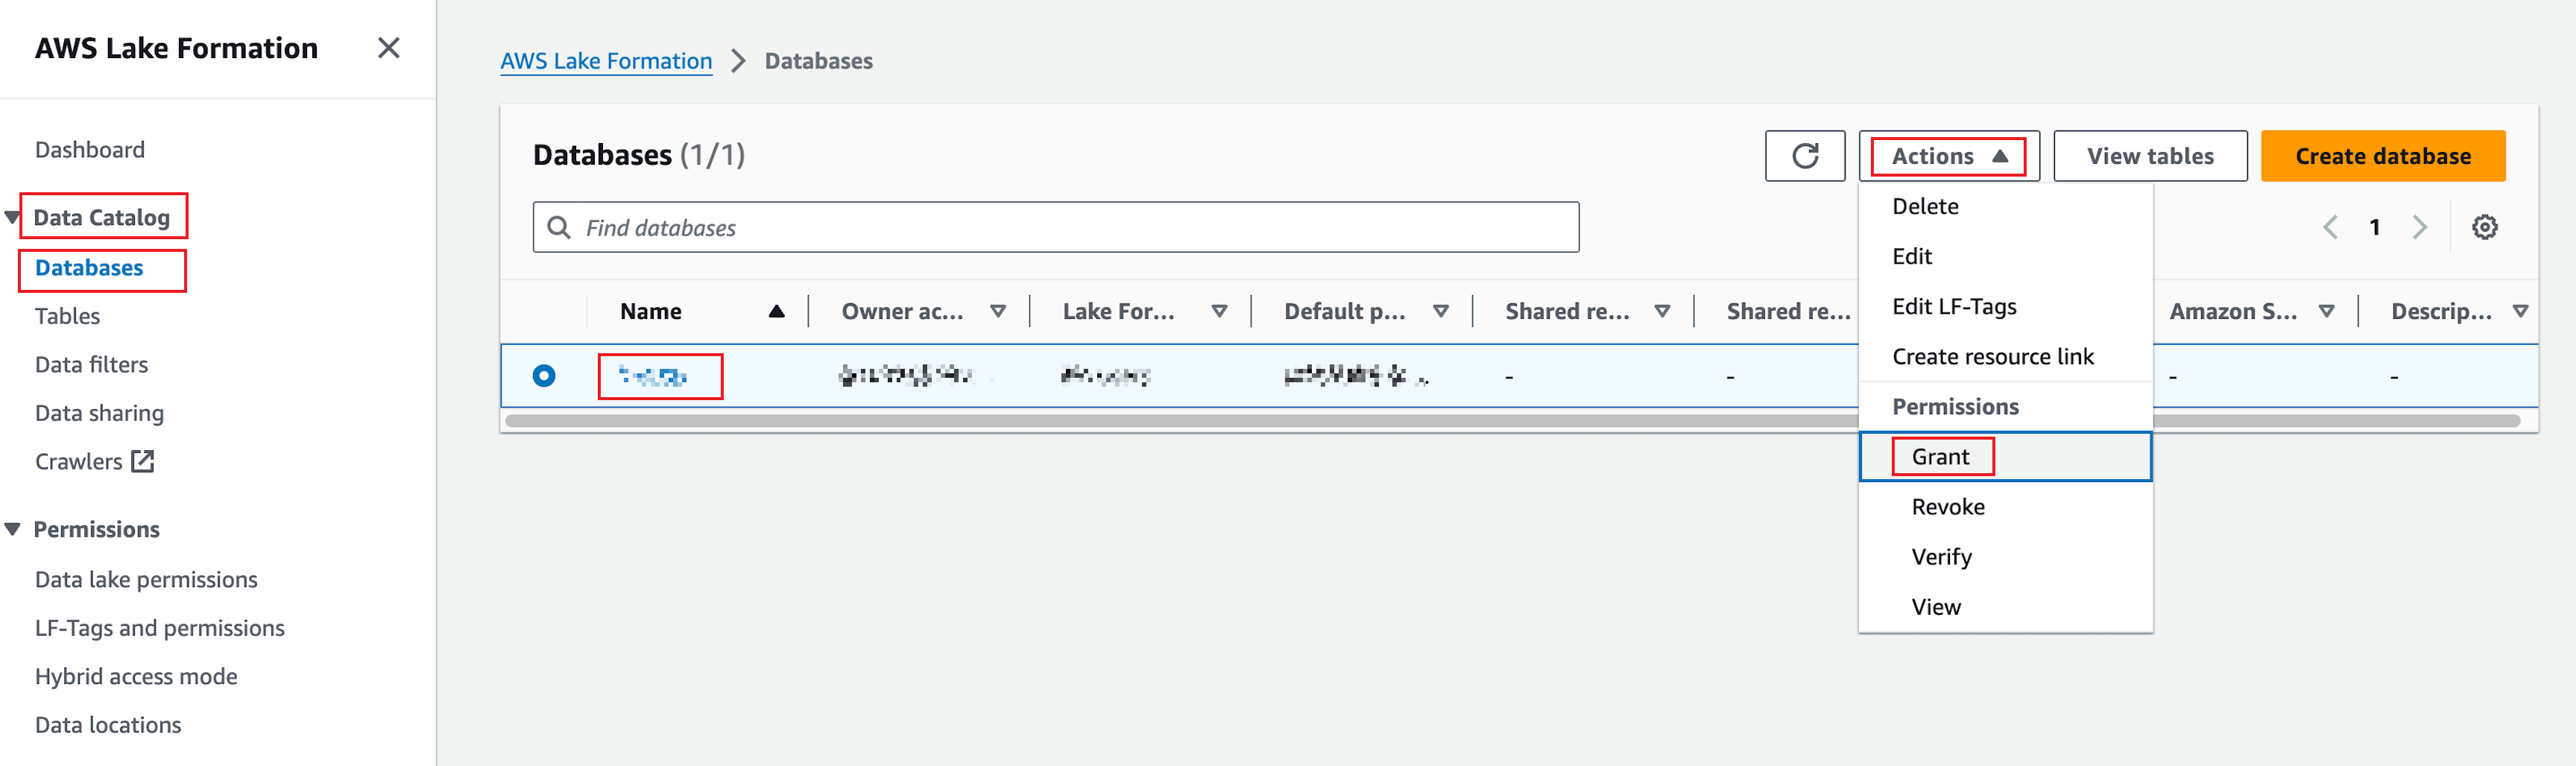
-
In the left sidebar, choose Data Catalog > Databases, select the target database, click Actions, and select Grant from the drop-down list.
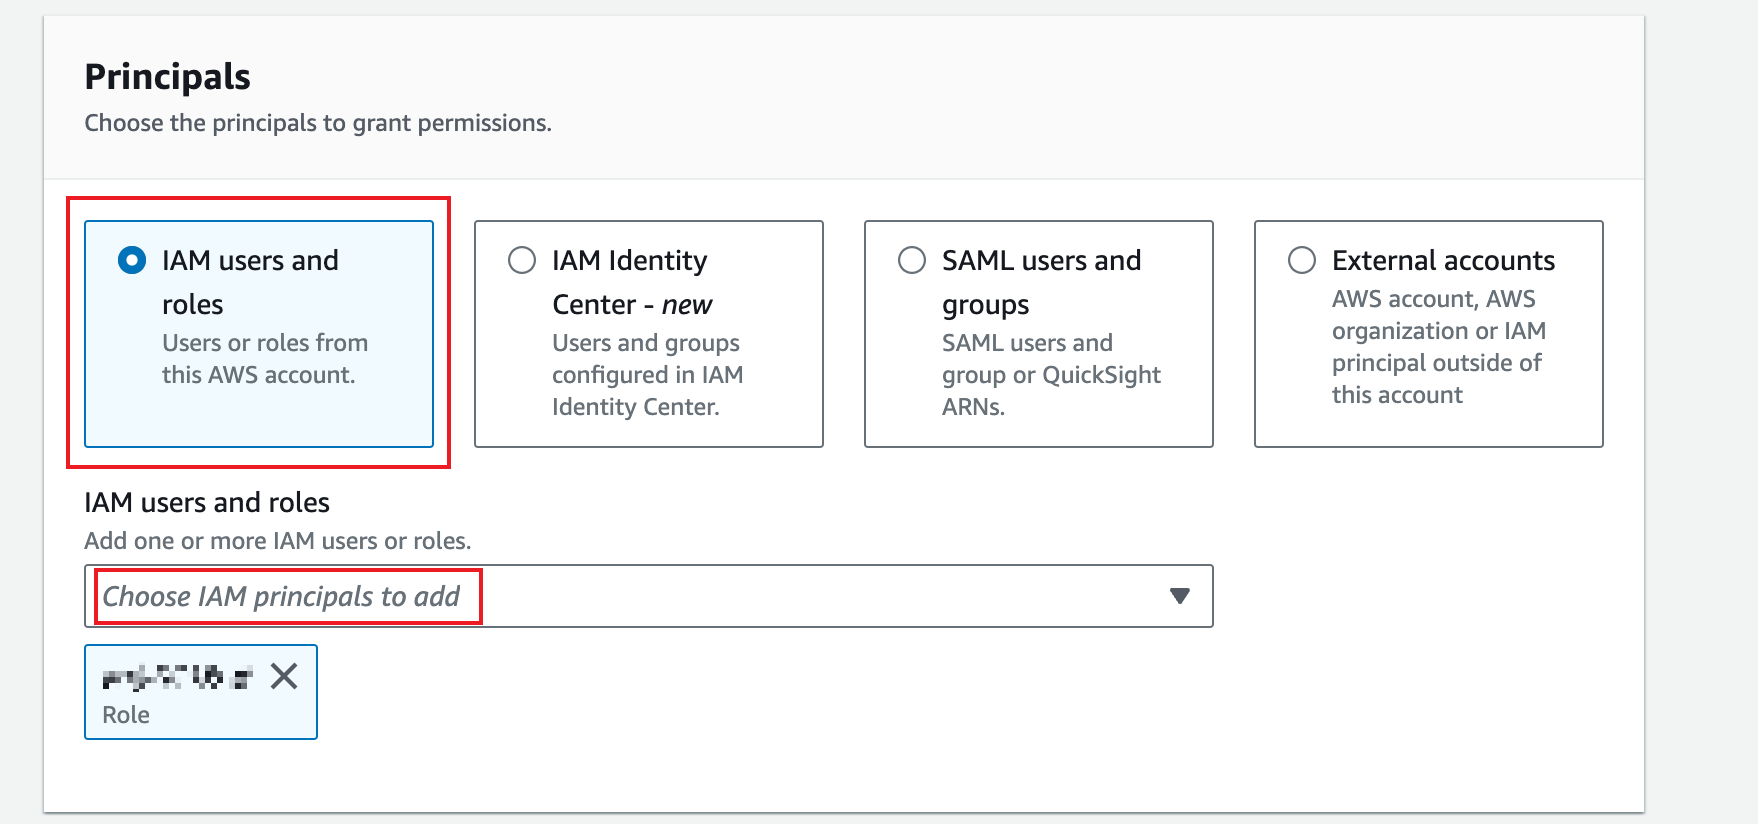
-
On the page that is displayed, keep the IAM users and roles option selected and select the role created in 5.2.2 in the IAM users and roles field.
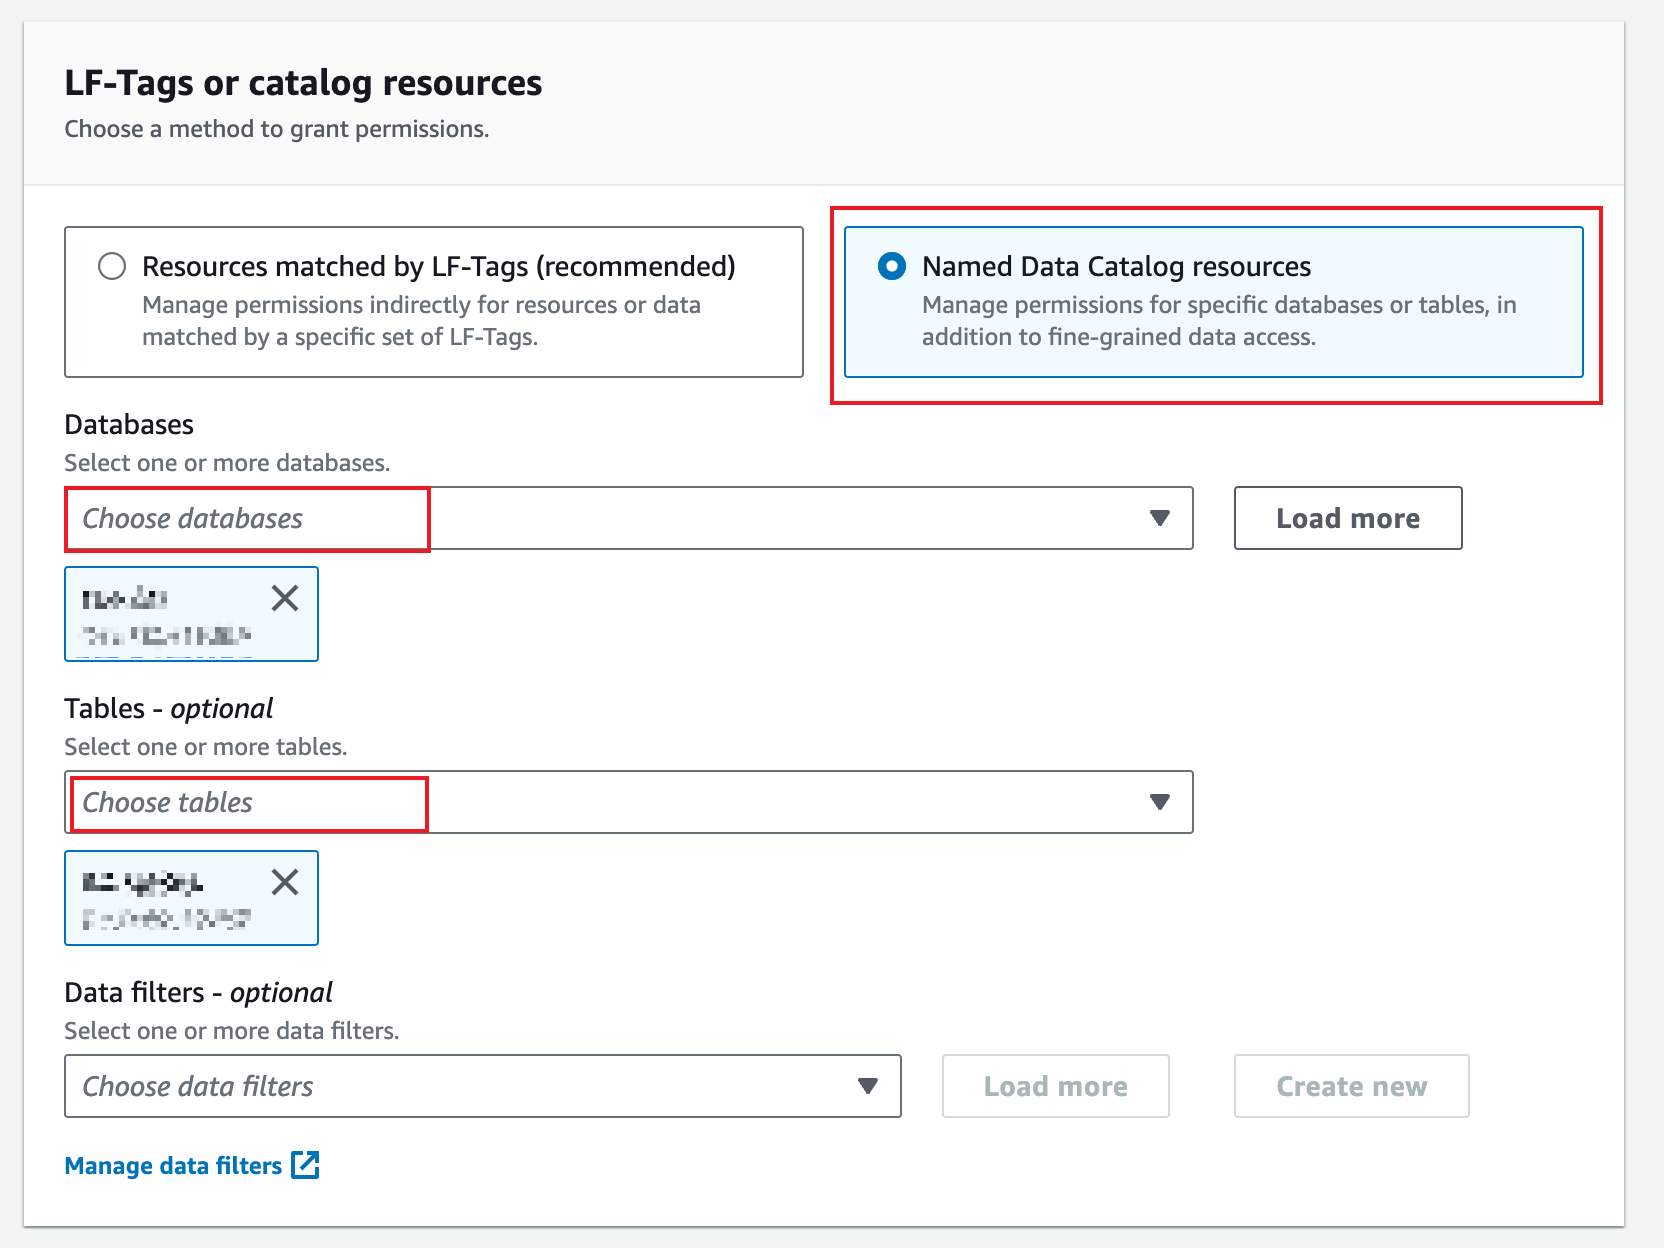
-
In the LF-Tags or catalog resources section, choose a method to grant permissions and complete other configurations accordingly.
In this example, we choose the Resources matched by LF-Tags (recommended) option.
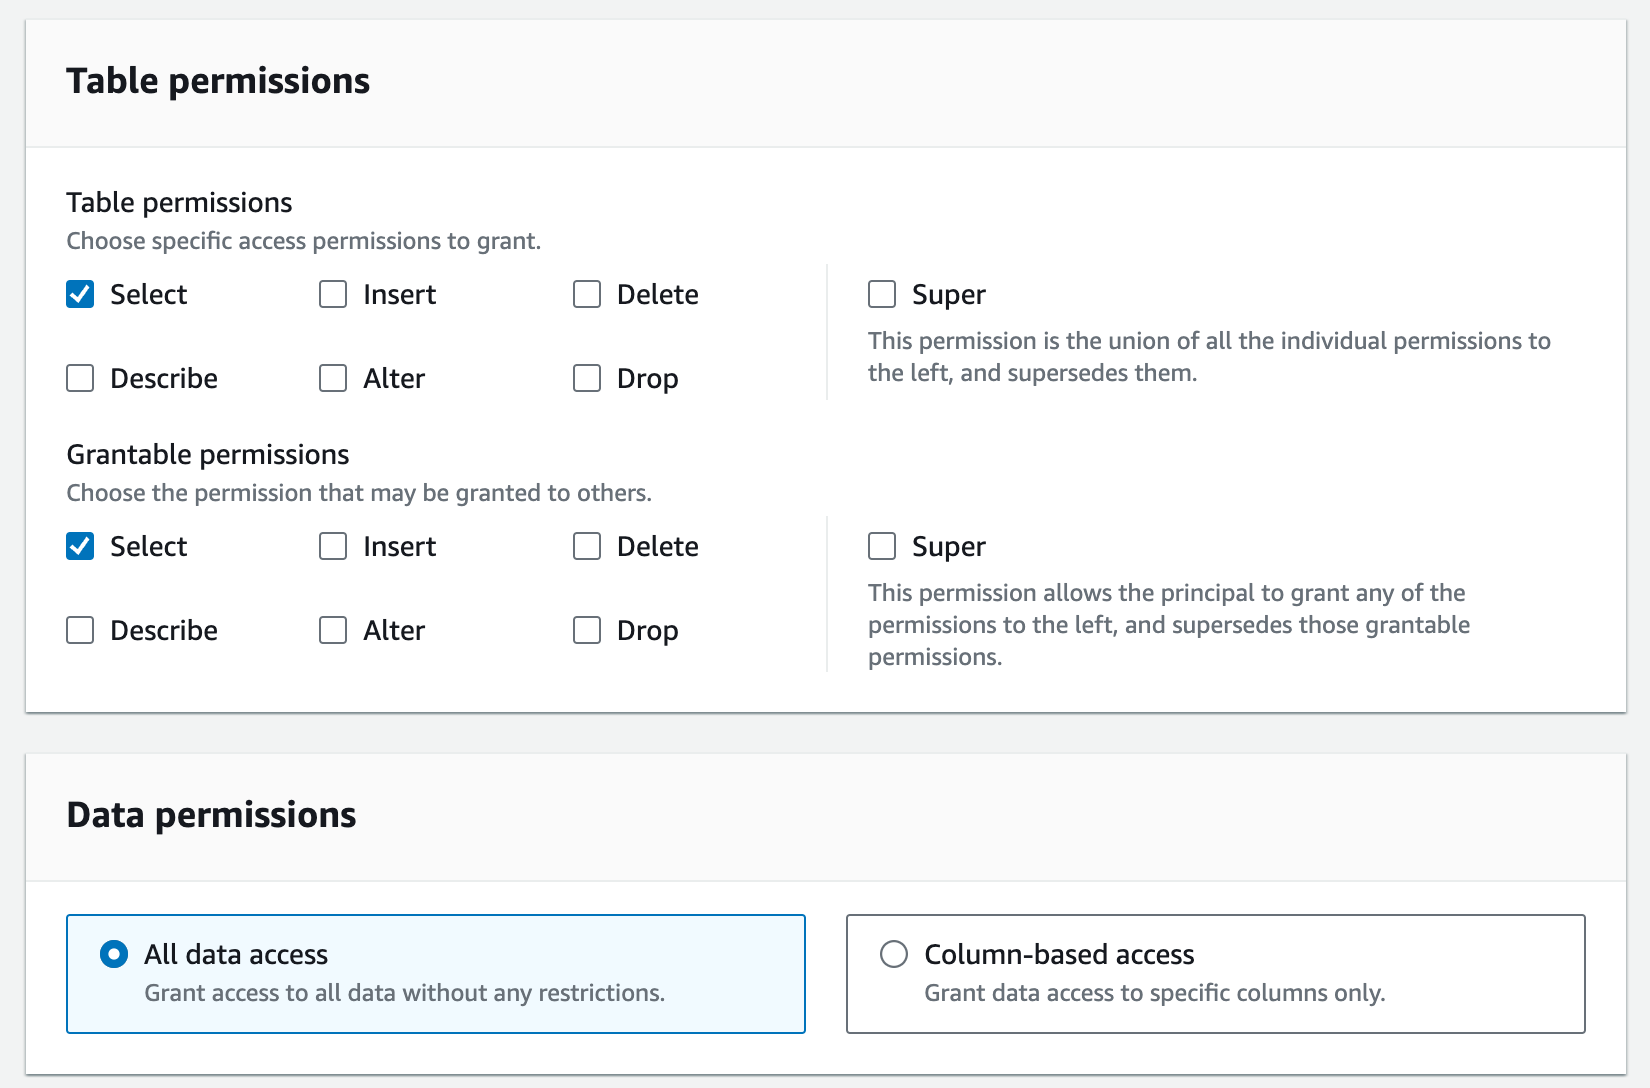
-
Grant permissions based on actual needs and click Grant.
5.3.3.2 (Optional) Grant LF-Tag permissions
For configuration details, refer to the AWS official documentation.
Step 6. Connect Relyt to your data lake
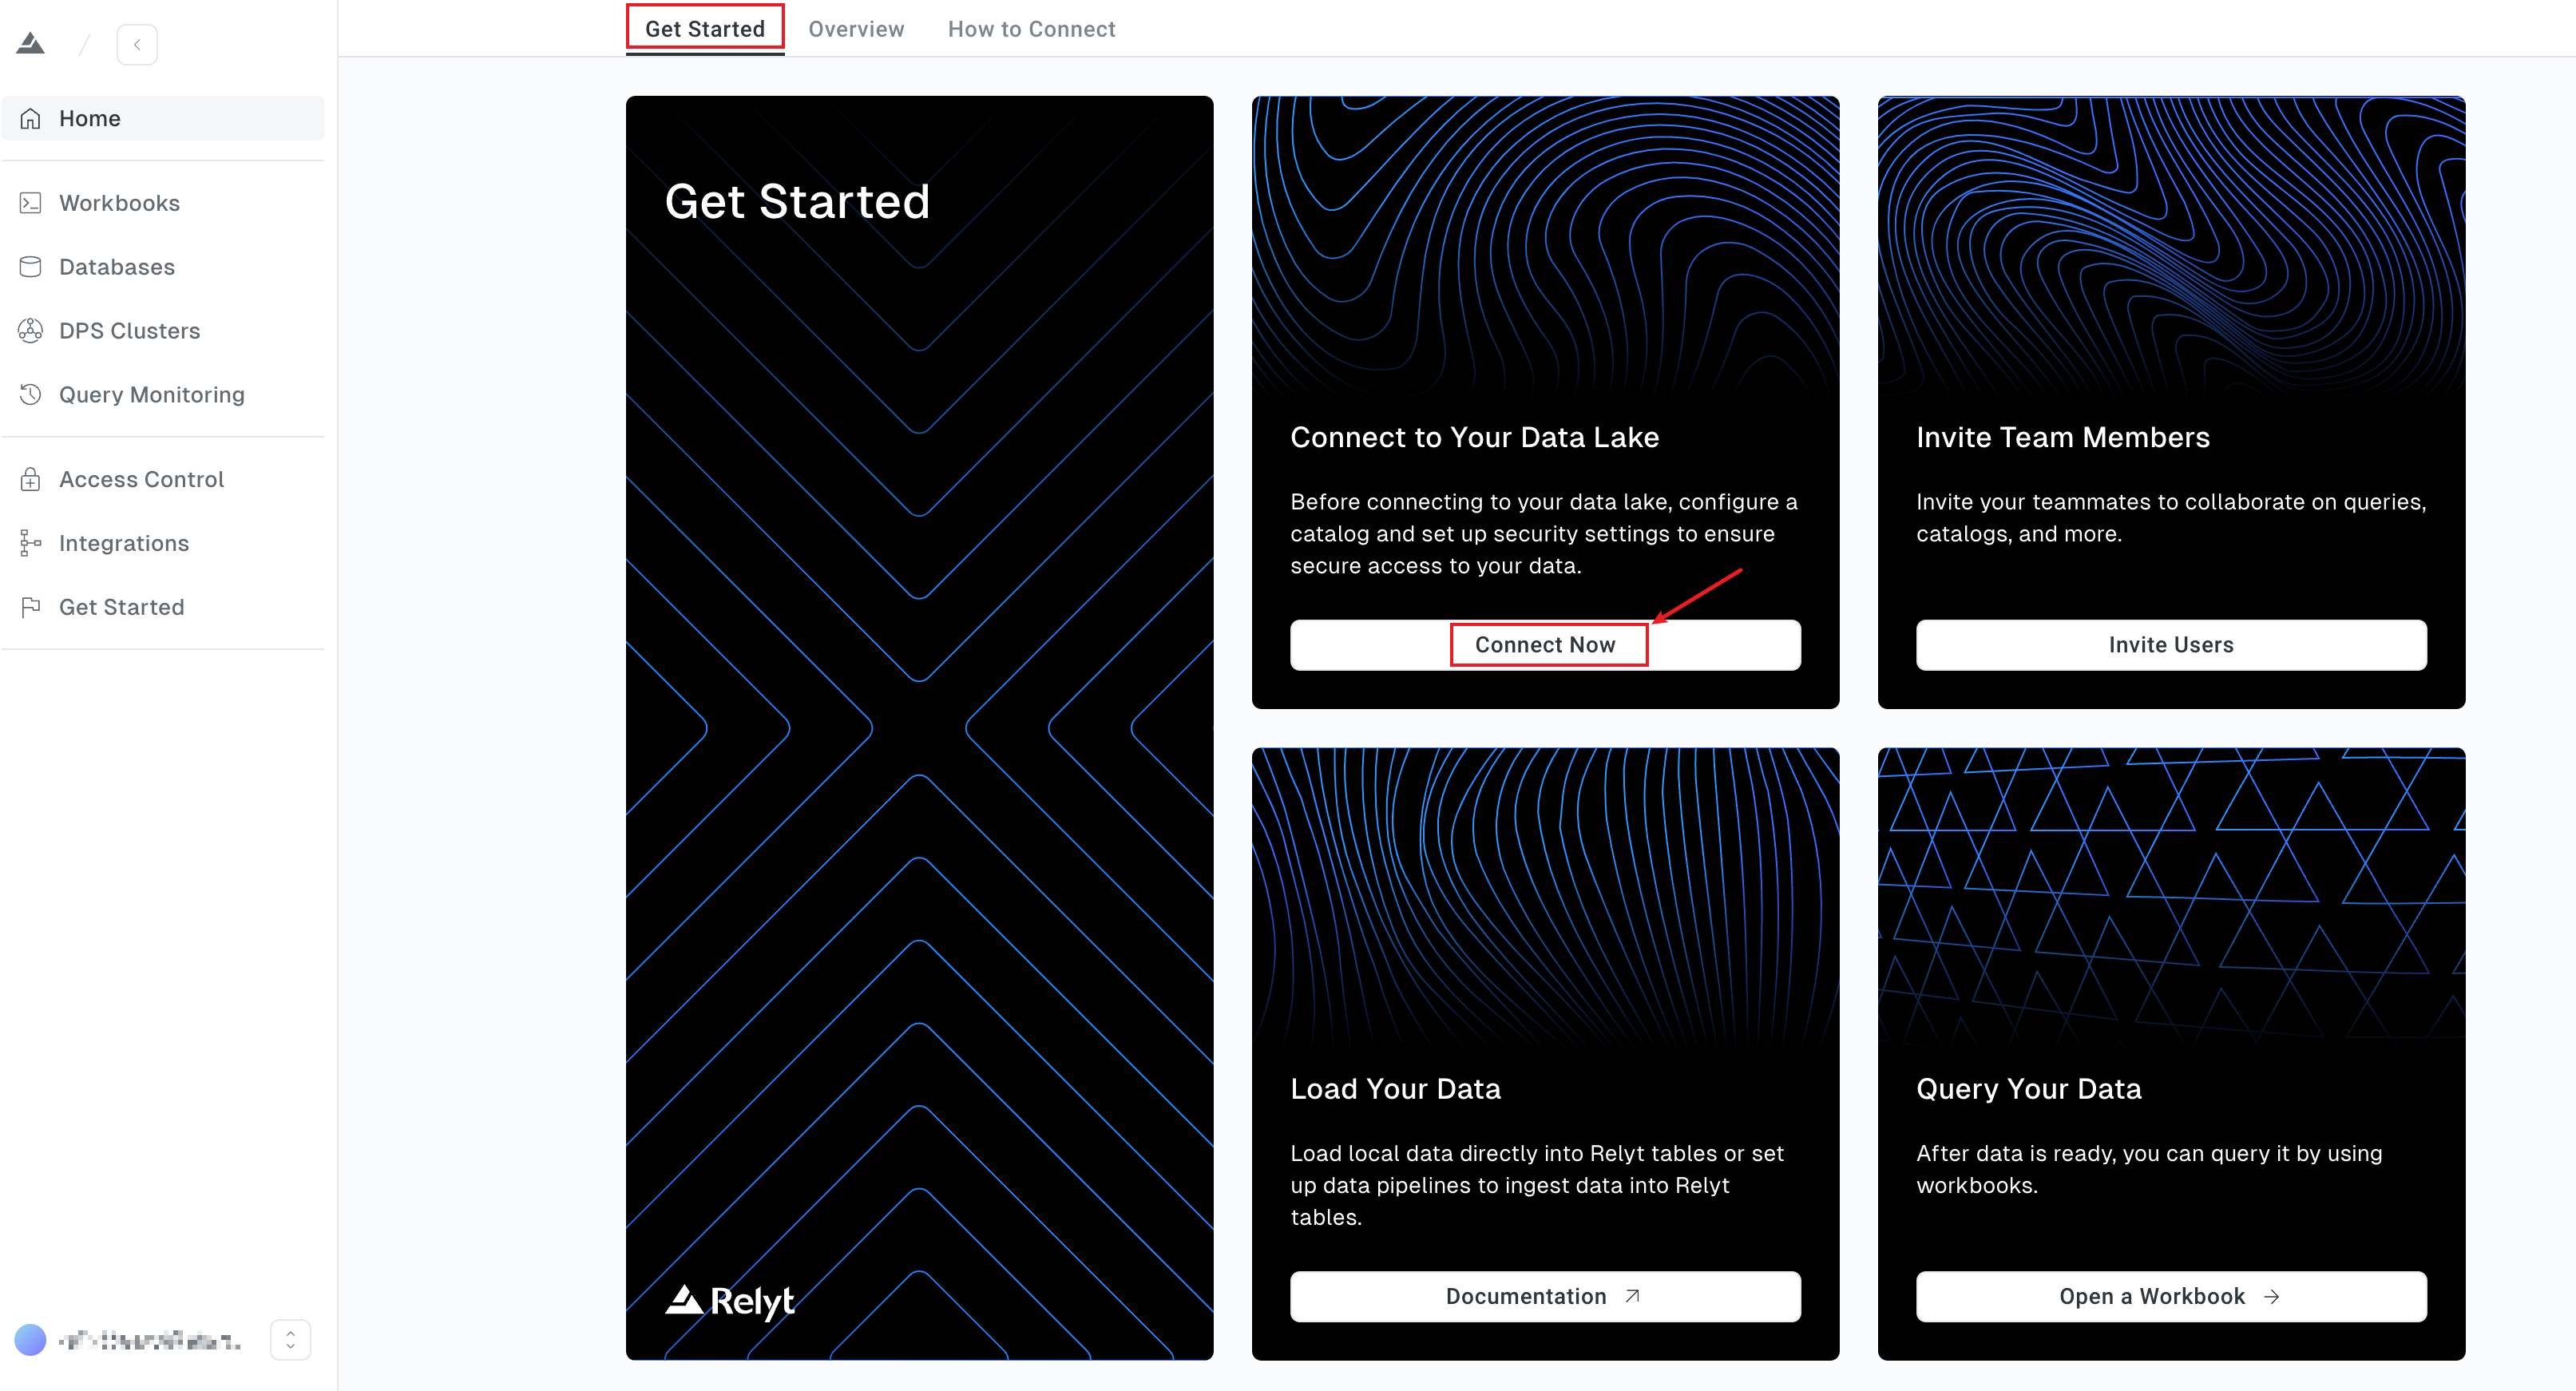
6.1 Start the connection process
-
Sign in to the target DW service unit.
-
On the Get Started page that is displayed by default, click Connect Now in the Connect to Your Data Lake card to open the wizard that will guide you complete the connection process step by step.
6.2 Specify the Extreme DPS cluster
-
Specify an Extreme DPS cluster, such as the one created by running the Terraform script.
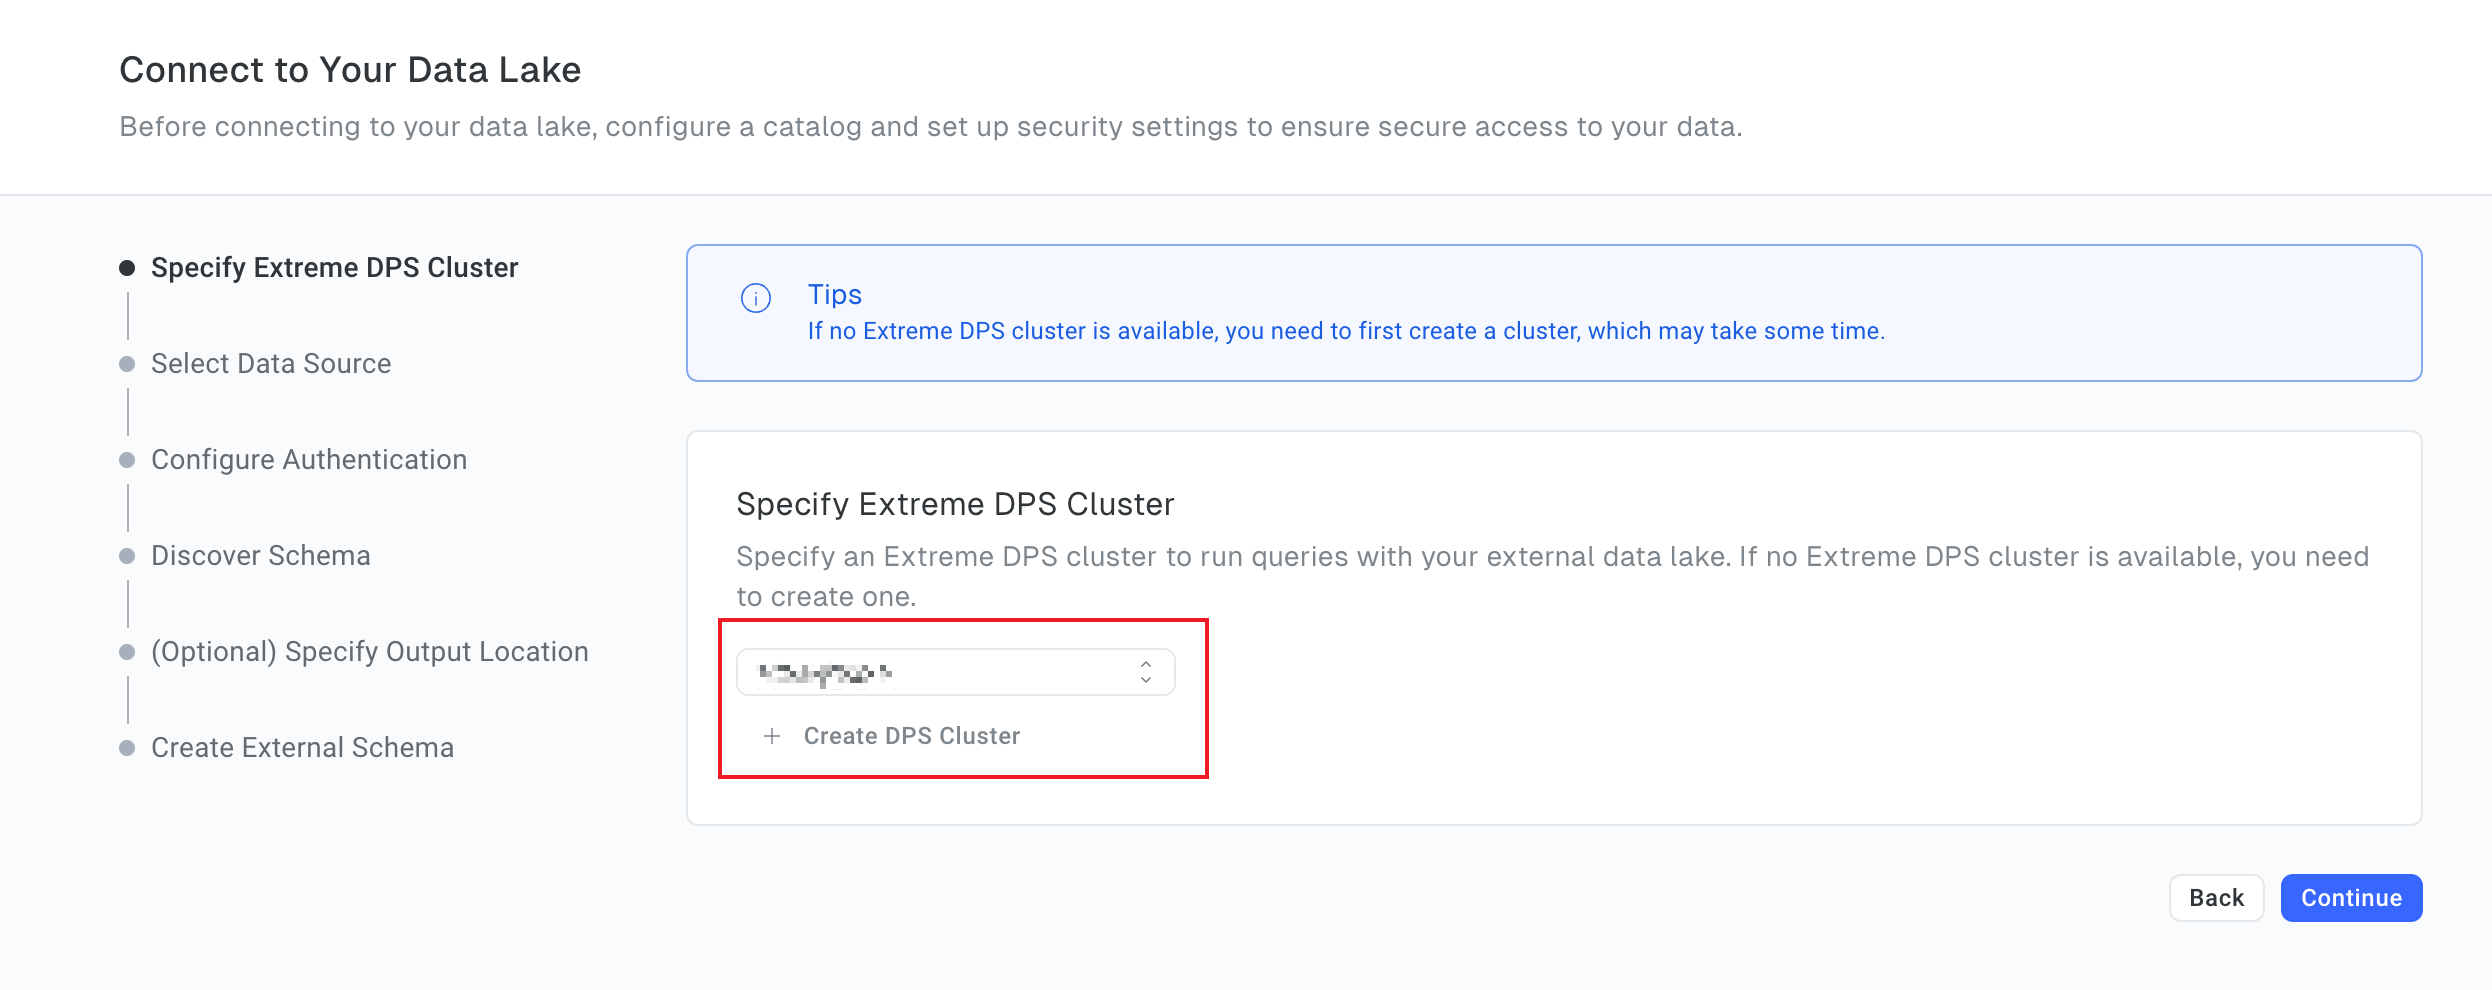
-
Click Continue.
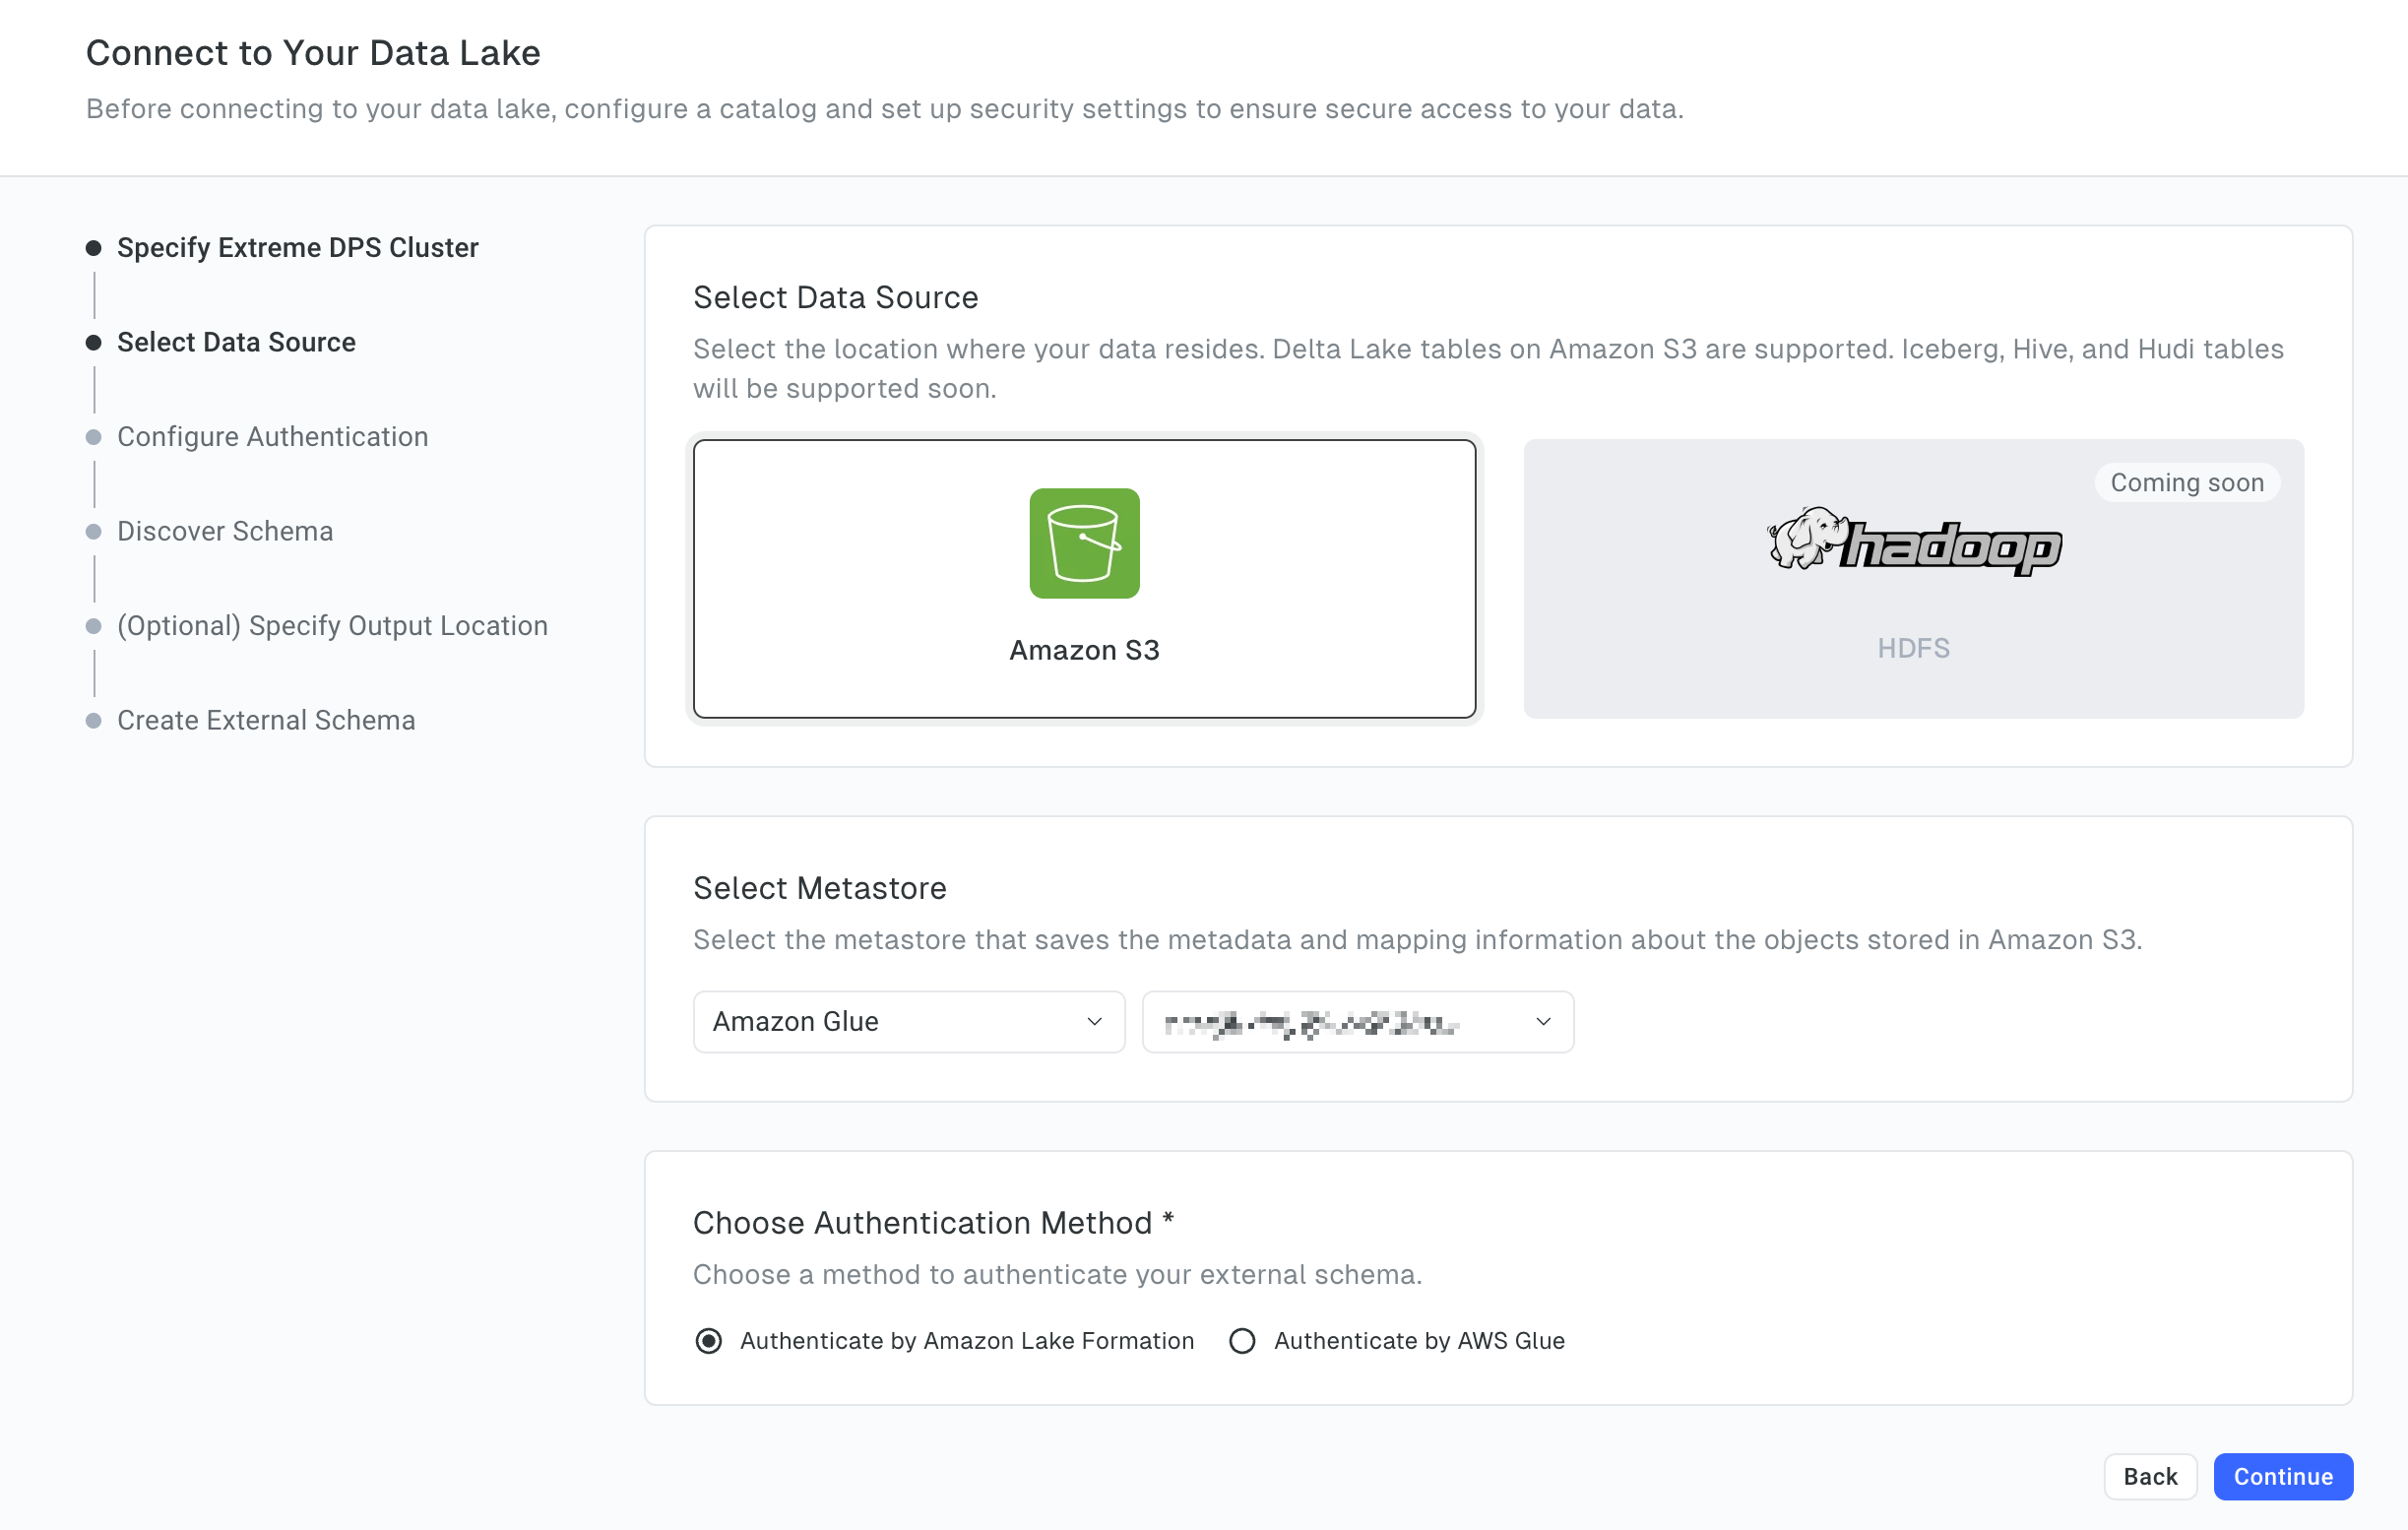
6.3 Select the data source
-
Select the location of the data source to connect. Currently, only Amazon S3 is supported.
-
Select the metastore type and the region where the metastore resides. Currently, only AWS Glue is supported.
-
Choose the authentication method you want to use. Available options include Authenticate by Amazon Lake Formation and Authenticate by AWS Glue. Currently, only Authenticate by Amazon Lake Formation is supported.
-
Click Continue.
6.4 Configure authentication
-
In the AWS Role ARN field, enter the ARN of the cross-account IAM role created in 5.2.2.
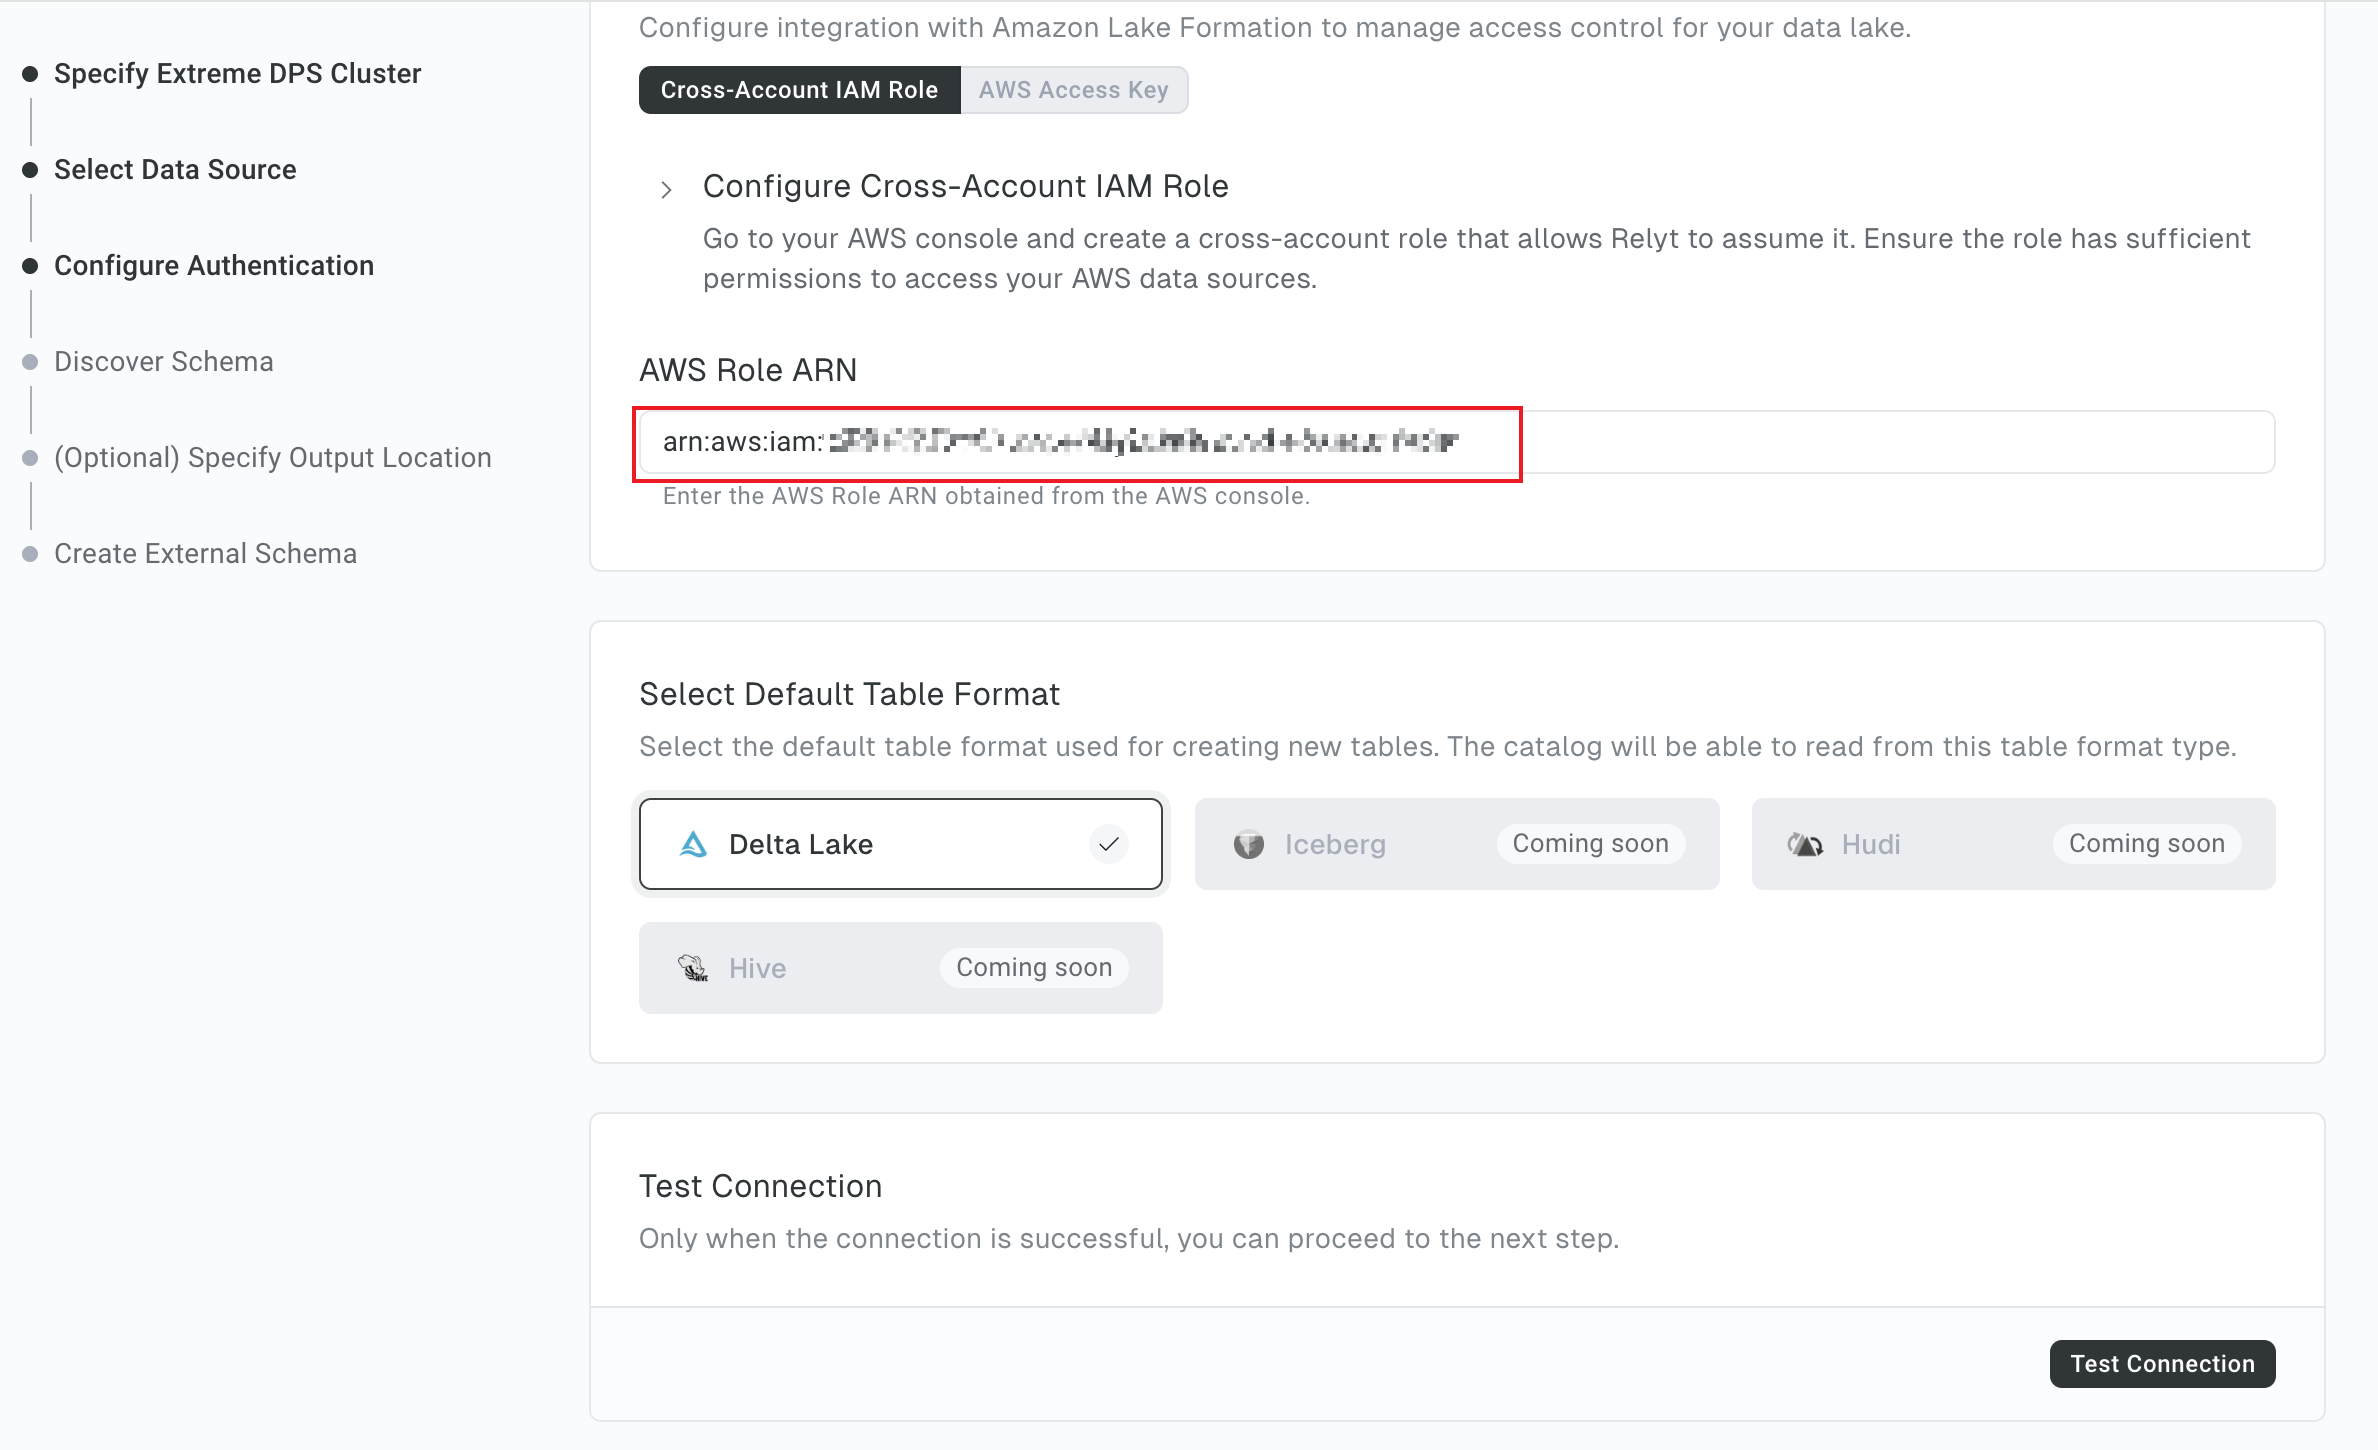
-
Click Test Connection. When the system prompts you the connection test is successful, click Continue.
6.5 Select the schema
-
In the External Catalogs and Schemas pane, select the schema you want to use. In the Relyt Databases, select the database to which you want to mount the schema or create a new database.
-
Set a name for the catalog.
The catalog name independently can be repeated, but the
<database_name>.<catalog_name>.<schema_name>must be unique.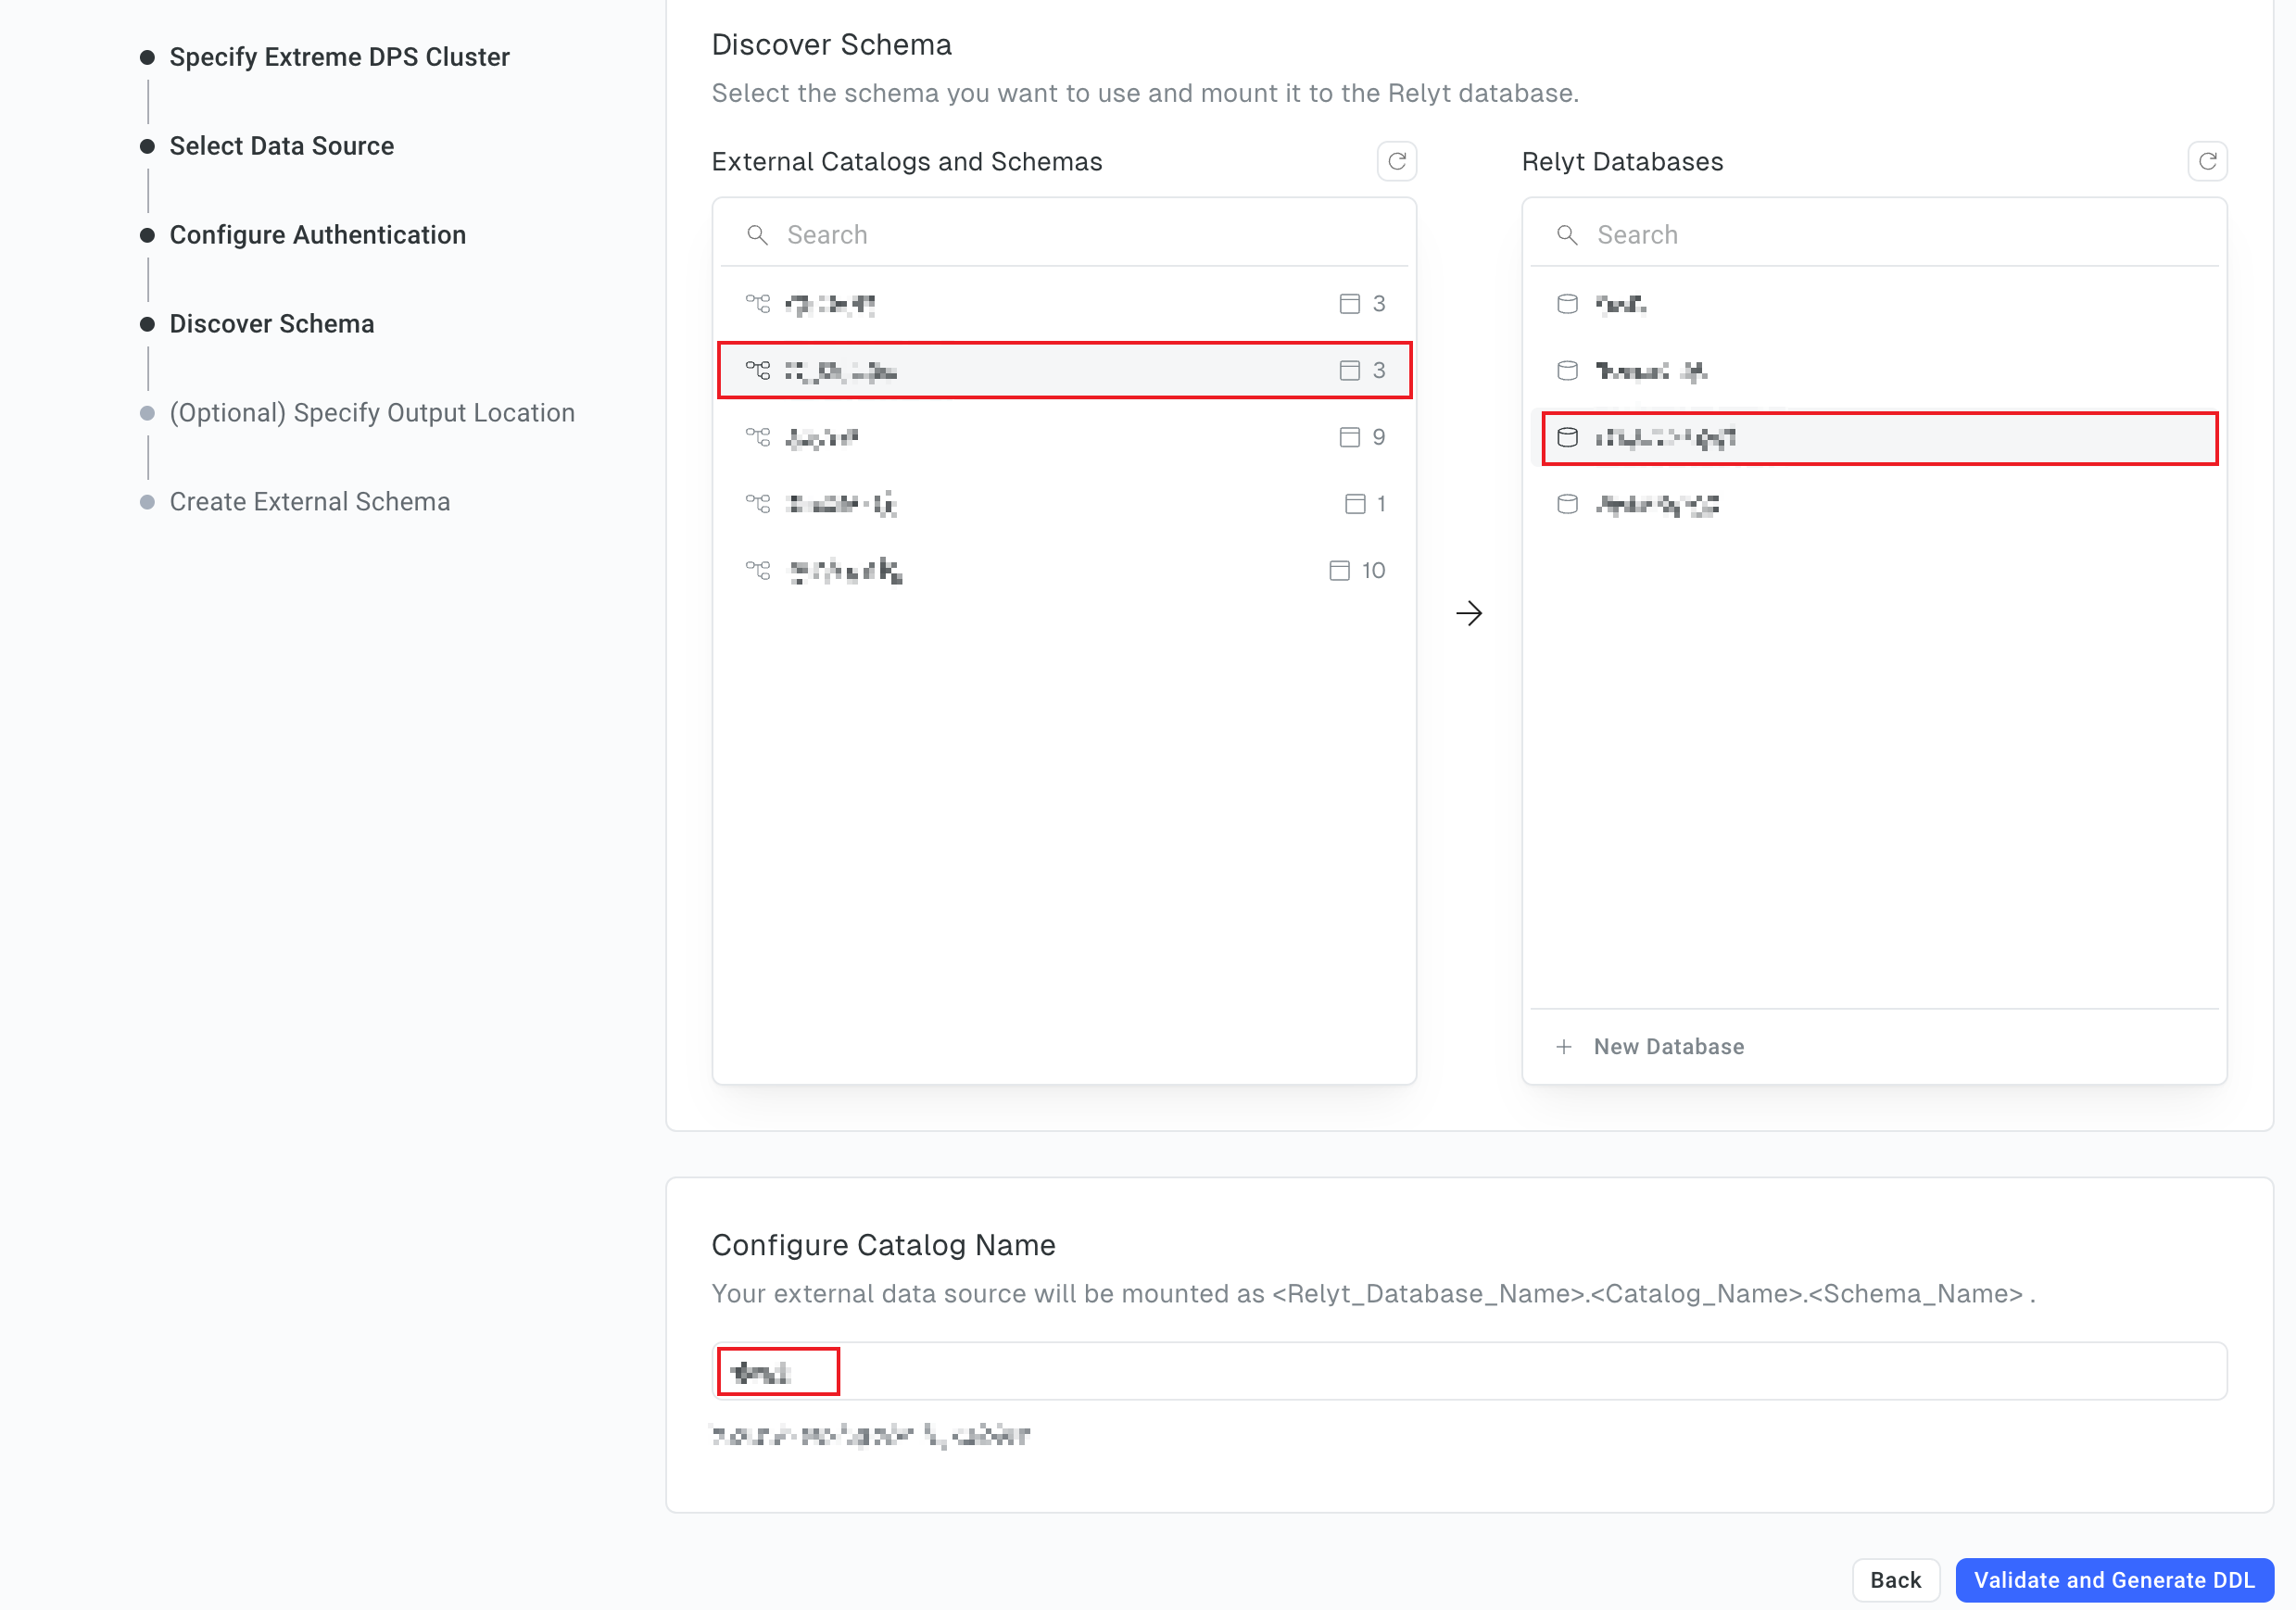
-
Click Validate and Generate DDL.
6.6 (Optional) Specify the output location
This step is optional. you can skip it.
-
Set the output location to save the results of async executions performed by the current DW user.
-
In the AWS Role ARN field, enter the ARN of the cross-account IAM role created in 5.2.2.
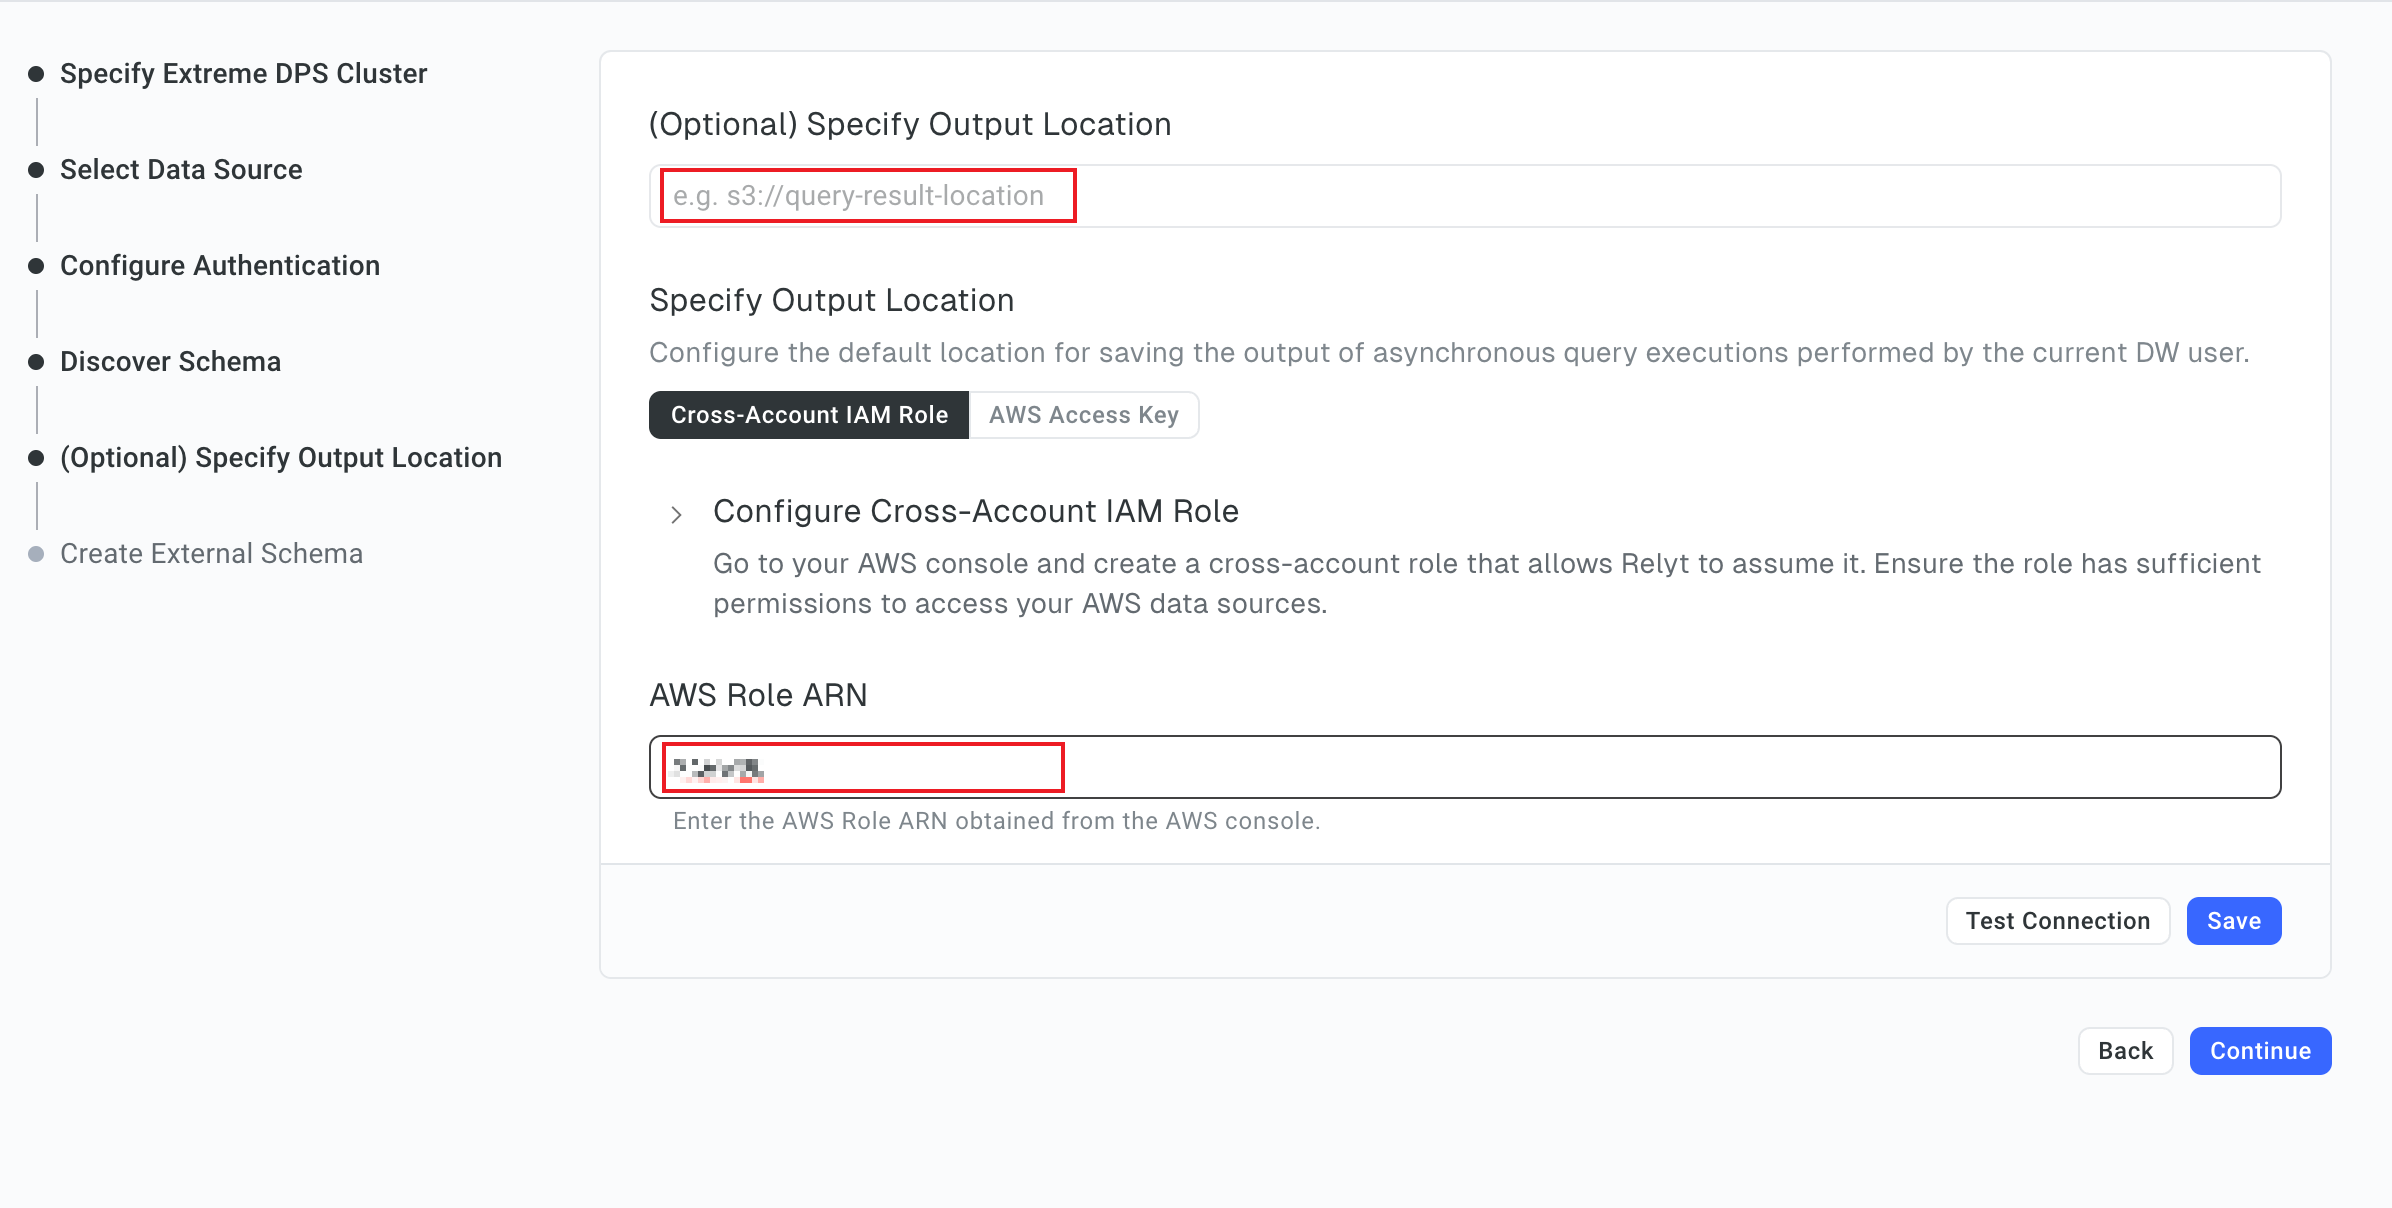
-
Click Test Connection. When the system prompts you the connection test is successful, click Save and Continue.
6.7 Run the generated DDL
-
In the Create External Schema step, view the DDL and click Run.
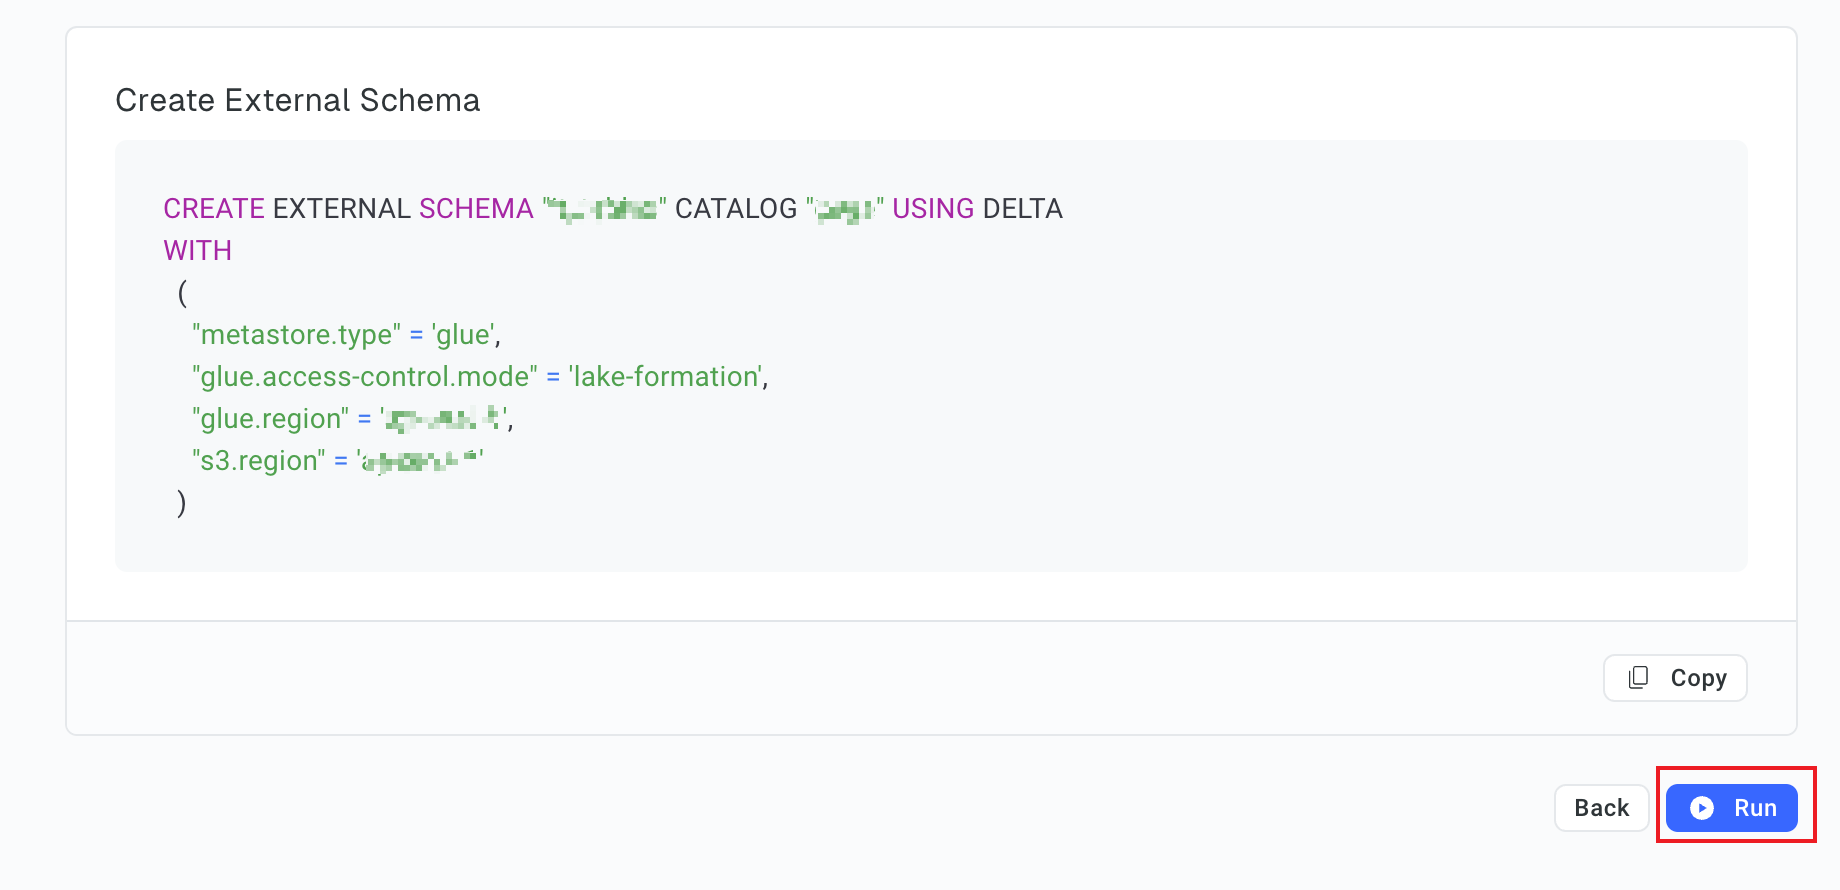
-
In the dialog box that is displayed, click Go to Query.
-
In the workbook that opens, run the queries.
(Optional) Step 7. Use Boto3 to run async queries and dump query results
For more details, see Use Boto3 to Run Async Queries and Dump Query Results.