Create a Database
This topic describes how to create a database through a DW service unit console or by using a Terraform script.
Before you start
Ensure the following:
-
A DW service unit is available in your environment. For details about how to create a DW service unit, see Create a DW Service Unit.
-
You have the credentials of a DW user (or cloud account) with access to the target DW service unit.
Use the DW service unit console to create a database
There are two ways to create a database on the DW service unit console.
From the Databases page
-
Sign in to the DW service unit console.
infoIf you have signed in to the Relyt global console, navigate to the DW Service Units page. Locate your target service unit and click Connect to access its console.
-
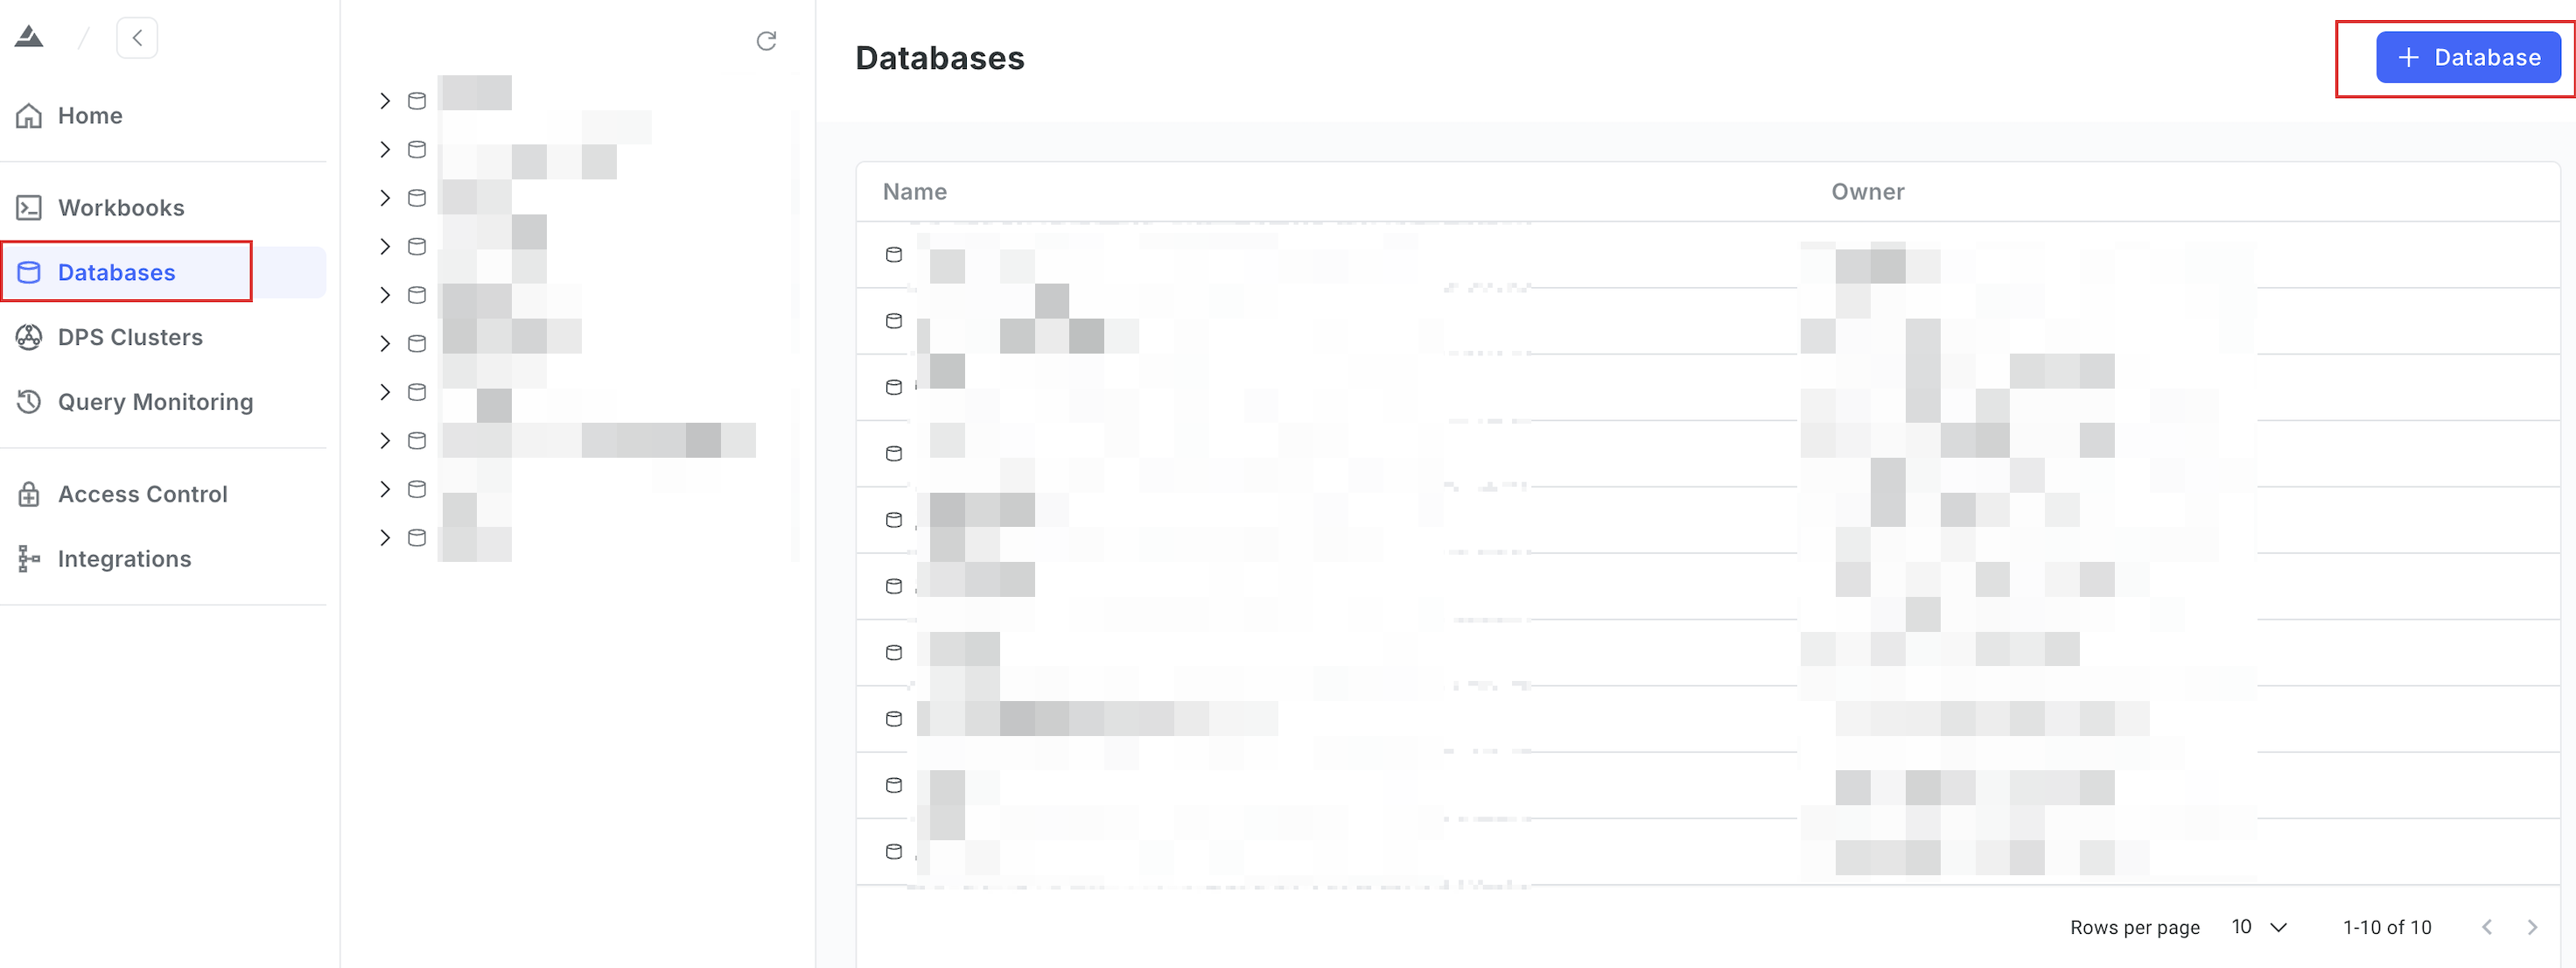
In the left sidebar, choose Databases. On the page that appears, click + Database in the upper-right corner.
-
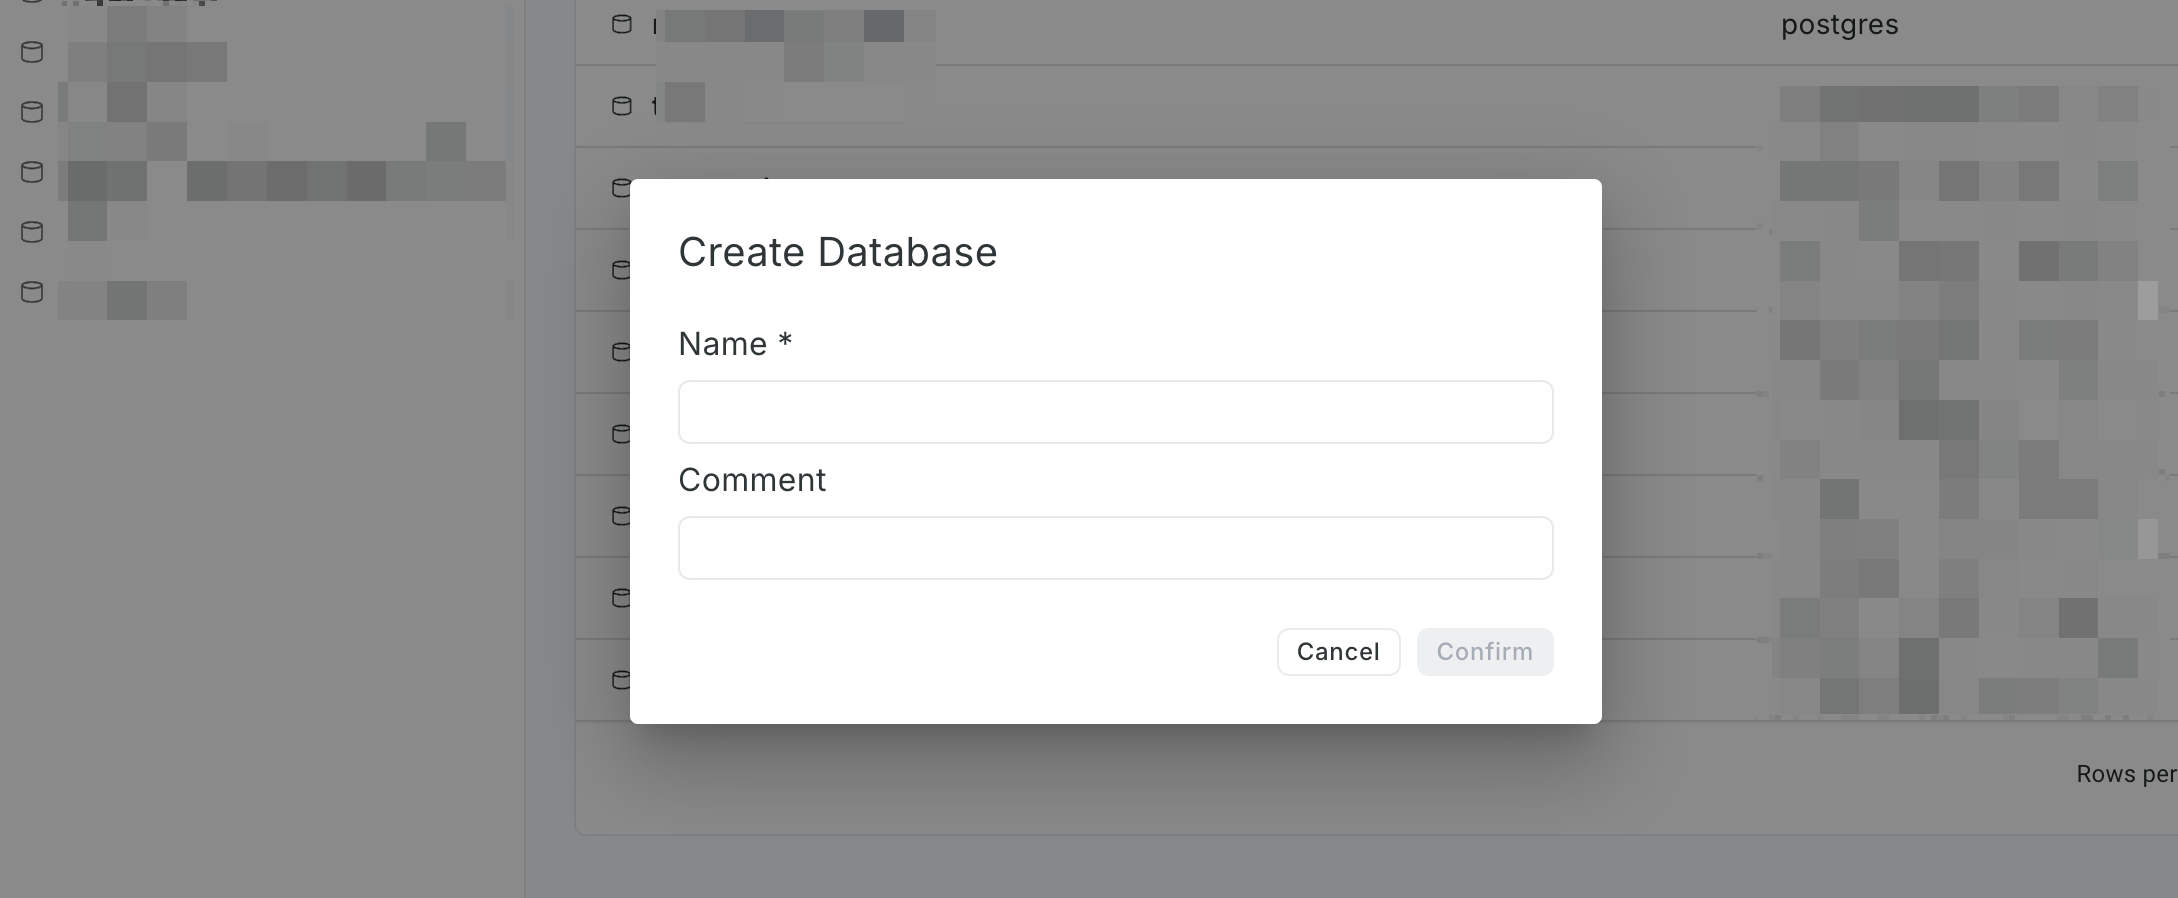
Set the database name and optionally the comment, then click Confirm.
Use a workbook
-
Sign in to the DW service unit console.
infoIf you have signed in to the Relyt global console, navigate to the DW Service Units page. Locate your target service unit and click Connect to access its console.
-
In the left sidebar, choose Workbooks. On the page that appears, click the + Workbooks button on the upper-right corner to open a new workbook.
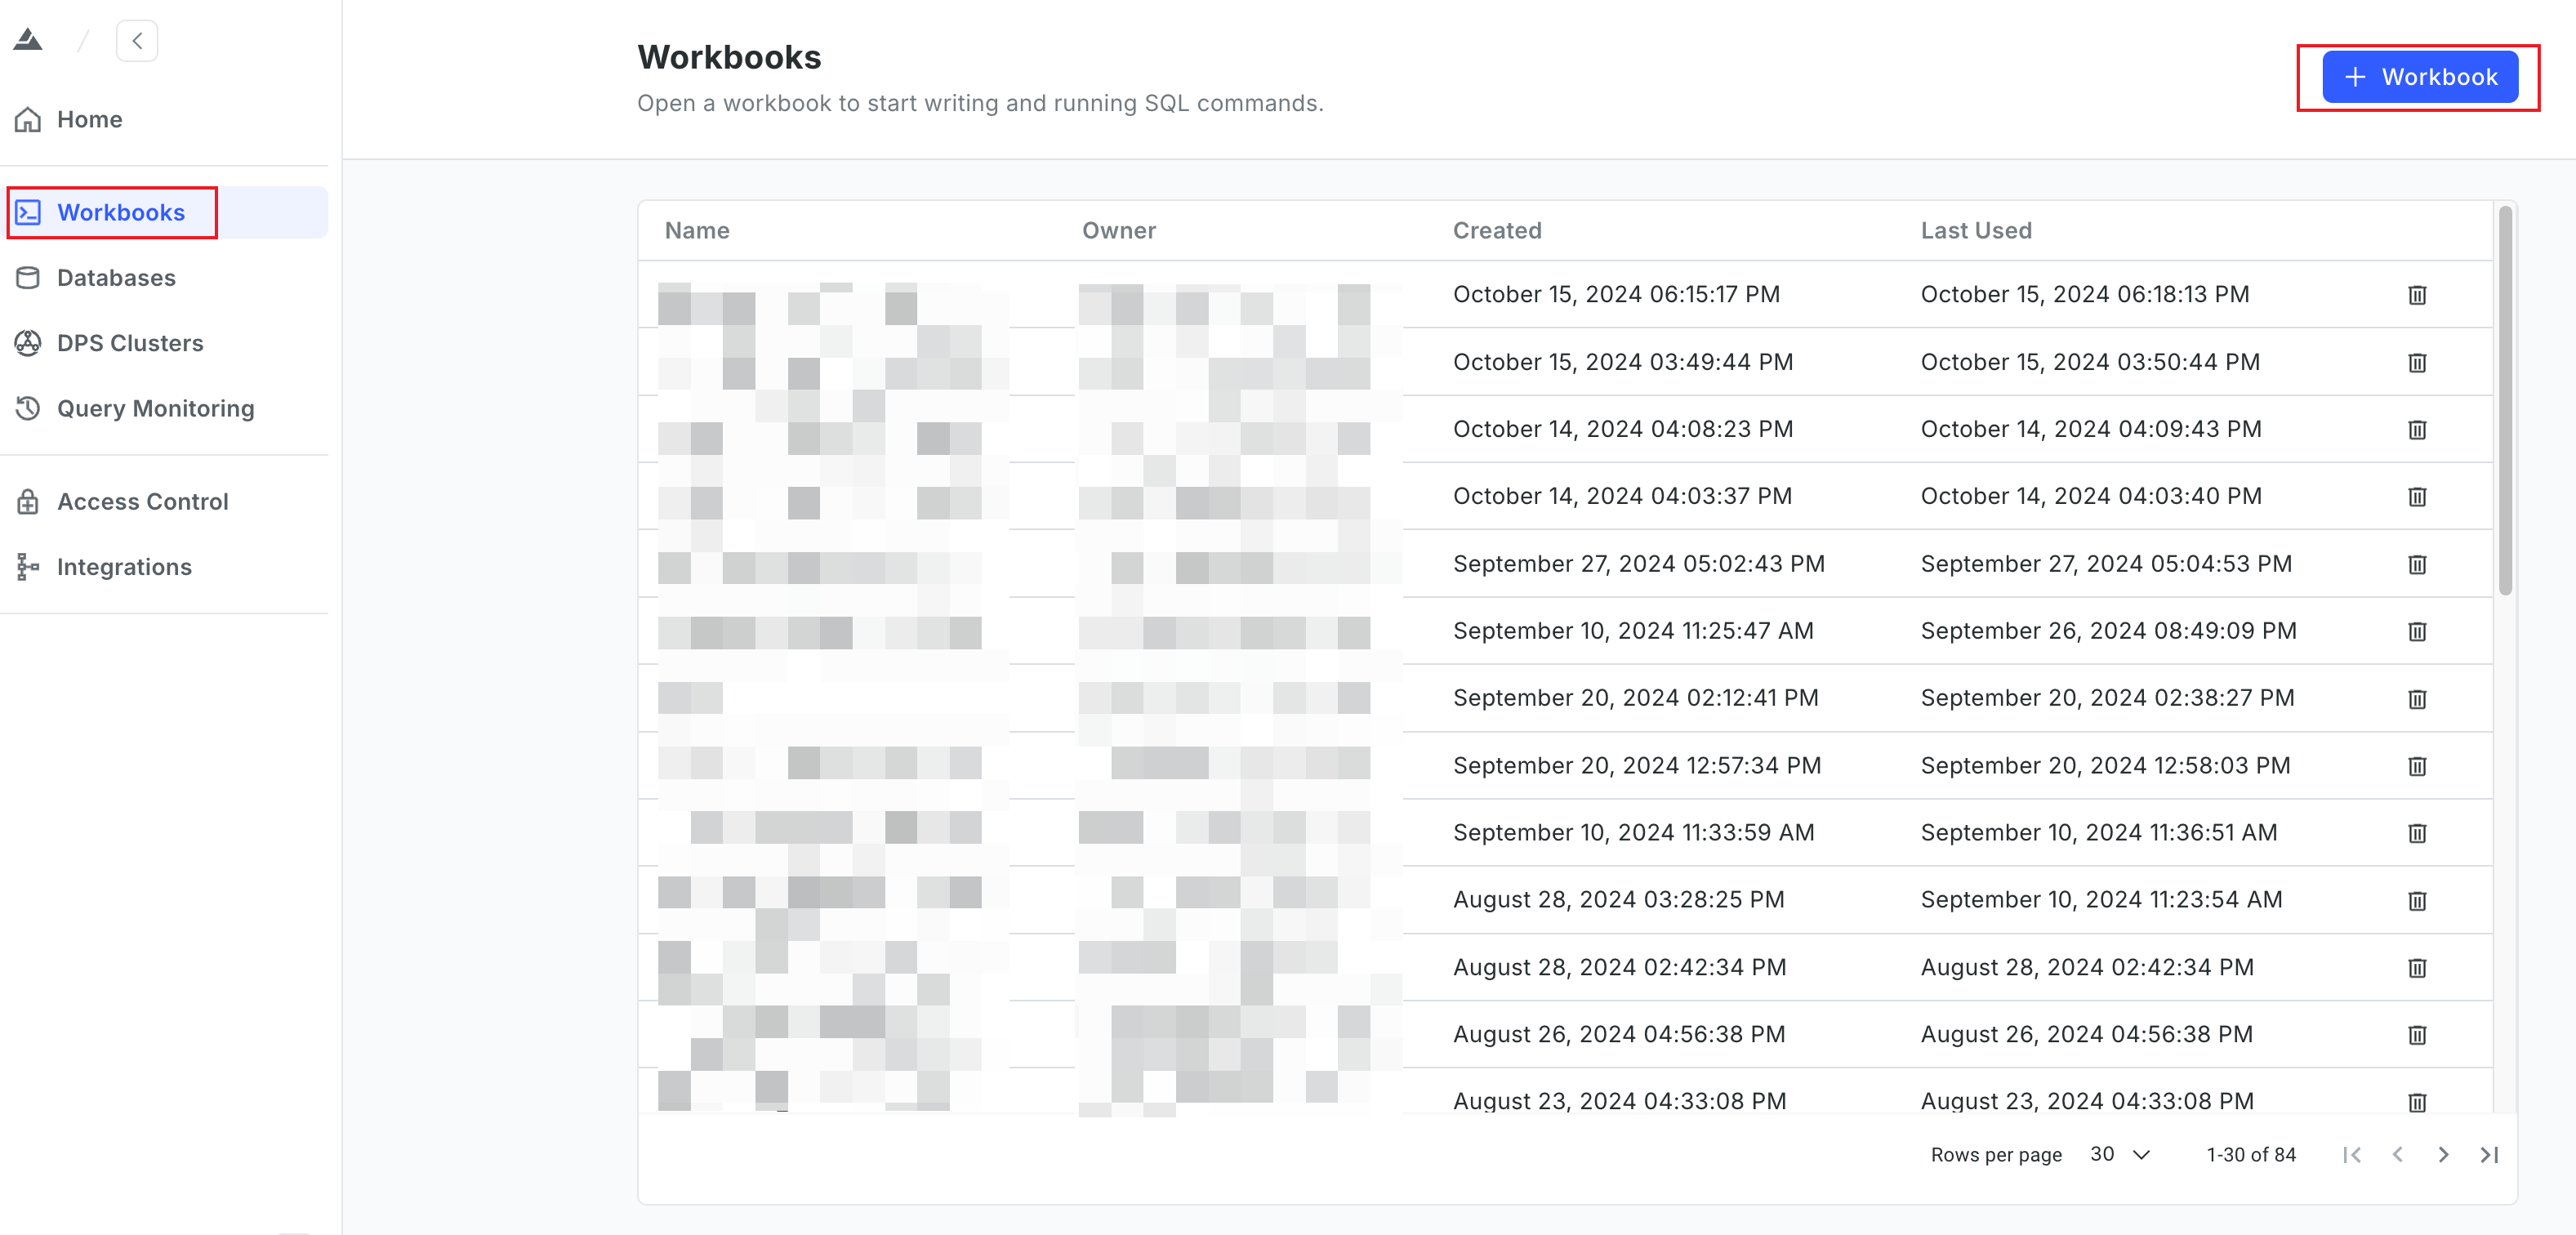
Alternatively, you can click the workbook name to open an existing workbook.
-
In the SQL editor, write the
CREATE DATABASEcommand, select the desired DPS cluster, and click Run.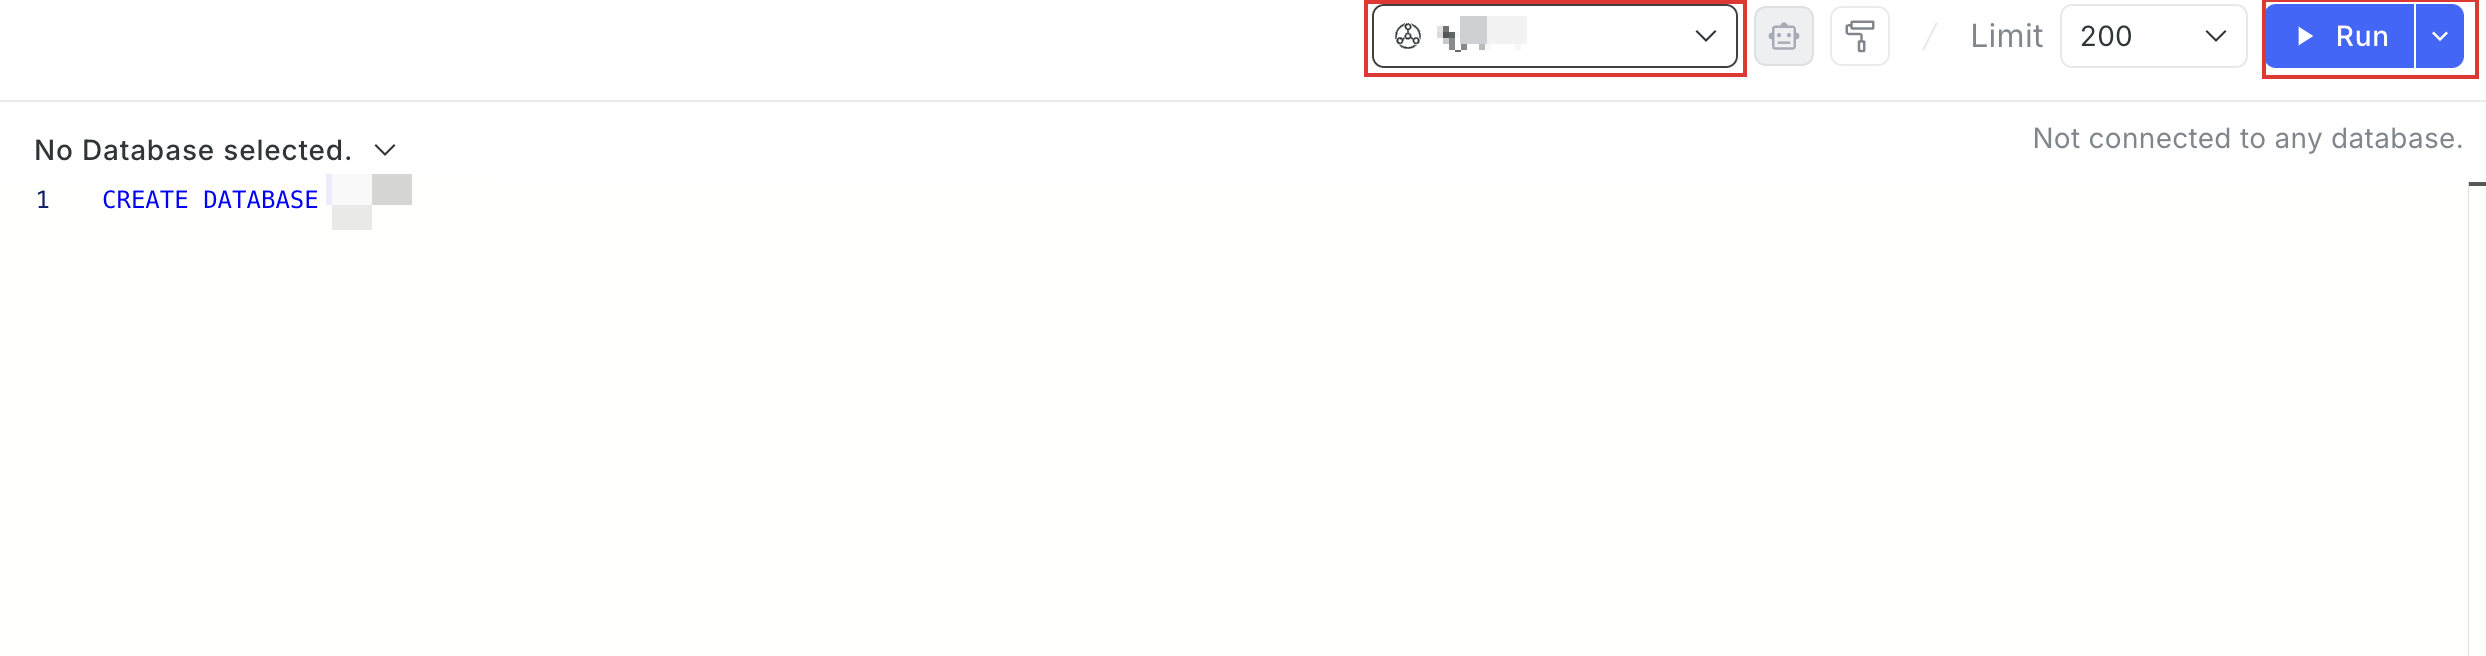
For more information about the command, see CREATE DATABASE.
After the database is created, click the Refresh button on the database tree in the left to view its details.
Use a Terraform script to create a database
This section describes how to run a Terraform script to create a database.
Before you start
To use the script, ensure you have obtained the following information:
-
An API key:
How to obtain: Sign in to your Relyt console, choose API Keys from the top navigation bar, and click + API Key to create one.
-
An pair of access key and secret key:
How to obtain:
-
Sign in to your DW service unit console and choose Access Control > Open API.
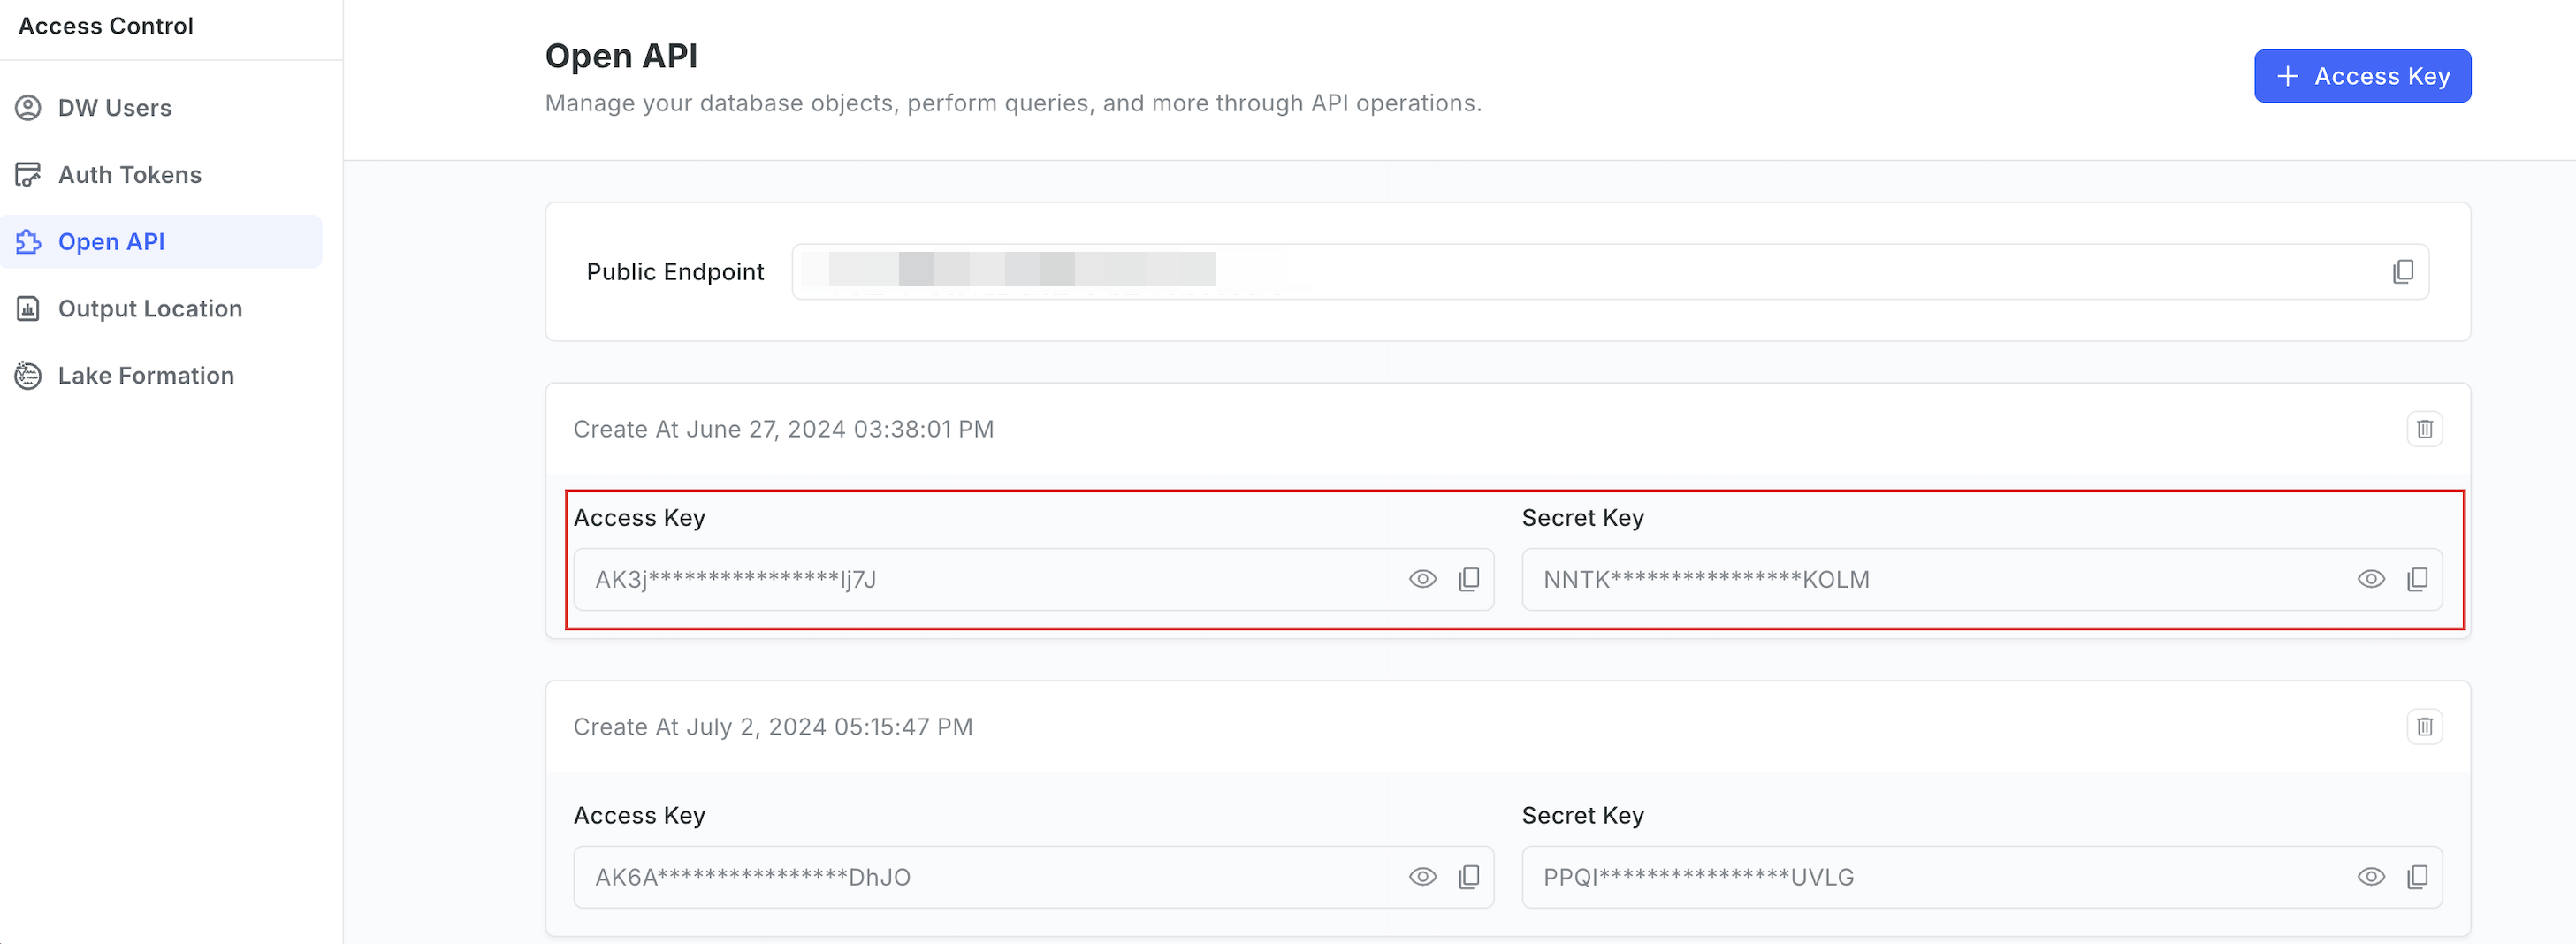
-
Copy the access key and secret key.
If no access key/secret key pair is available, click + Access Key to generate one.
-
-
The endpoint for accessing the DW service unit
For details about how to check the endpoints, see Query Endpoints.
Procedure
-
Download the latest Terraform script.
Following is a code snippet example from the module for creating a database. Configure the parameters according to your needs.
terraform {
  required_providers {
    relyt = {
      source = "relytcloud/relyt"
    }
  }
}

provider "relyt" {
  role     = "SYSTEMADMIN"

  data_access_config = {
  access_key = "<access_key>"
  secret_key = "<secret_key>"
  endpoint = "<endpoint>"
 }
}

resource relyt_dwsu_database "db" {
name = "<database_name>"
}
Field description:
Field Description sourceThe name of the Relyt plugin. It is fixed to relytcloud/relyt.roleThe system role of your Relyt cloud account. It is fixed to SYSTEMADMIN.access_keyThe access key for Open API operations. secret_keyThe secret key for Open API operations. endpointThe endpoint for accessing the DW service unit. nameThe name of the database to create. The database name must not exceed 127 characters.
For details about how to obtain the
access_key,secret_key, andendpoint, see the instructions provided in Before you start. -
Run the following command to export the auth key.
export RELYT_AUTH_KEY="<api_key>"Replace
<api_key>with the API key you have obtained. For details about how to obtain the API key, see the instructions provided in Before you start. -
Run the following command to initialize the Terraform working directory.
terraform init -
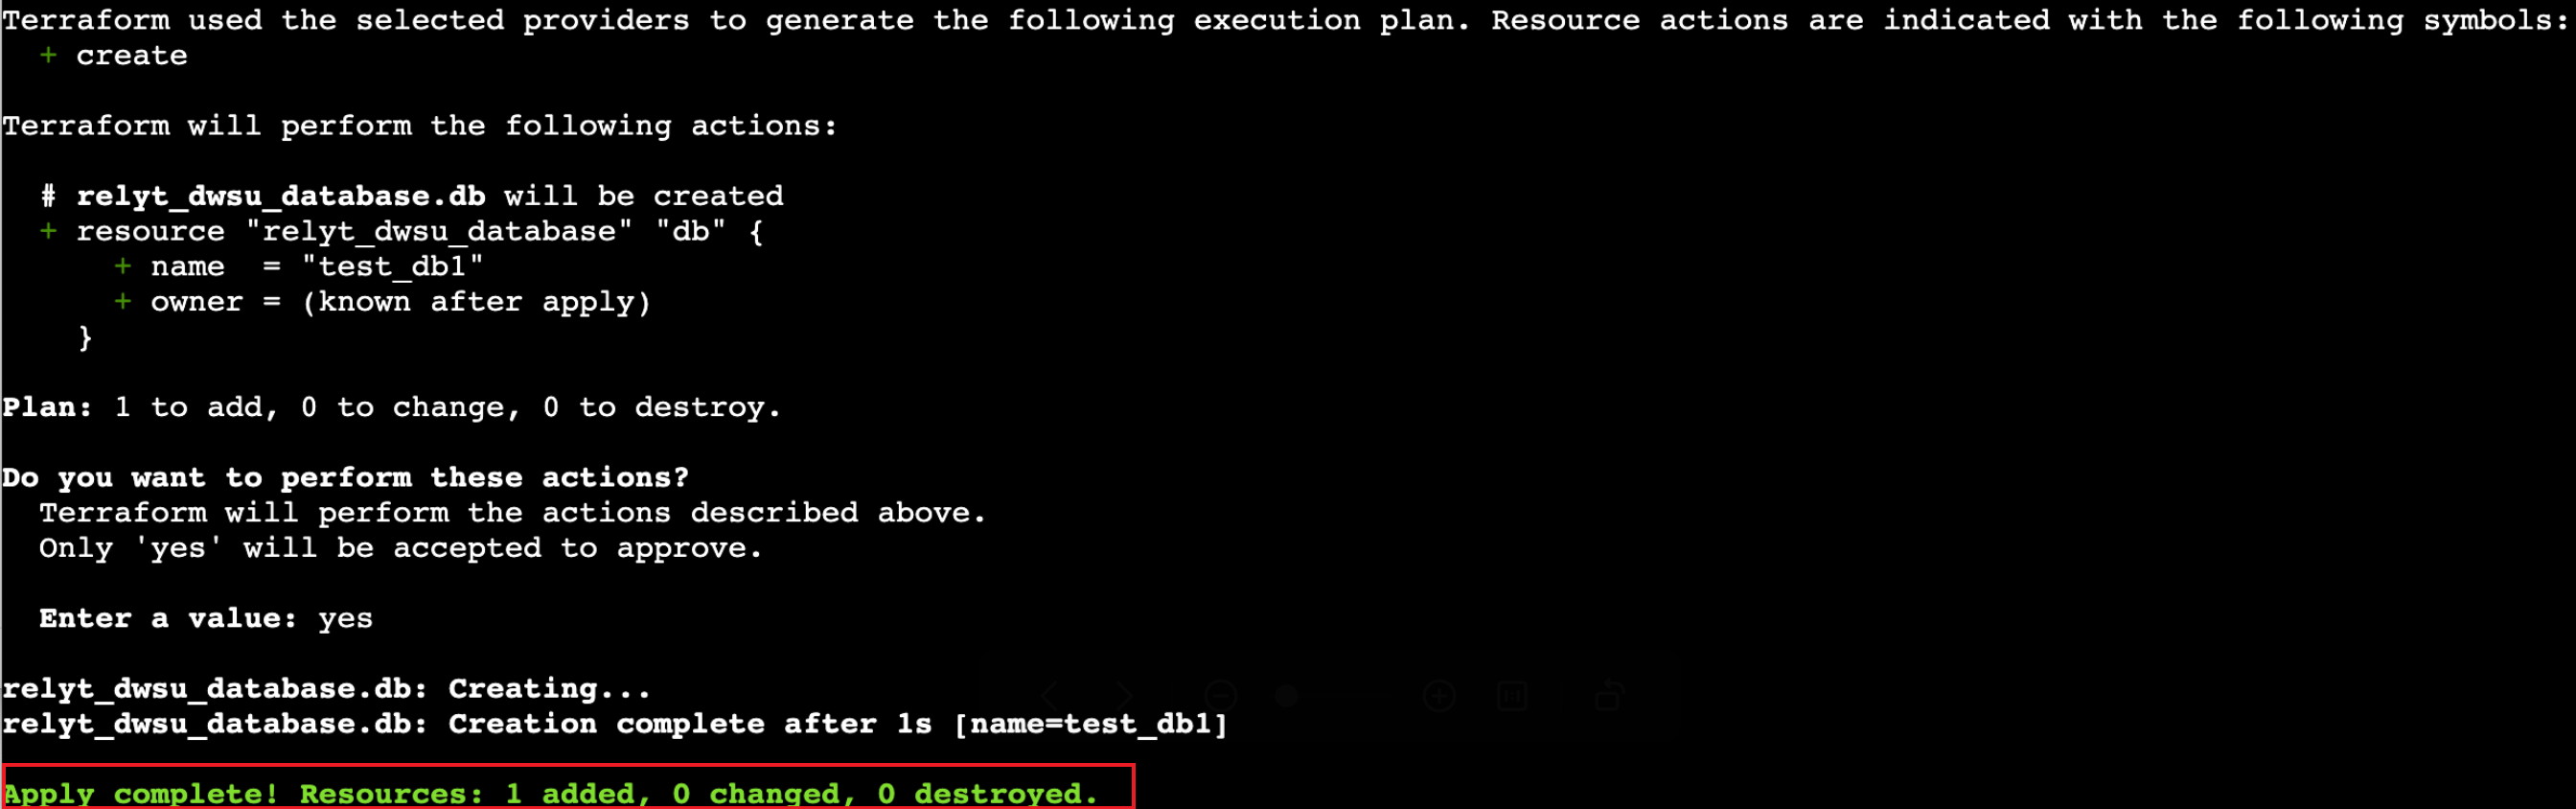
Run the following command to apply the module.
terraform apply --target=module.database -
When prompted, enter
yesto confirm the operation.When information similar to the following is displayed, the database is created.